
4/25/2022 – 5/8/2022
Noise Toaster Demo Video: https://youtube.com/shorts/SvXzWK2Lwkw?feature=share
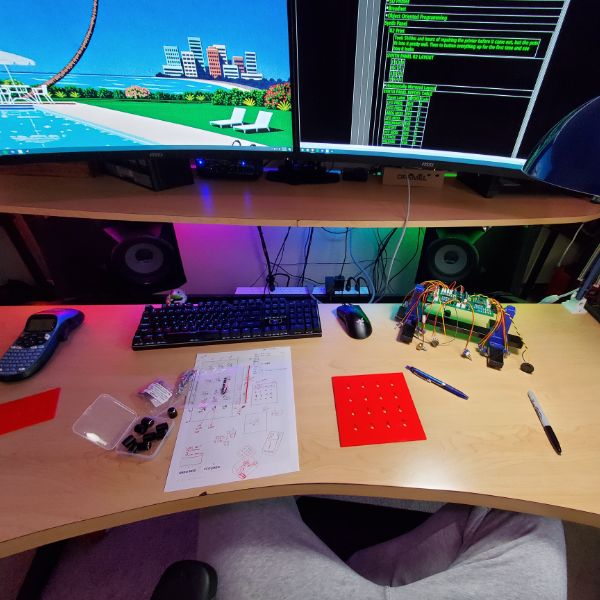
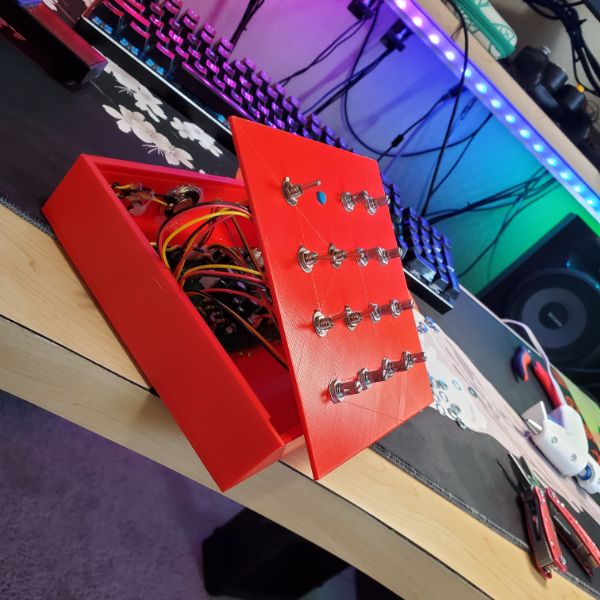
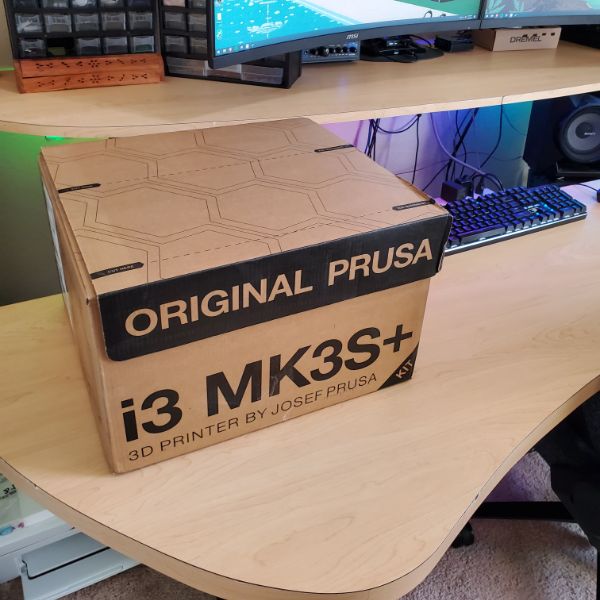
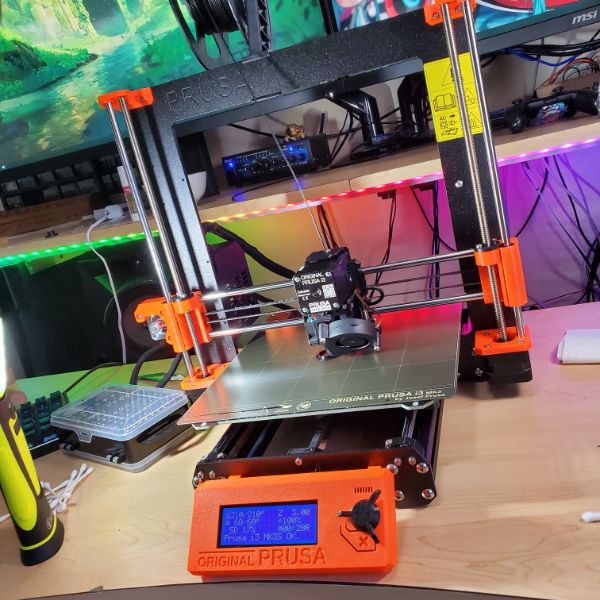
Summary: Lots of pretty pictures. Last time it was mostly text and a few pictures. This time it’s the opposite. Very productive two weeks. Learned about OOP. Then I repaired the 3D Printer from its continuously broken state long enough to produce some new best prints. Then I used it to design and print the housing for the Synth. Put together the front panel for the synth, and then buttoned the whole thing together and now the first synth is in business. Some redesigns to be had there, but huge milestone. The Prusa printer also showed up and that thing literally took me 2 days and around 15 hours to build. After spending about 2 months trying to get the other printer to work, I found myself appreciating all the little design decisions in the i3 MK3S+. It also works better and faster than anything I could squeeze out of the other one. It is retired now. Well worth the $800.
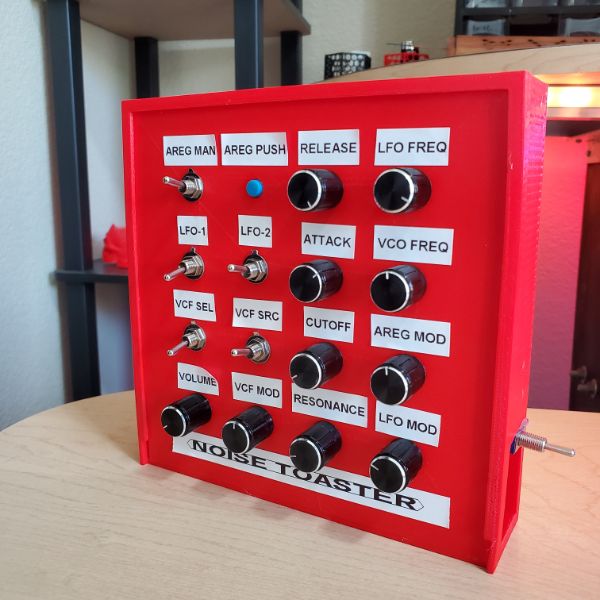
The synth panel design and the body it slots into both have issues. First, I want to embed the text into the print so I don’t have to use a label maker, because it’s ugly. Second, there’s no way to get into the case from the back to switch out a battery or fix a broken connection. I also forgot to add a slot for a power switch in the side of the case. The front panel itself is fine, but getting multicolor text will be a new task. I’ve been wanting two-tone embedded text for a while now though, so it’ll be worth the effort.
Felt out the prusa printer and the prusa slicer and came up with a new 3D printer setup that involves my laptop and a USB cable so I don’t have to run back and forth between my desk and my closet, crouch down on the floor, and hope the printer works. And hope the static electricity my chair produces doesn’t fry the SD card, either requiring a formatting or a new SD card… Or hope the printer doesn’t just stop working overnight and require a Z calibration that takes 2 hours. The prusa fixes literally all of these problems. The old printer did work better with a gluestick and the exposed glass bed though. I’m a big fan of bed adhesives now.
Next two weeks I’ll redesign the synth case, learn some new tricks on my new printer, and put together another Synth and start handing them out. Then it’s back to Breadnet and some C++/AoE work.


Iguana
Iguana Mode
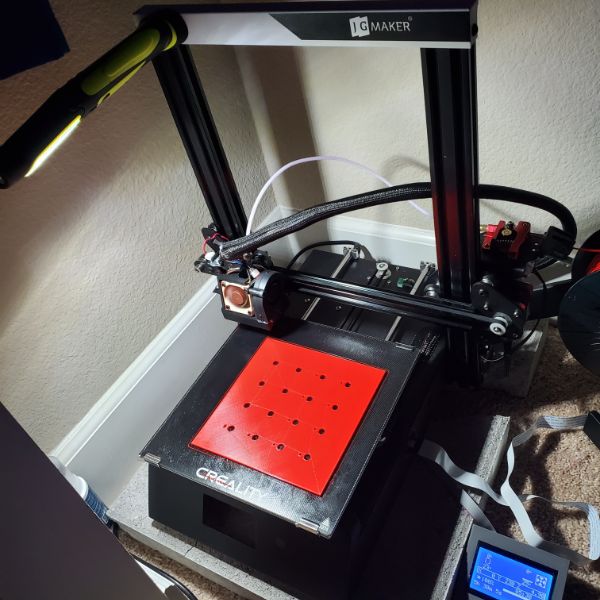
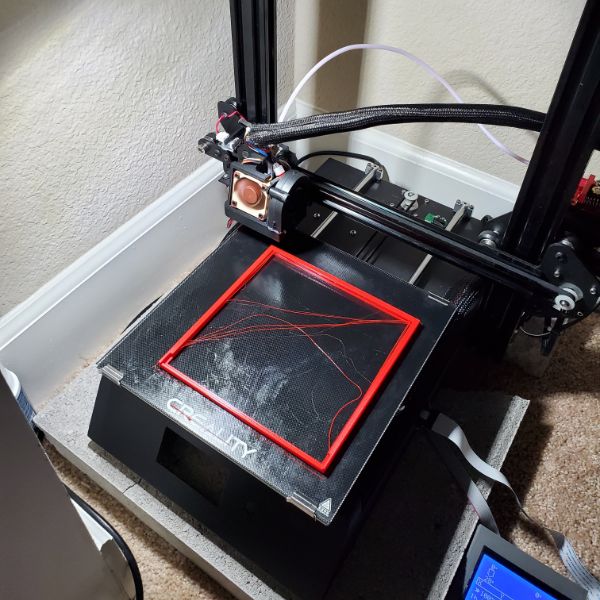
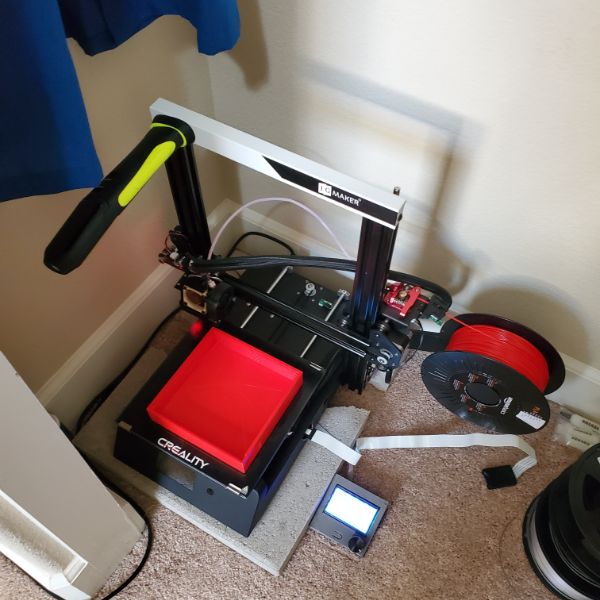
3D Printer
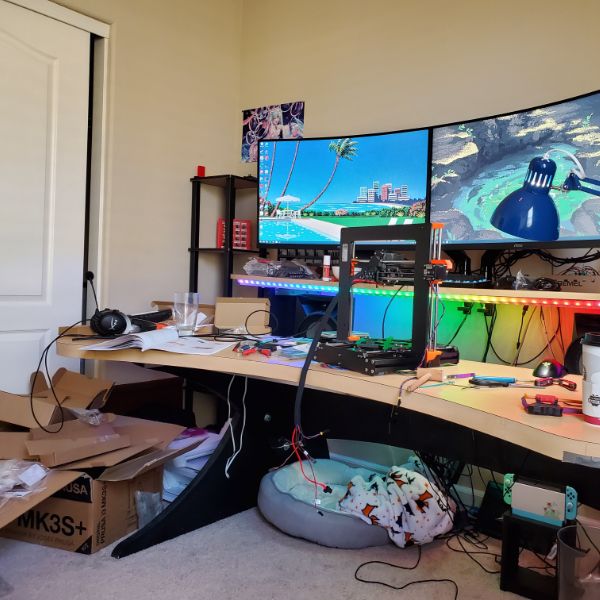
Still waiting on the Prusa printer
Delivery date confirmed for Friday, May 6
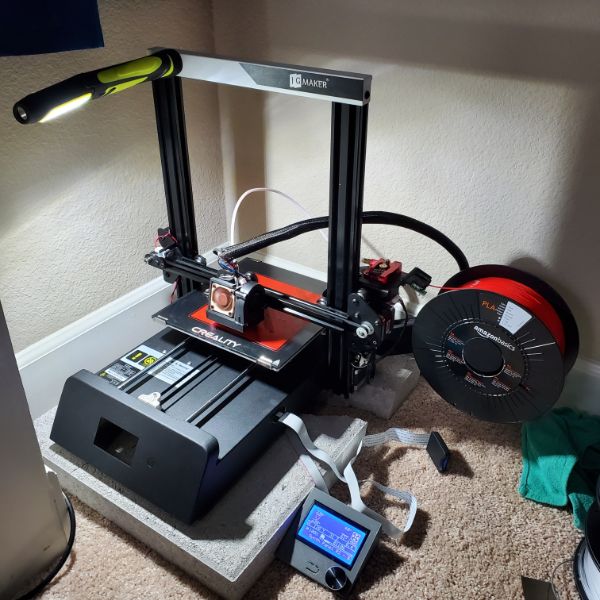
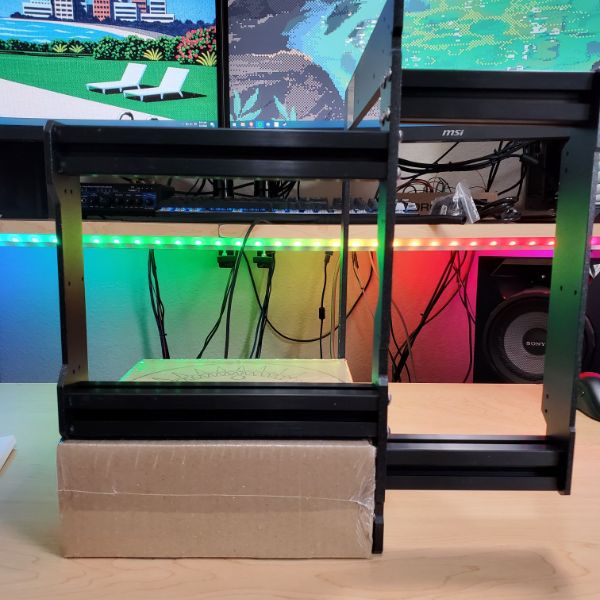
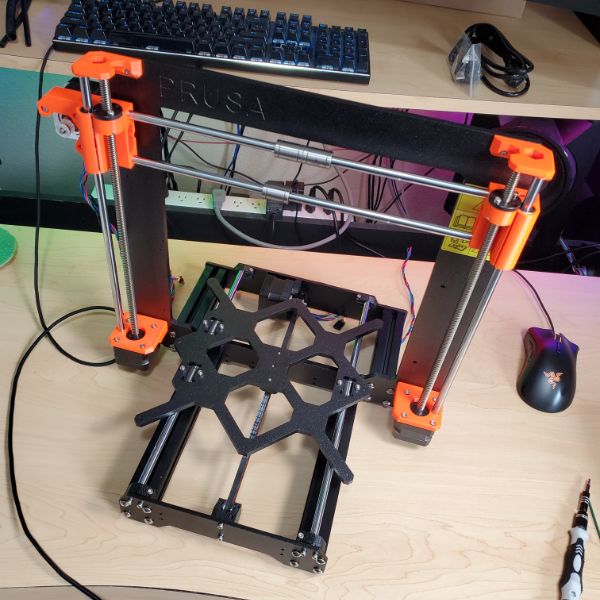
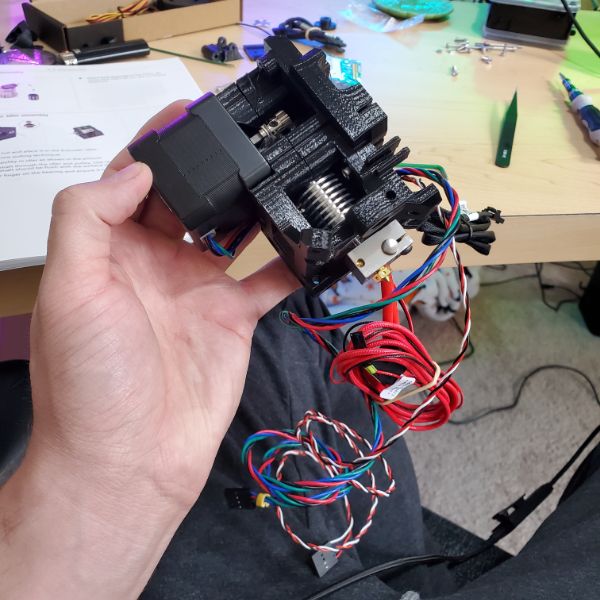
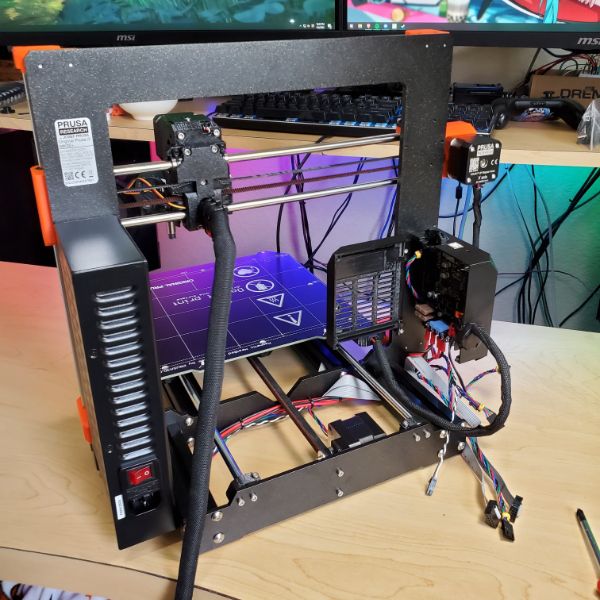
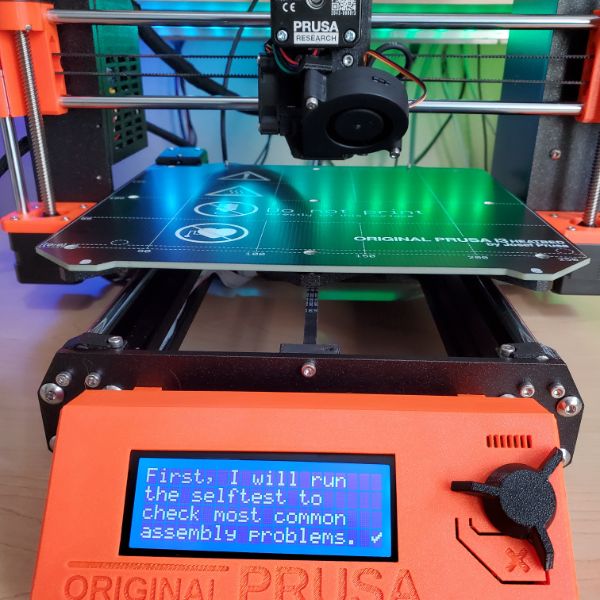
Showed up and built it. Took 2 days but its amazing
honestly, the printer and the documentation are so high quality, it was a ton of fun putting together & got to appreciate a lot of little design decisions they made. the hardest part was fitting washers into tiny, breakable 3D printed parts that make up like half the printer. if you use too much force you can crack the part and then you have to get another printer to print a new one to keep building the other printer… but that wasn’t a huge issue. It works better than anything i’ve ever worked with out the box
I guess I’ll have to name the printers soon to differentiate between them
Bought a THIRD PEI SHEET, some bed clips, and some bed adhesive so I can see if it works better for me. Feeling like, I don’t want to just let this printer go away. But I did let it just rot for a month. It’s easy to get fed up with 3d printing
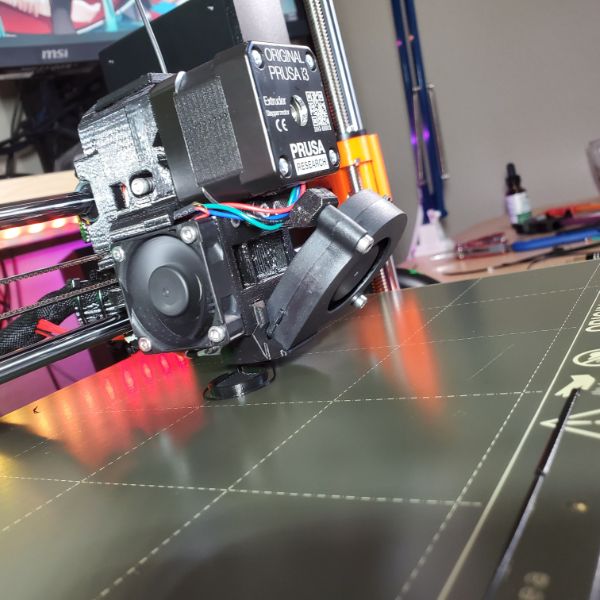
If the printer works better than before, I might buy another noctua fan or two to get it to actually be quiet. That’ll require printing a new, different type of fan shroud that doesn’t use a centrifugal fan for part cooling. I’ve seen a few designs that use double axial fans
New Upgrades
If I decide to order another noctua fan and reprint the fan shroud, I’ll have to retune the Z Axis Offset and definitely redo the firmware with a new PID tune
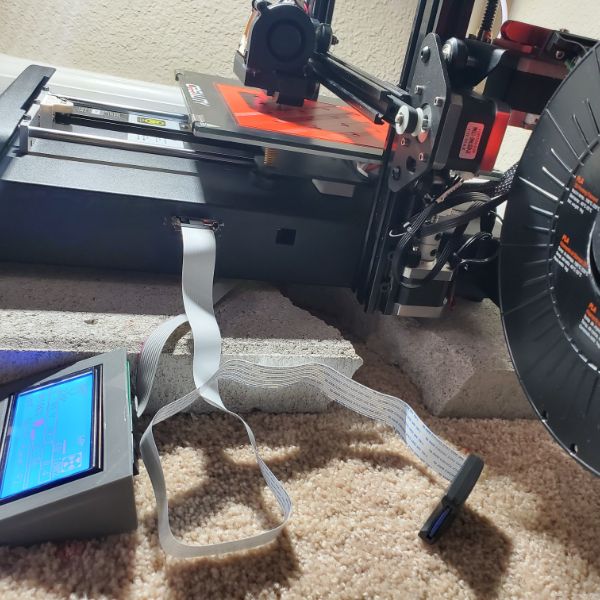
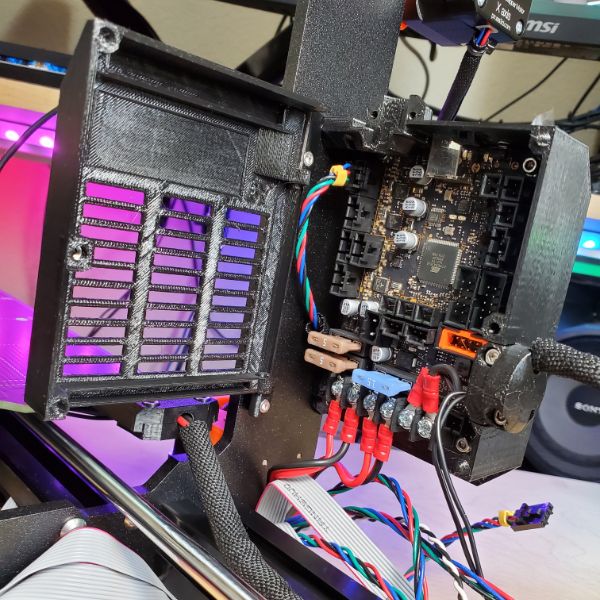
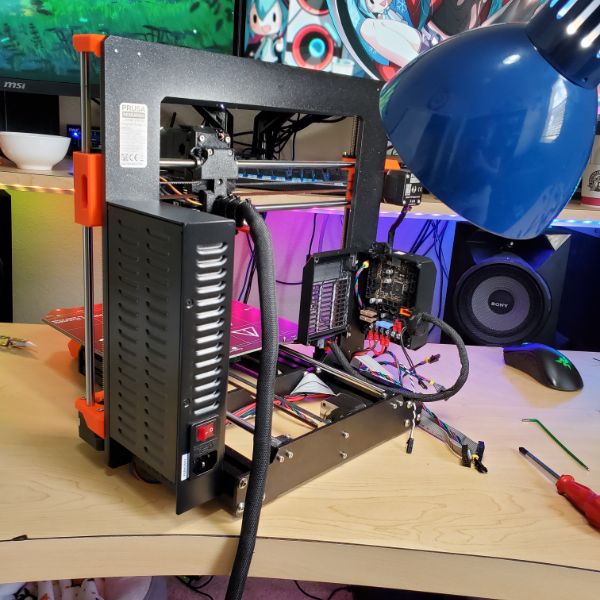
The first thing I should probably do is enclose the LCD, SD Card slot, and Motherboard in a more permanent way, because the interface to the printer as it is now is hot garbo
and the USB slot can’t even be meaningfully accessed
I might have to mutilate the frame a little bit
I should also go buy a second paving stone I think, or at least a larger one
Even just one inch larger on the square would be sufficient. It’s exactly the wrong size for this
I don’t think it’s worthwhile to replace the PSU fan with a noctua, but it’s something I think about a lot
Designing an enclosure for the mobo, lcd, and sd slot seems like a bit of a hassle
New Calibration
Removed PEI Sheet
Z Axis Calibration: Borosilicate Glass Bed, No PEI, Textured Surface
Current Ranking
1
-2.987
2
-3.000
3
-2.975
Z Axis Offset: -2.70
Some wobble on filament drop, so the probe needs to be lowered a bit
Print head is too high, lines are bad
Z Axis Offset: -2.75
No apparent wobble, lines are slightly better, still too high
Needs more Smush
Z Axis Offset: -2.80
Technically -2.801, for some reason you can only to 801 or 799
Lines are much better for first layer filling, but experiencing some line interference as the print head lifts up older outlines.
Maybe this can be solved with the gluestick?
Thankfully I’m not experiencing the firmware heat crash when i run a print cycle twice on one boot anymore… That was a pain
Knock on wood
Z Axis Offset: -2.85
Getting closer…
Infill looks better, still not Smushing though so each trace can flutter
Slight outline interference
Print adhesion generally seems pretty good on the textured surface of the BSG
Z Axis Offset: -2.90
First config that is viable
No outline interference
Outline traces are smushing effectively
some smushing on infill, but seems like it could be improved
New reference point
Z Axis Offset: -2.925
Slowing the increment down
Good outlining and good smush on outline
infill lines are smushing very well now. Still some room for improvement. It seems worthwhile to overshoot from here and then dial it back.
This is a better reference point
Z Axis Offset: -2.950
This one is the best so far by far
Perfect smushing on outlines and on infill, no outline interference
Bed adhesion significantly increased, partially due to infill smushing and outline smushing meeting
Z Axis Offset: -2.975
Might Overshoot it a little
Some outline interference on one small corner, otherwise fine
Infill looks well smushed
Smushing is more thorough than -2.950 without spreading
Surface sheet is SIGNIFICANTLY STRONGER than -2.950 as well. New standard
Z Axis Offset: -3.000
Very close in quality to -2.975, but the bed-side texture is perfectly smooth to the texture. It feels very satisfying.
There is some ghosting in the outline traces, so I think -3.000 might be a little too far.
There was also some biting into the same corner
I suspect there’s an issue with the tightness in the vRollers and that specific turn causes the print head to rock
Turning back to -2.987 now
Z Axis Offset: -2.987
Final
The toughest, the smoothest
Celeste and Angel reviewed and confirmed this chart
Current Ranking
1
-2.987
2
-3.000
3
-2.975
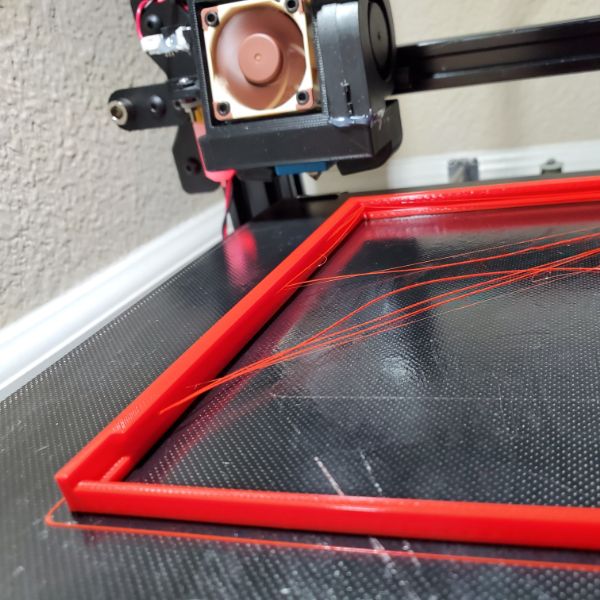
Adhesive Testing
I’ve got a gluestick, and I also started using bed clips.
So I can test both sides of the glass if I want, but I should probably re-level if I flip it
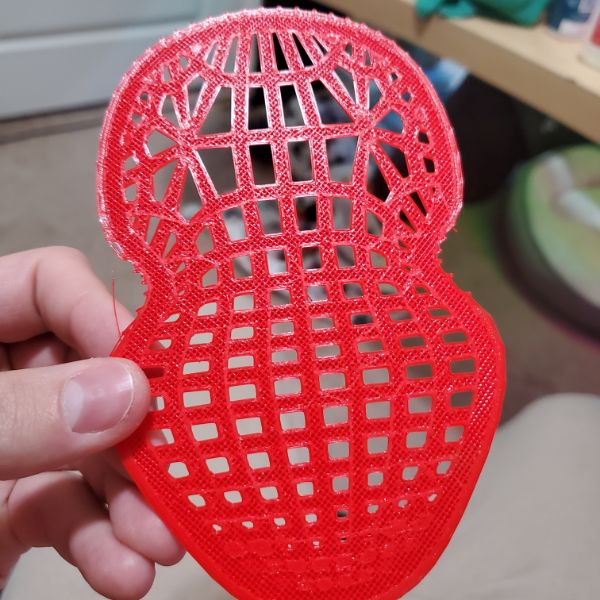
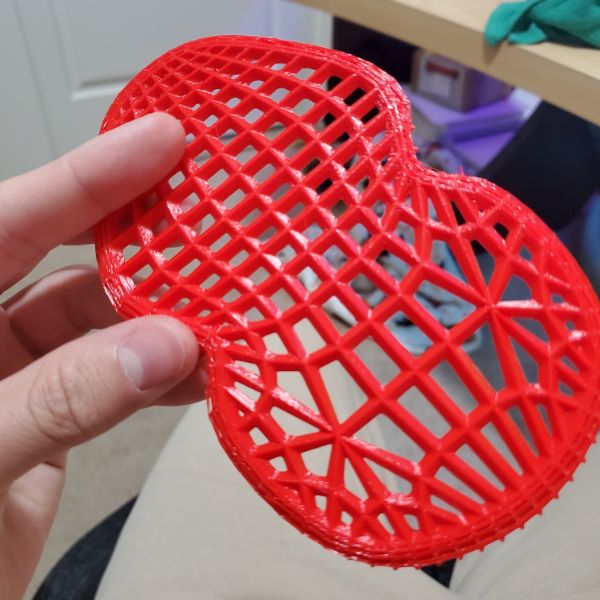
I mainly want to be able to print the manticore and skullcup without issue. I usually experience a lot of lifting, cornering/biting, and outline interference because of the complex pattern on the base of the print
With the Z Axis Offset calibrated to -2.9875, let’s see how precision prints come out
Print Tests
Test 1
Manticore
BSG Textured
-2.9875
No Adhesive
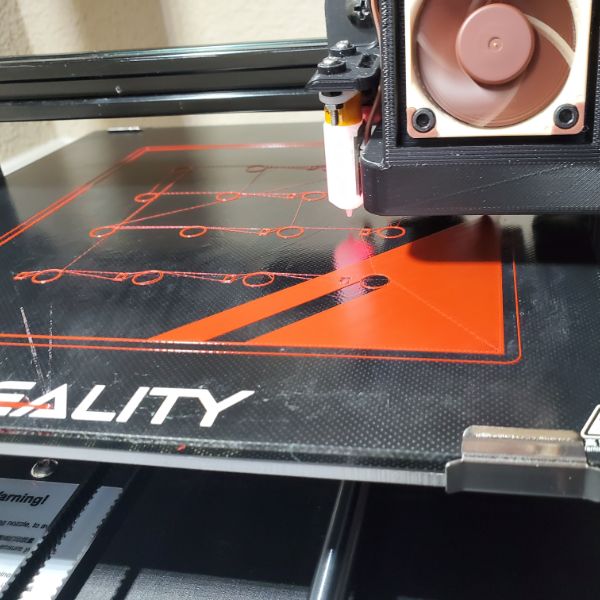
Some ghosting due to the print head being low, but only in certain regions of the print bed, which makes me think I need to level it again.
No outline interference, which is looking good
Circular infill lines came out great
Outline fidelity is very high. not much flow in the filament after drop or on second pass
It passed the foot test! I’m thinking I don’t have much to worry about with this new config. We’ll see
Let it ran for an hour. It did not spaghetti and came out great so far
Some heavy stringing in areas, so some more config seems necessary, but so far so good
Test 2
Manticore
BSG Textured
-2.9875
Glue Stick ~3 pass
Same quality of outline but with less outline interference, which was already minimal
The main issue with this setup will be retrieving the parts. I’m kind of hoping the gluestick will make it easier to retrieve prints by adding a material buffer between the filament and glass, while also improving first layer adhesion
Testing skull next, aborting this early
Test 3
Skullcup (100%)
BSG Textured
-2.9875
Glue Stick ~3 pass
Glue stick results in phenomenal first layer adhesion + resistance to outline interference.
The skull is at 100% (tiny) and the gridlines were constructed perfectly and without incident
like literally no blemishes. I’m really impressed
Not sure how this will hold up over time but for now it’s baller
Hoping retrieval is easier because of the gluestick
Retrieval was easy, grid came out fantastic
Some stringing issues, I’ll have to do some more calibration tests again before I put it back
It feels kind of silly doing the same runthrough of all this work over again for like the 4th time but its faster now and I know what I’m doing so
You know what’s stupid
The next day, the Z Offset was all wrong, and the print head was far too low
after recalibrating it entirely, with the application of the new adhesive, the new best Z-Probe Offset is
-2.787
Super annoying
Printer 1 is still working great after putting it on the tile in the closet. I definitely need a new tile though because it barely fits and it’s annoying.
I also noticed that if I let the print bed cool off completely before extracting the part, the print pops off effortlessly. The special adhesive (not the gluestick) actually works very well
Since this works now, I can move on to the Synth Panel
Breadnet
Pi ip got changed somehow, now 10.0.0.15 from 10.0.0.25
MQTT Server: 10.0.0.15:1616
Node-RED Server: 10.0.0.15:1880
Can’t get WiFi.h to interface with PubSubClient.h
WiFi and MQTT clients both initialize independently, but MQTT won’t accept the WiFi client instance and thinks it’s offline. returns an error claiming the host is unreachable
FINALLY GOT IT
https://www.survivingwithandroid.com/esp32-mqtt-client-publish-and-subscribe/
MQTT and WiFi work now. Meaning the ESP32 can listen into the MQTT topic and print the topic messages over serial.
The Node-RED and MQTT aren’t externally facing yet, so that’s next
Once I get the port forwarding working, I’ll look into security and then a DNS
Port Forwarding
I set up the port forward for Node-RED and MQTT but the ports still return closed
I found a useful website for checking Ports
External IP
75.38.106.136
Port Checker
https://portchecker.co/
Router Login
10.0.0.1
admin
supervolcano55
Services
Node-RED
10.0.0.15
1880
MQTT
10.0.0.15
1616
Minecraft
10.0.0.2
25565
To Do List
MQTT
Confirm unprotected external network connection pubsub
Configure for privacy, user auth, SSL
MQTT Security Fundamentals
https://www.hivemq.com/blog/mqtt-security-fundamentals-securing-mqtt-systems/
https://bedrockautomation.com/securing-mqtt-absolutely-positively/
Securing a MQTT Server
https://dzone.com/articles/mqtt-security-securing-a-mosquitto-server
Node-RED
Confirm unprotected external network connection pubsub
Configure for privacy, user auth, SSL
Securing Node-RED
https://nodered.org/docs/user-guide/runtime/securing-node-red
Reddit Posts
Reddit post
Port forwarding is really the simplest way, and there are guidea available (including on NodeRed.org) for doing it more safely. You can secure your editor with username and password, disable terminal control of Node Red, etc., so that it becomes safer.
However, even if you set that up, if you have a dynamic public IP address, it’ll eventually change and you’ll need to change the links you have on your phone or in your browser off-site.
One way to work on this would be reverse proxy, which lets you assign a friendlier-looking address to your IP address and then change it, even pretty quickly. An even simpler way would be to just have a redirect html file somewhere on any website you own/manage, and have your Pi upload a new redirect html via FTP anytime it detects a change to its public IP.
However, these more public methods are going to come with added probing by malicious bots, so you should probably have made all the security changes you can before you do that.
Finally, IBM’s cloud offers free Node Red instances. It’s very difficult to get one set up and running if you don’t work in their cloud architecture every day (I just did this the other day). But, it can be done, and you could create a replica of your dashboard there, or actually build it there. The problem is that you’re still subject to the IP address change and port forwarding thing there, unless you can figure out how the hell a mere mortal can connect an MQTT broker to the instance through their cloud. Otherwise, you’re back to hosting the MQTT broker on your Pi, and back to port forwards, passwords, SSL, etc. etc.
Reddit Post
Set up a VPN, much safer option and should give you what you need.
This. Note he means a vpn into your home, not out. I use a home vpn and dynamic dns to access home LAN resources anywhere.
Reddit Post
Yes you can, however as others said it depends on the risk you willing to take, exposing ANYTHING to the Internet has some risk, so up to you. If you do decide to do it, here are a few tips
Do not use the default port for Nodered, use some random one
in your router fwd that port to your nodered machine
then from outside your house, all you need to do is http://YOUR_EXTERNAL_IP:PORT/ui
I strongly recommend you setup SSL
I strongly recommend you setup User/Pass for your dashboard
Is there still a risk sure, but you at least tried to block some of them.
Good luck.
Design basic UI page to reflect current states
ESP32
Set up a small breadboard with LED assigned to subscribed topic
Research connection hardening for ESP32
Breakdown of ESP32 Security Features
https://docs.espressif.com/projects/esp-idf/en/latest/esp32/api-guides/wifi-security.html
https://blog.espressif.com/understanding-esp32s-security-features-14483e465724
https://blog.espressif.com/esp32-tls-transport-layer-security-and-iot-devices-3ac93511f6d8
Experiment with OTA updates
https://randomnerdtutorials.com/esp32-ota-over-the-air-arduino/
VSCode
Take some notes on how to manage github repo and PIO projects
PlatformIO
Create a Repo that contains multiple PIO projects
Create PIO projects for the following functions in isolation
ESP32 Blink
ESP32 WiFi.h Connection
ESP32 PubSubClient.h Connection
ESP32 WiFi+PubSubClient Connection
ESP32 Breadnet LED
ESP32 Mega Lights 2 Test
ESP32 Mega Lights 2 Final (own repo)
Object Oriented Programming
Object-oriented Programming in 7 Minutes | Mosh
https://youtu.be/pTB0EiLXUC8
OOP implementations of the same code ends up with functions with less or no parameters.
The four pillars of OOP
Encapsulation
Reduce Complexity, Increase Reusability
Abstraction
Reduce Complexity, Isolate impact of changes
Inheritance
Eliminate redundant code
Polymorphism
Refactor Ugly Switch Case Statements
Before OOP, we had Procedural Programming
A set of functions
A set of data
Functions operate on the data
You end up with a bunch of functions that are all over the place
You copy and paste them all over
They become an interdependent mess of spaghetti code
OOP solves this
combine a group of related functions and variables
Call that group an OBJECT
refer to the variables as PROPERTIES
refer to the functions as METHODS
ENCAPSULATION – Lumping variables and functions together into objects
The best functions have no parameters!
ABSTRACTION – hiding some of the properties and methods from the interface of the object
Makes it easier to understand, simpler interface
Reduces the impact of changing the “PRIVATE” Methods
If you make changes to the private methods, they won’t influence the external-facing object interface
INHERITANCE – A mechanism to eliminate redundant code
define parameters once in a generic object, and then have other instances of the object inherit those parameters.
this saves lines of code because you don’t have to declare the same properties multiple times
POLYMORPHISM – multiple forms
A function can behave differently depending on the type of object we are referencing
Polymorphism is a method to eliminate branching if-else and switch statements
You can have an element.render() function that can be used on multiple different types of objects
Intro to Object Oriented Programming – Crash Course
https://youtu.be/SiBw7os-_zI
In order to understand Object Oriented Programming, you have to understand Objects
To understand Objects, you need to understand Primitive Data Types
Primitive Data Types
Byte
Int
Float
Bool
Double
Char
These primitives were fine when programming was small and simple.
Programmers began to group variables of similar types together
If you were simulating a chess piece, like a knight, you would need
Position Data
Team Bool
Captured Bool
You would need a group of data like this for every single piece
You might also want a group for both knights, since they’re similar
You might also want a group for the entire white side, since they’re similar in behavior
Grouping related variables together is necessary in complex programs
This is where the structure aka struct comes in
A structure is like an Array
Stores many pieces of data
Structures can store data of different types together
Arrays can only hold all ints or all strings
A Struct can hold multiple data types, including other structures
Nested Structures
Example
struct Knight
Position
Color
Captured
struct Knights
Knight 1
struct Knight
Position
Color
Captured
Knight 2
Knight 3
Knight 4
struct whiteKnights
Knight 1
Knight 3
The struct was the precursor to the Object
Functions could not be defined within a structure. Objects fixed this. This was the main issue. Structures could only reference functions, not define them
What is an Object? What is a Class? – Circular Definition
Objects are instances of a Class
A Class is a template for an Object
Defining the Knight Class
define move()
takes the knight’s position and returns the available moves for the knight
define position variable
define color variable
but DON’T INITIALIZE THEM
Because each instance of the knight will obviously have different data
So don’t pre-define it with a default value. Specify that value when you instantiate the class into an object
It is better to define the move function in the class, rather than in each instance of the object
When creating an object, you initalize its ATTRIBUTES aka variables and its METHODS aka functions, to contain info specific to that specific knight
A Knight Class defines any given knight
A Knight Object represents only one singular knight
OOP is the best tool we have right now to create complex programs by grouping data and functions
Four Main Principles
Encapsulation
bundling data and methods that can operate on that data within a class
Hide data within a class. Anything outside that class cannot directly interact with it
Members with other classes can only interact with the knight class’ data through the knight class’ pre-defined methods
The class METHODS define the ways its data can be manipulated, either internally or externally
There are GETTING and SETTING methods
GETTING – retrieving values
SETTING – defining values
ex
piece.getColor()
Checks the color of any given piece from anywhere in the program
You don’t have to access the internal attributes of the piece getting checked
This makes it easier to keep track of attribute dependencies
Player.maxHealth
Player.currentHealth
Player.levelUp()
Setting Method: If Max Health Goes Up, Set Current Health to Max Health
Setting Method: check if current health would be above max health. if so, set current health equal to max health instead.
Stuff like this defines the functional boundaries of an attribute
Some attributes can be READ ONLY, meaning you would only define GETTING methods
No SETTING methods. It’s predefined?
Defining SETTING methods instead of updating values directly means you can add boundary checks. Like making sure the knight doesn’t move off the board
Without boundary checks, you can create illegal moves
GETTING methods with Validation can be very useful
It’s best to not allow external classes directly edit an object’s attributes
Each piece of code should not have access or dependencies on other sections of code
Keep them, independent
Encapsulation lets the programmer keep control over access to data, and prevents the program from ending up in strange or unwanted states
Abstraction
Abstraction refers to showing only essential details, and hiding everything else
You don’t need to understand everything under the hood to know how to drive a car
You just need to know how to handle the stick, pedals, and wheel
Users of your classes need not worry about all the fine details of how your classes work
Classes should not directly interact with other classes’ data.
Instead, use the target class’ methods in order to access its data
This helps you to work on programs incrementally. You can work on one class at a time and manage the project that way
Multiple programmers tend to work on a single program. OOP helps this reality because your section of the code can function completely independently of the rest of the system
Start to think in terms of INTERFACE and IMPLEMENTATION
Interface – methods that define access to data that other classes can use
Implementation – of these methods, and how they’re coded. These should be hidden.
If you have a knight piece and a king piece, you want some interface to let the two objects interact
The knight can’t move when the king’s in check
Let the knight use the King’s GETTER METHOD (INTERFACE)
The knight class retrieves information. If the king is in check, the knight cannot move unless to dispel the check.
The knight class is not concerned with how the king determines that it is in check. It just accesses that data and that data’s fidelity is the responsibility of the king class.
That is abstraction
If the knight has to look INTO the king class to make a determination, then it’s dependent on the king class
If the king class changes names, organization, etc. The knight will get corrupted
If classes are entangled, then one change can create a ripple effect throughout the program
Creating good interfaces ensures that each piece can be individually and independently developed
Abstraction allows the program to be worked on incrementally, prevents entanglement, and reduces complexity
It also lets the user predetermine specific points of contact (INTERFACE) and then worry separately about the implementation of the class
Inheritance
Allows you to derive classes from other classes
Inherit methods and attributes from another class
Game
class Weapon
contains methods and attributes common to all weapons in the game
such as
Weapon.damage
Weapon.attack()
More classes for specific weapons
class Sword
weapon.damageType = “sharp”
class Club
weapon.damageType = “blunt”
The Weapon class is the SUPERCLASS
the sword and club classes are SUBCLASSES
SUBCLASSES inherit attributes and methods from the SUPERCLASS
Class hierarchy can be extremely large
The Weapons class can be a subclass of a broader Item SUPERCLASS
And also unique types of swords can be their own type of class
CLASS STRUCTURE
class ITEM
class TOOL
class WEAPON
class SWORD
class FIRESWORD
class ICESWORD
class CLUB
Access Modifiers – Change which classes have access to other classes, methods, attributes
Three main access modifiers
public
can be accessed from anywhere in your program
anywhere both inside and outside the class hierarchy
private
can only be accessed from within the SAME CLASS that the member is defined
best if the info does not need to be accessed from anywhere else in the program
Lets you create private members of the same name in different locations
A private member defined in the Fruit Class can only be accessed by another Fruit Class Object
protected
can be accessed from within the class it is defined in, as well as any SUBCLASSES
Private to the hierarchy
A protected fruit class object can be accessed by fruit subclasses such as APPLE and ORANGE
Polymorphism
methods that can take on multiple forms
two types
dynamic polymorphism
occurs during runtime
when a method signature is in both a subclass and a superclass
the methods share the same name but have different implementations
the implementation of the subclass overrides that of the superclass, because subclasses are more specific(?)
ex
class Car
.drive(miles)
{Car.gas -+ 0.04*miles}
class sportsCar
.drive(miles)
{Car.gas -= 0.02*miles}
>mySportsCar.drive()
will override the superclass Car.drive() function
But only if you specifically are using an instance of the sportscar class
“dynamic polymorphism is when methods share the name name but have different implementations at a superclass and subclass level, and the subclass implementation overrides”
i hate this geek speak
it’s just like, you made the class more specific and and the function also more specific
the form of the method is decided based on where in the class hierarchy it is called
static polymorphism
occurs during compile-time rather than during runtime
refers to when multiple methods have the same name, but have different arguments, and are defined in the SAME class
Ways to differentiate between methods of the same name:
Different number of parameters
Different types of parameters
Different order of parameters
Known as METHOD OVERLOADING
they have the same name but different method signatures due to their different arguments
ex
class Car, has three different drive methods
1
.drive(int spd, string dest)
2
.drive(int spd, int dist)
3
.drive(string dest, int spd)
if I call
myCar.drive(45, “work”)
then it will fetch drive method 1, because the arguments match that
myCar.drive(15, 60)
fetches drive method 2, because the arguments match that
when implementing method overloading, the methods tend to have different implementations and achieve similar, but slightly different effects/outputs
if two methods always achieved the same result, there would be no need to have two of them
if you can’t keep the methods straight based on their arguments, you will get in trouble
If you pass the incorrect arguments, you won’t get an error, but you’ll use the wrong method, which can create issues down the line
polymorphism allows methods to take on many different forms
make sure you’re calling the right method
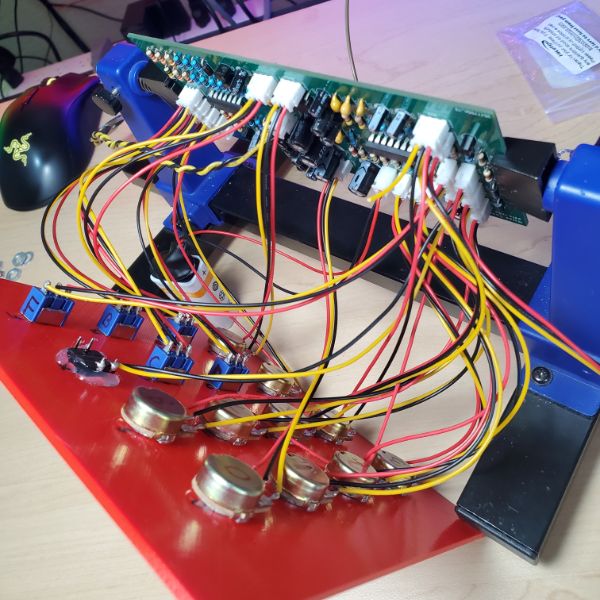
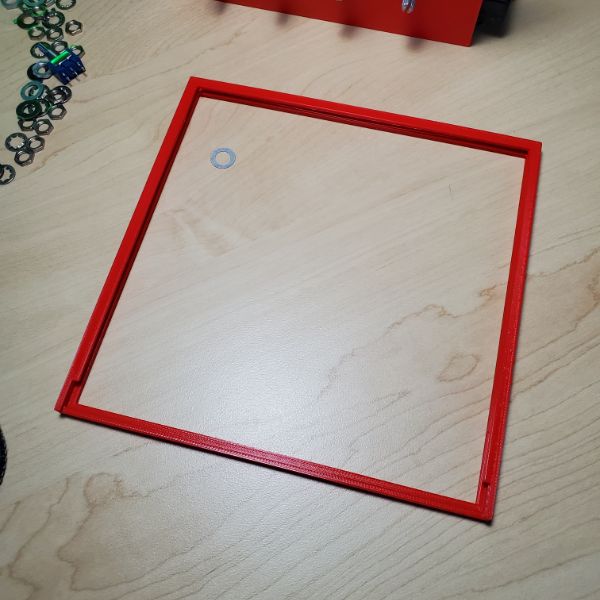
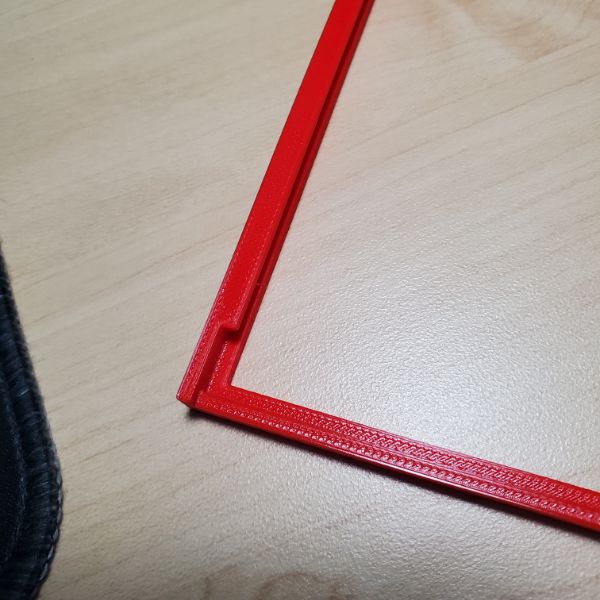
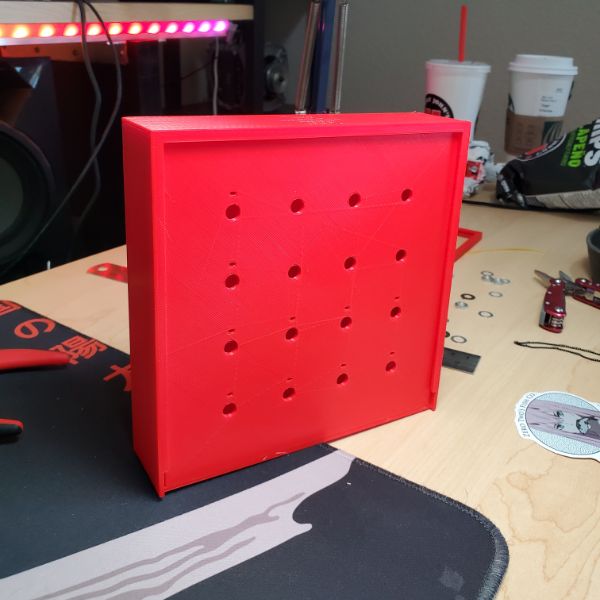
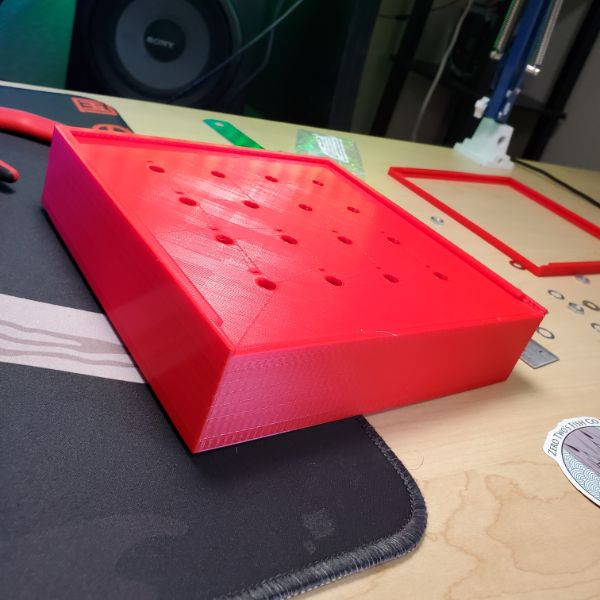
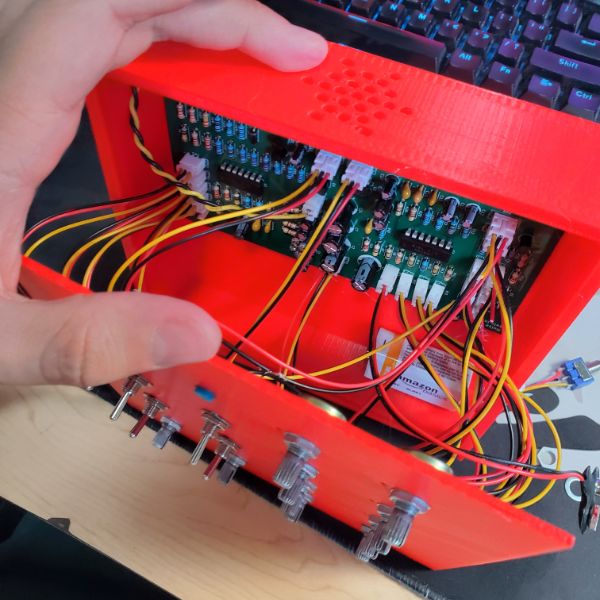
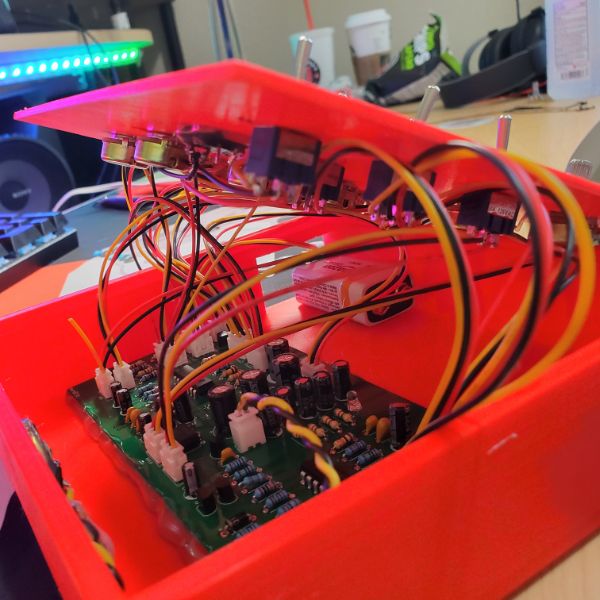
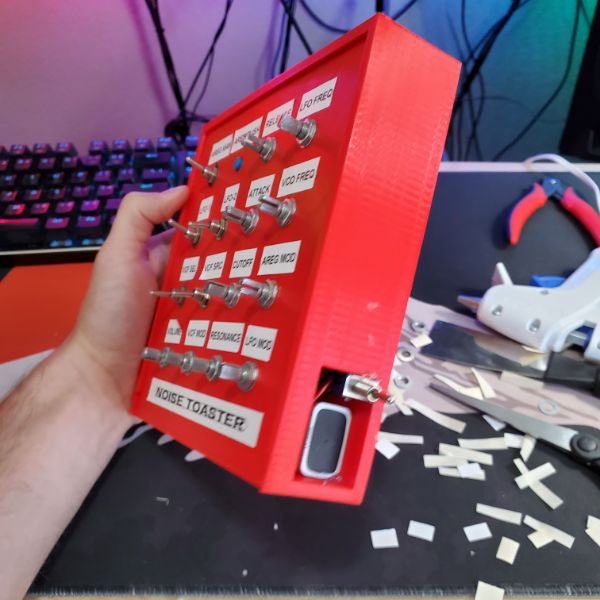
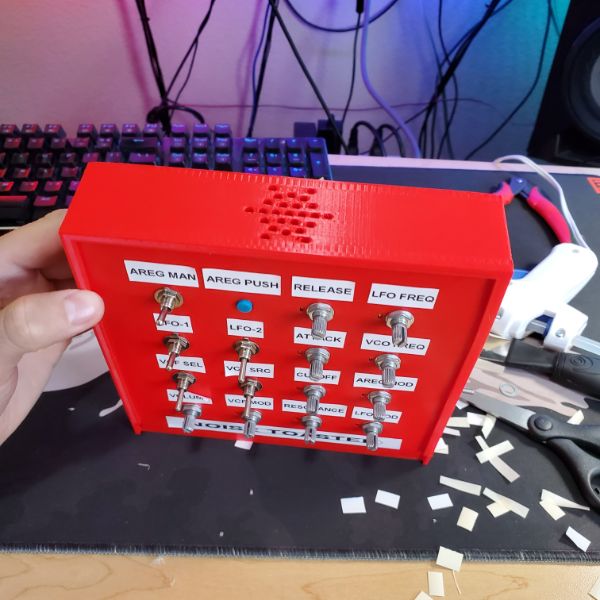
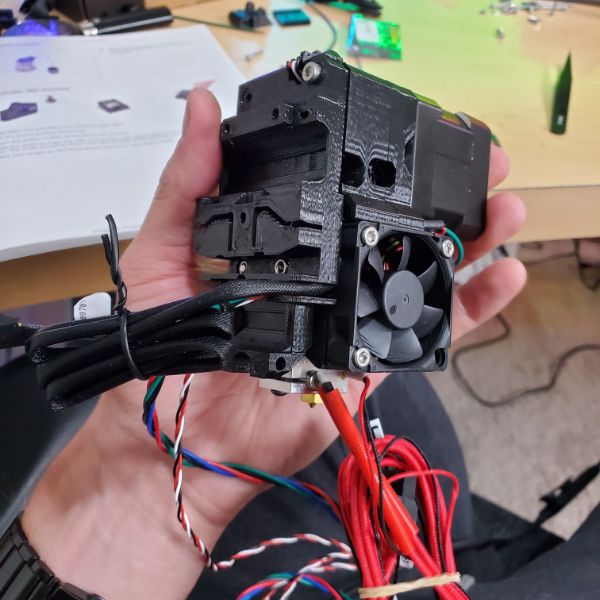
Synth Panel
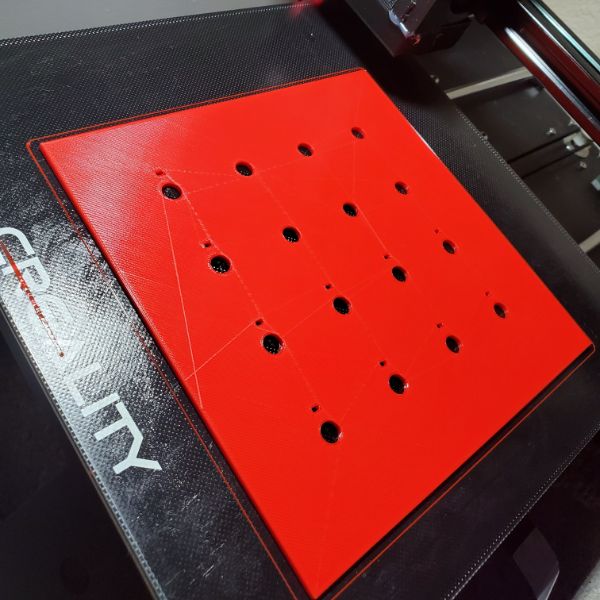
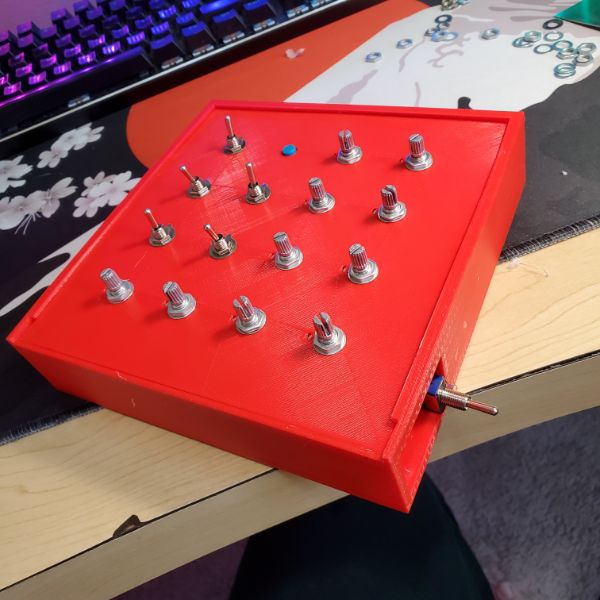
R2 Print
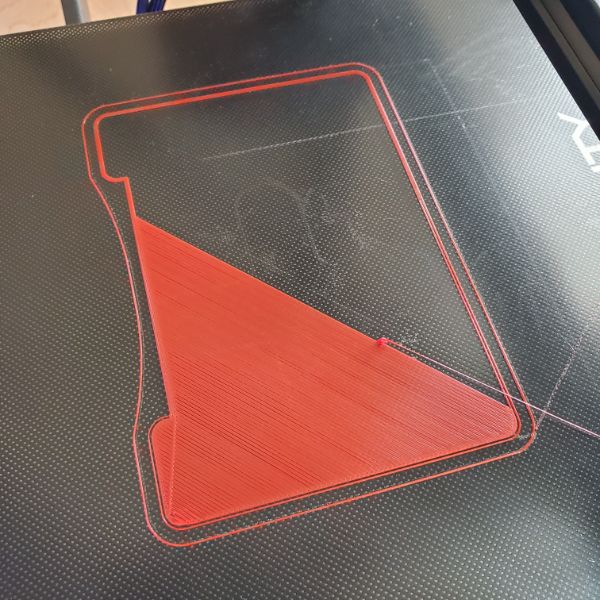
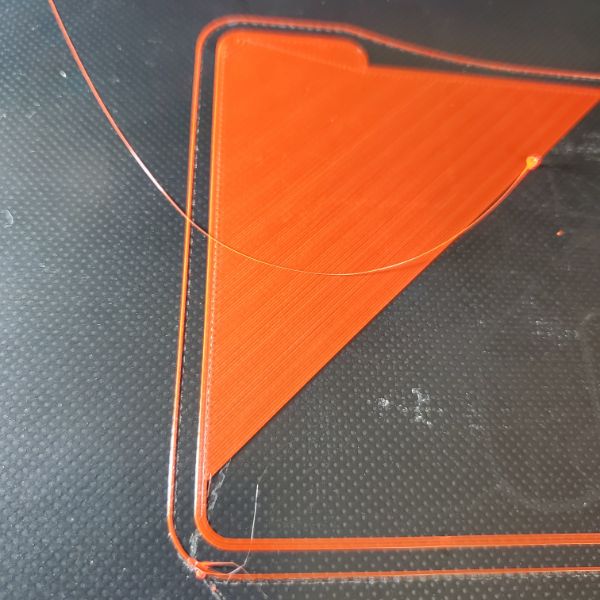
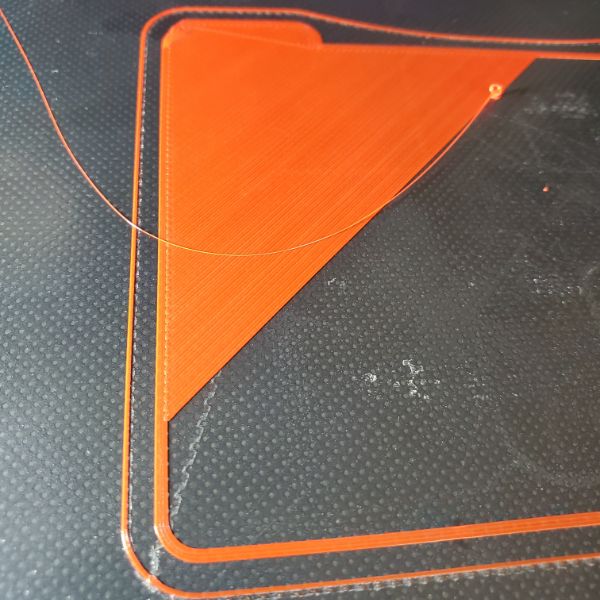
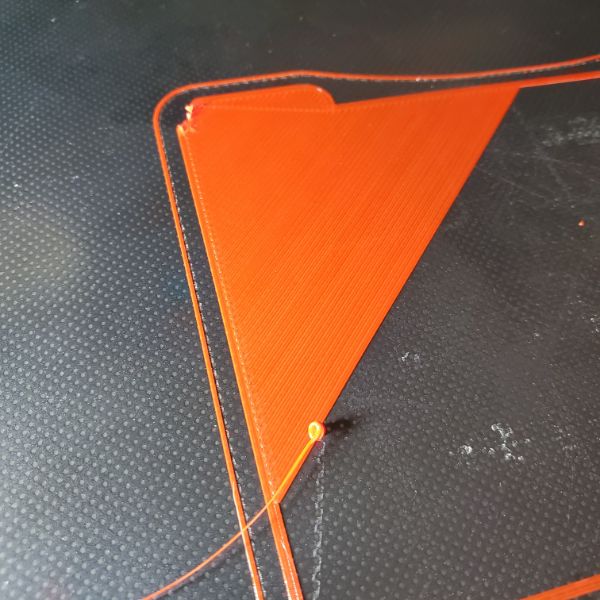
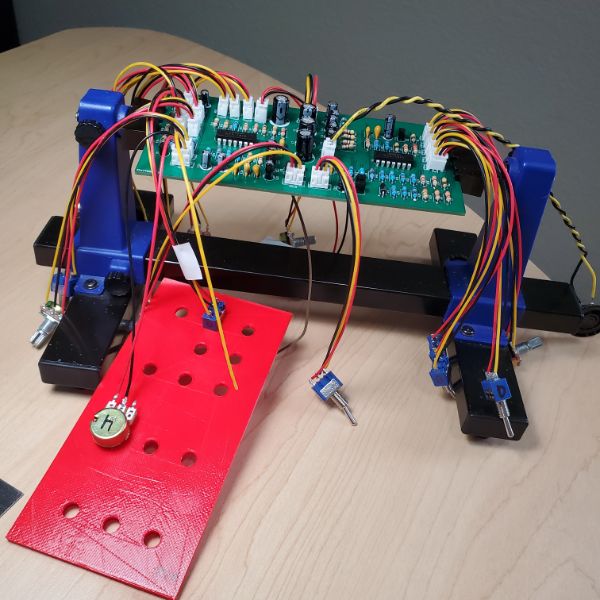
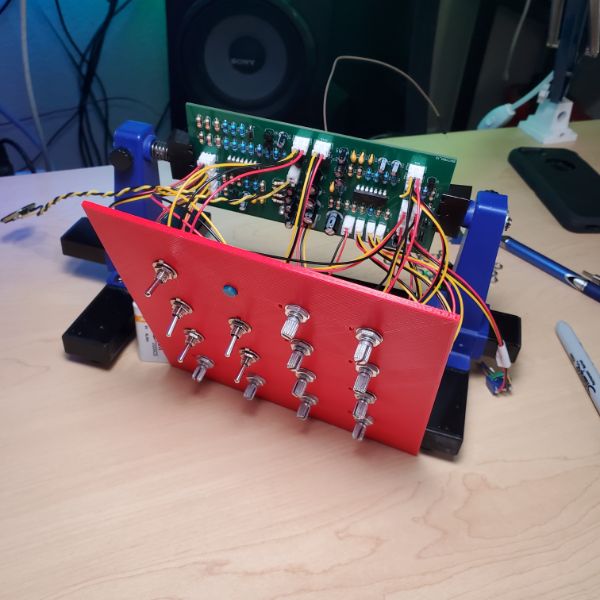
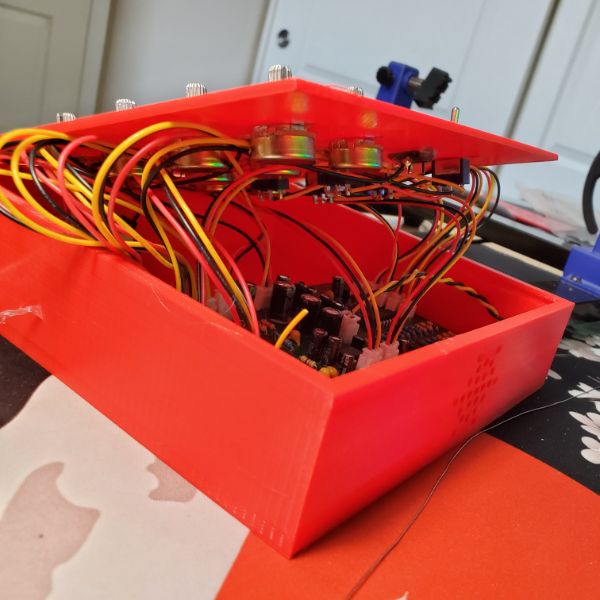
Took 5h30m and hours of repairing the printer before it came out, but the pots fit into it pretty well. Time to button everything up for the first time and see how it looks
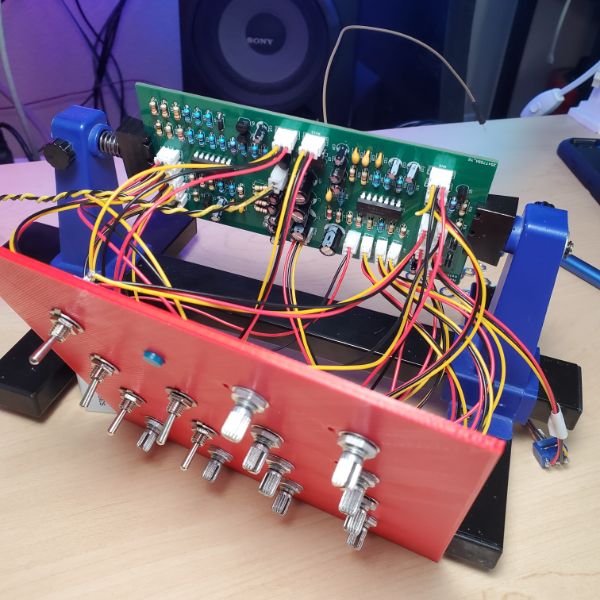
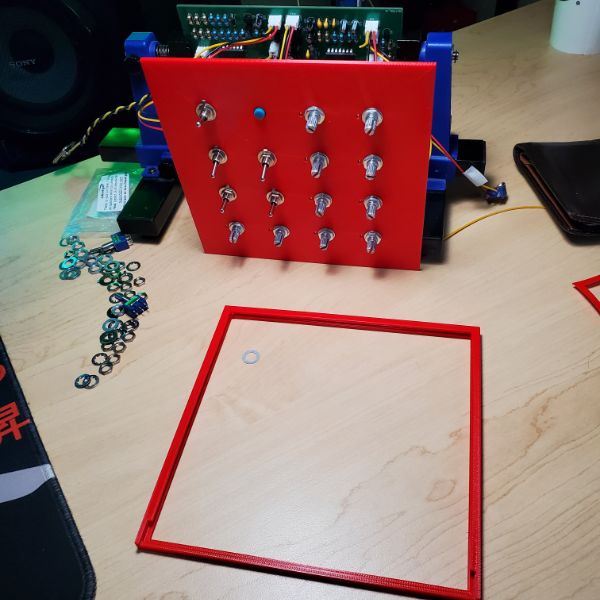
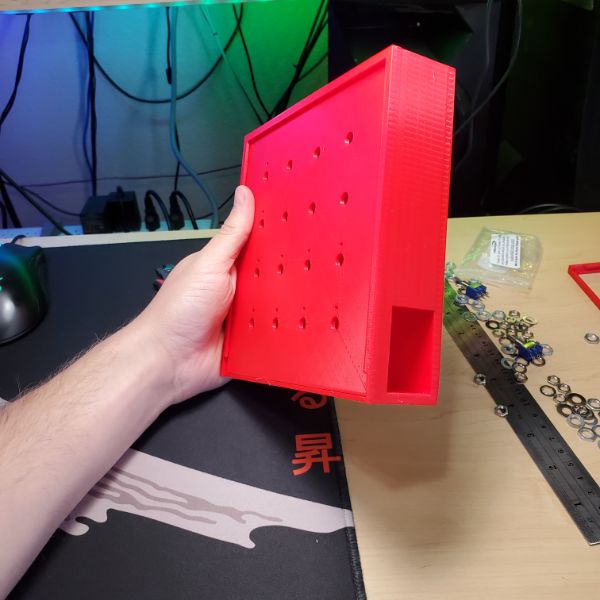
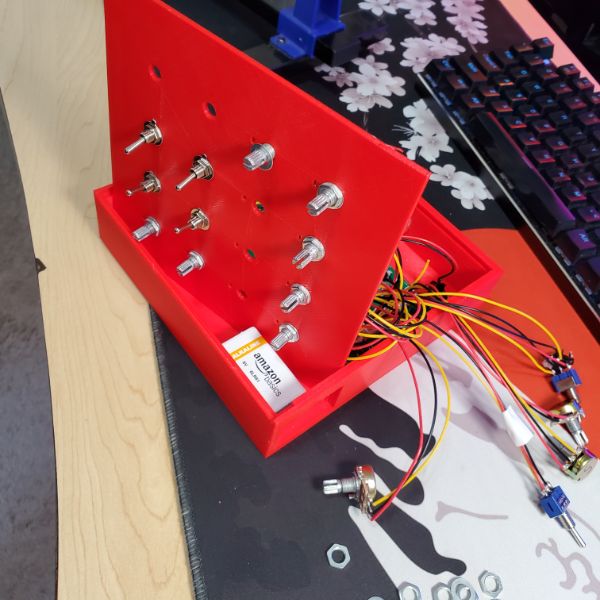
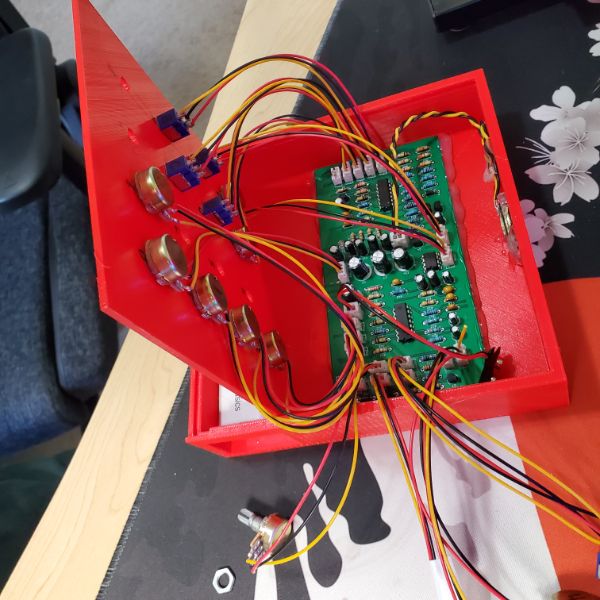
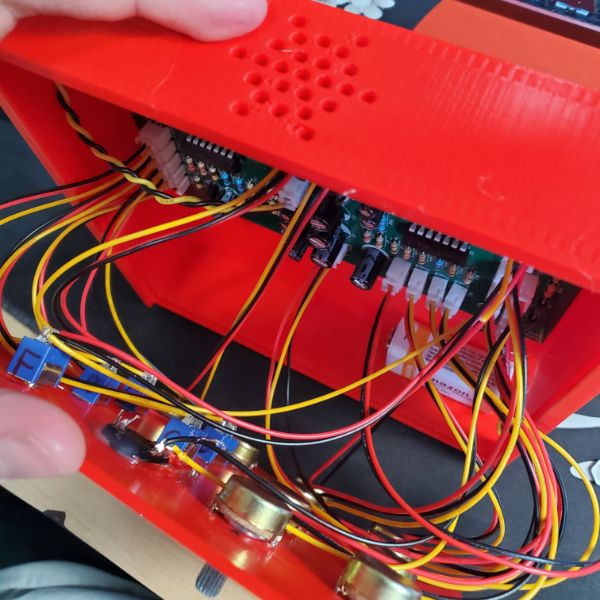
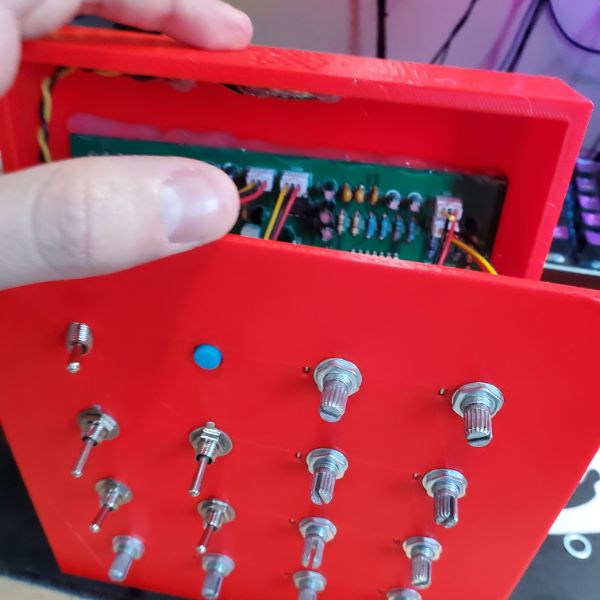
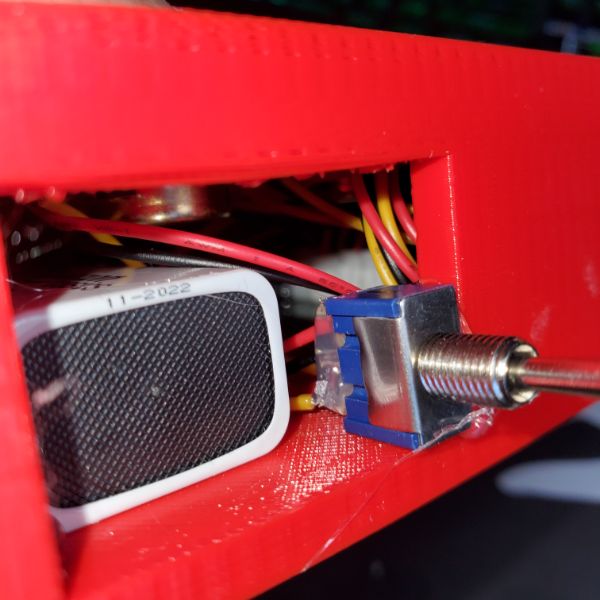
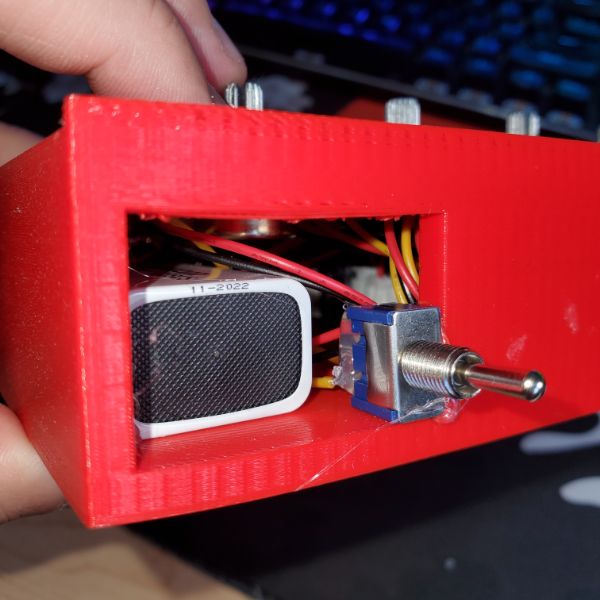
Fit everything into the panel just fine and bolted it down. I had a wire break but it was easy to solder back together.
Hot glued the button into place, and now everything’s where it should be
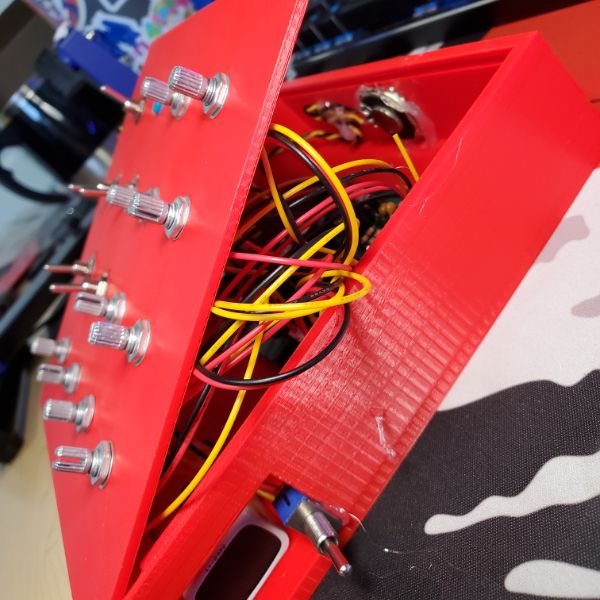
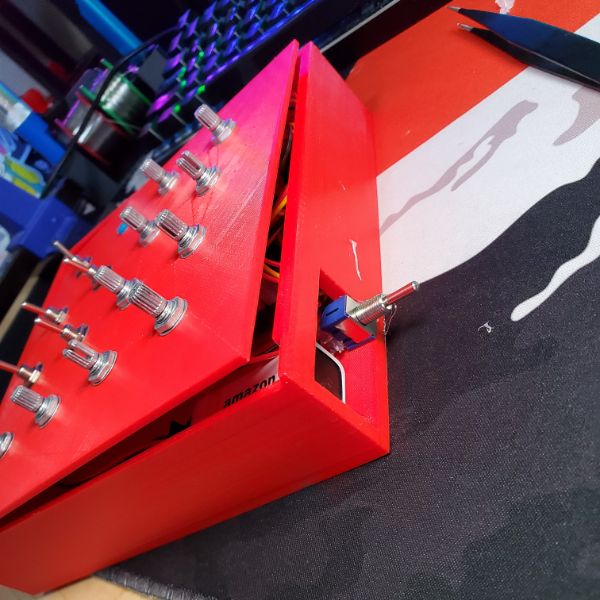
I was having an issue getting the switches to tight and aligned, so I think I’ll just wait until the body is done so I can get a better grip on it
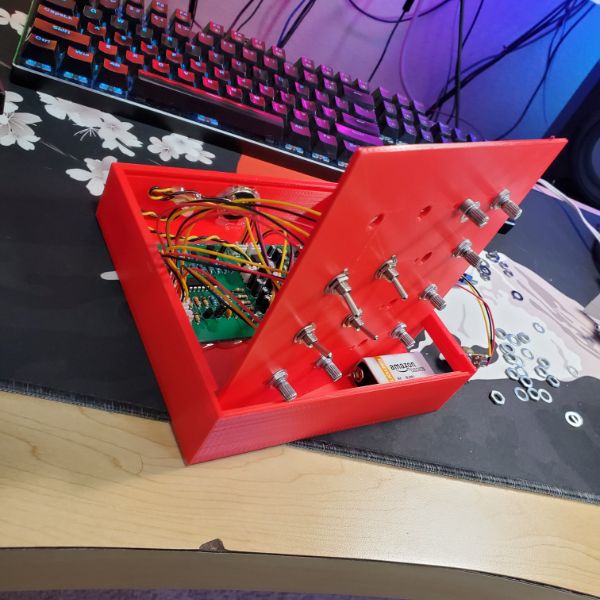
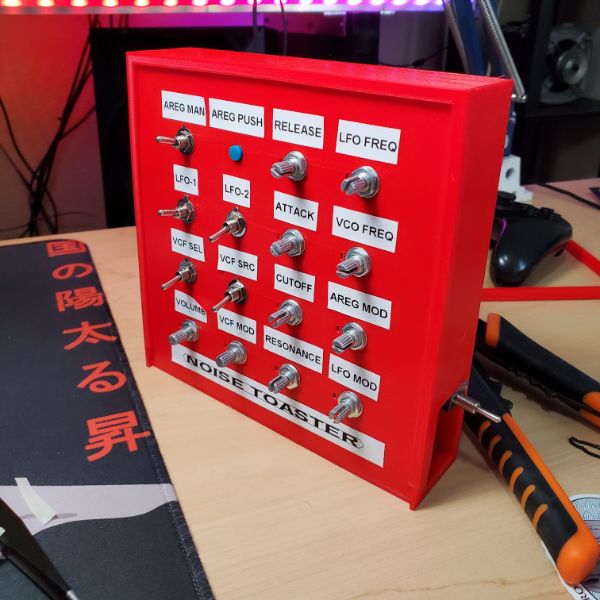
I need to check for a good power switch, I don’t really want to loot breadbox but I might be inclined to
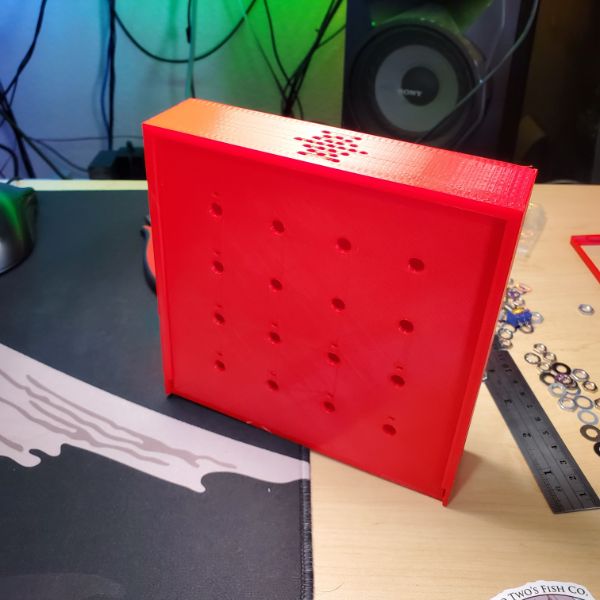
I’m thinking on the top surface of the case, there will be a hole for the power switch, and then a speaker perforation. Then the speaker can just go into the top and that’s where the sound will come out
The back will need a removable slot for a 9V battery
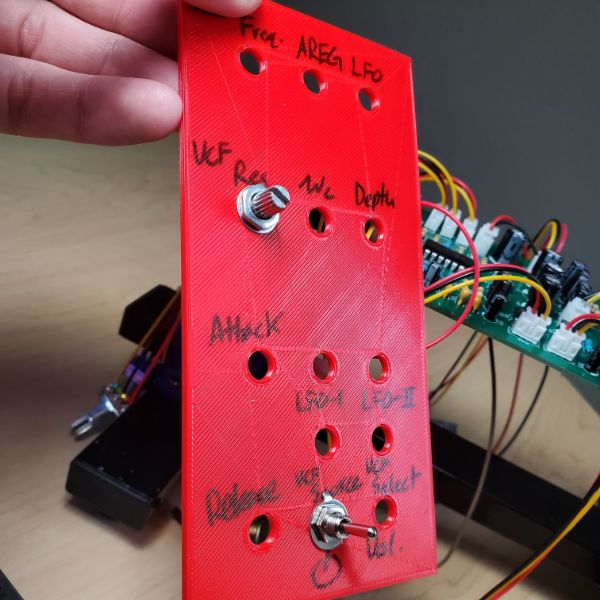
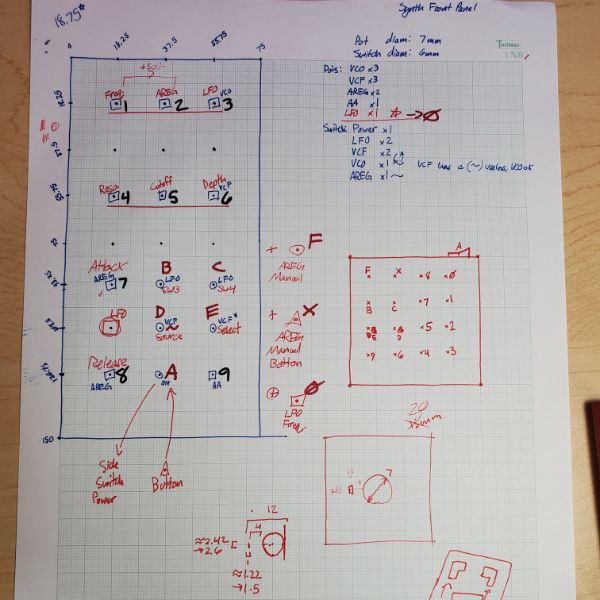
SYNTH PANEL R2 LAYOUT
F
X
8
0
B
C
7
1
E
D
5
2
9
6
4
3
Horizontally Mirrored Layout
0
8
X
F
1
7
C
B
2
5
D
E
3
4
6
9
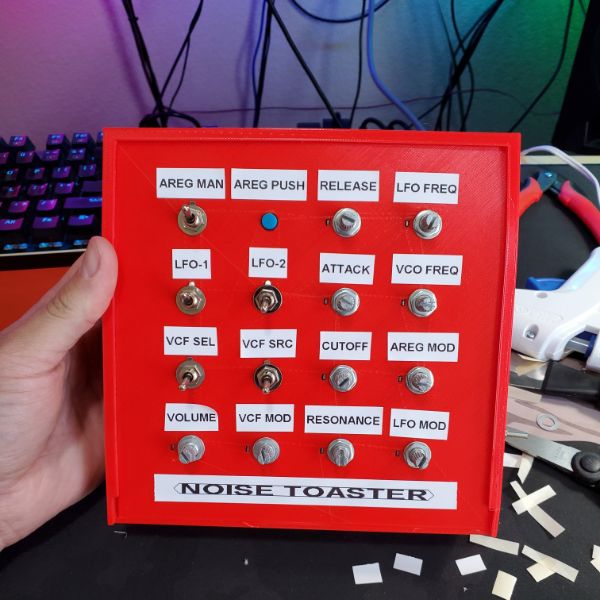
SYNTH PANEL REFDES TABLE
Panel Label
REFDES
Code
LFO FREQ
RV4
0
VCO FREQ
RV1
1
AREG MOD
RV3
2
LFO MOD
RV2
3
RESONANCE
RV9
4
CUTOFF
RV6
5
VCF MOD
RV5
6
ATTACK
RV7
7
RELEASE
RV8
8
POWER
SW1
A
LFO-1
SW3
B
LFO-2
SW4
C
VCF SRC
SW6
D
VCF SEL
SW5
E
AREG MAN
SW7
F
AREG PUSH
SW8A
X
AREG SEL
SW2
N/A
Notes
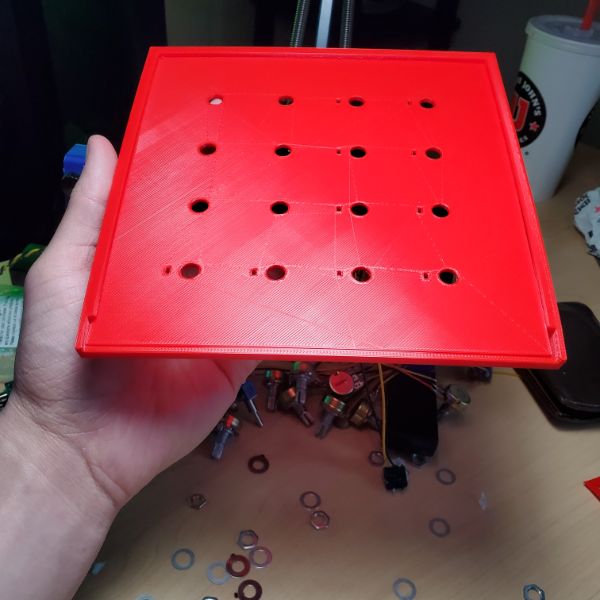
I printed out the old synth panel design I came up with previously.
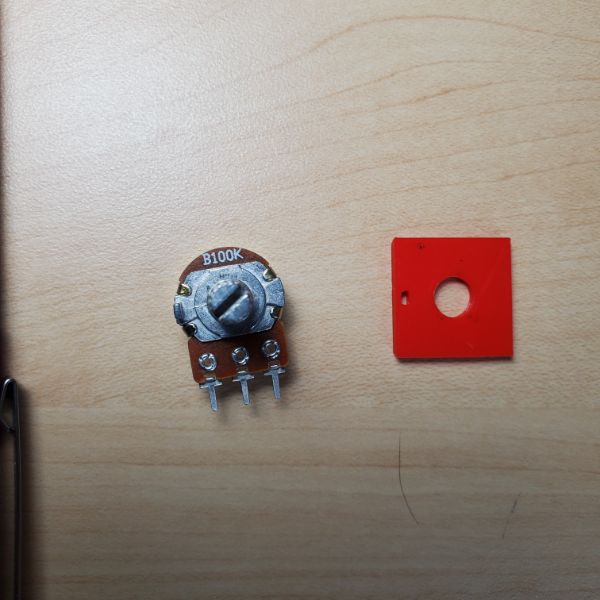
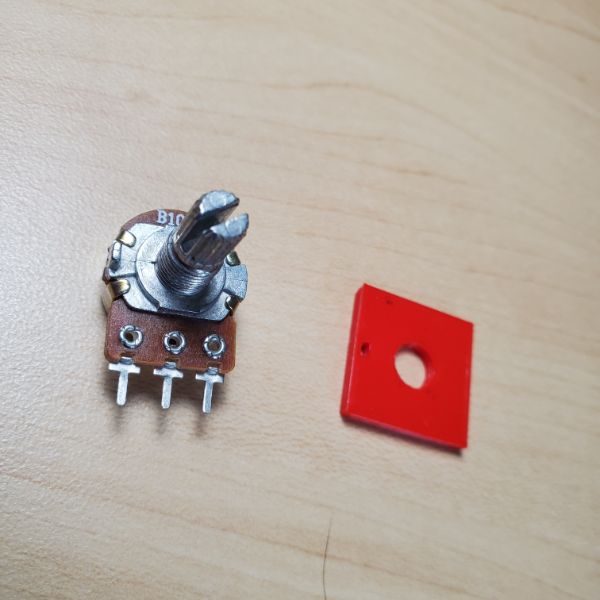
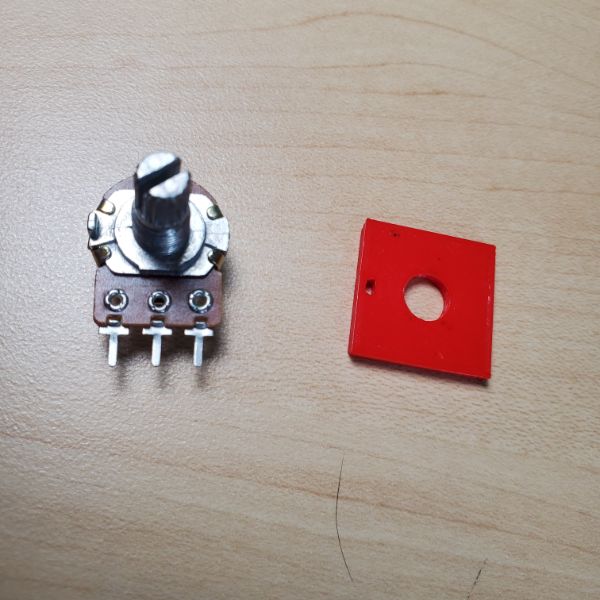
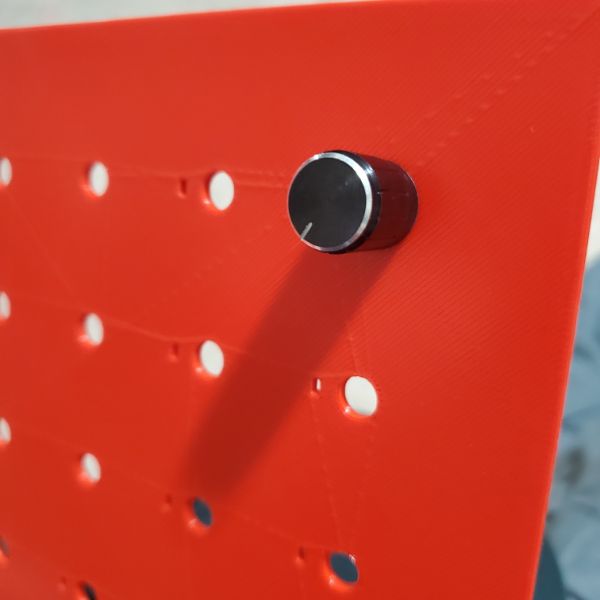
The 7mm and 6mm holes I put for the knobs and switches respectively don’t have any functional difference. You can tell visually if you look closely, but both threads fit into both holes so what’s the point.
I can already tell that the panel surface needs to be a lot bigger though, otherwise this thing will be painfully cramped, and end up being less convenient to use anyway
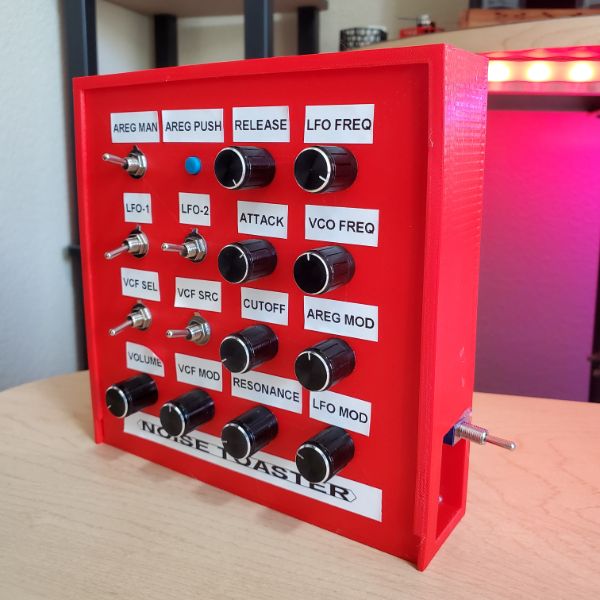
Labeling all the pots, they screw in just fine
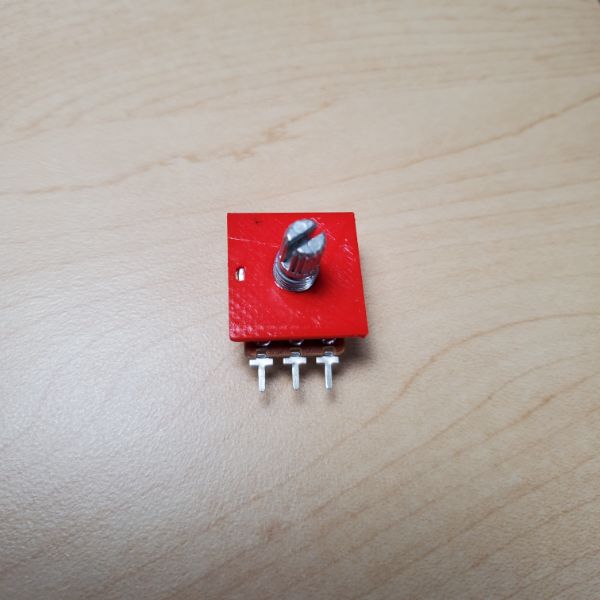
Turns out the pots have this little orientation tab that I have to account for. That’s kind of a pain and increases the complexity of the panel design by a lot
I’ll have to create a rectangular recesssion offset for each pot
switches bolt on just perfect
Turns out the underwater effect is cutoff freq
My headass forgot to model a hole for the LFO freq adjust, so now i REALLY have to redesign this thing
Looks like I constrained both circles to 7mm. So I’m just tripping on the visual difference
Either way, both pots and knobs seem to fit just fine if I bypass the metal tab by screwing on a second washer before inserting the knob. That means two washers per pot. Is it worth it? Probably. I can see those tabs becoming a headache on their own pretty quickly. I’ll still give them a quick try though
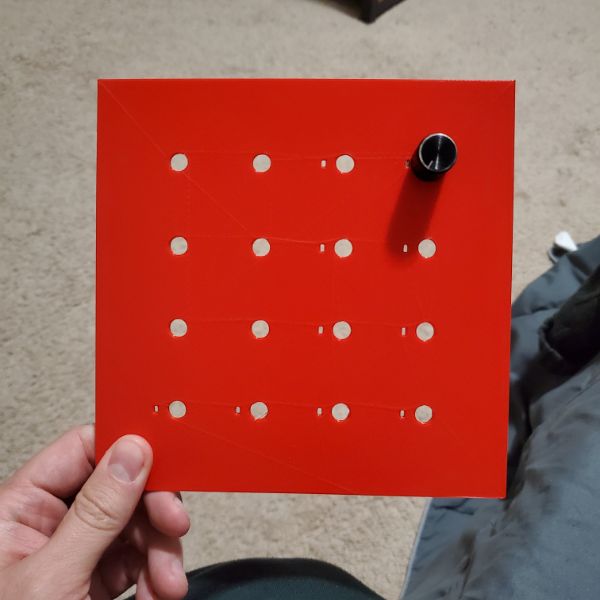
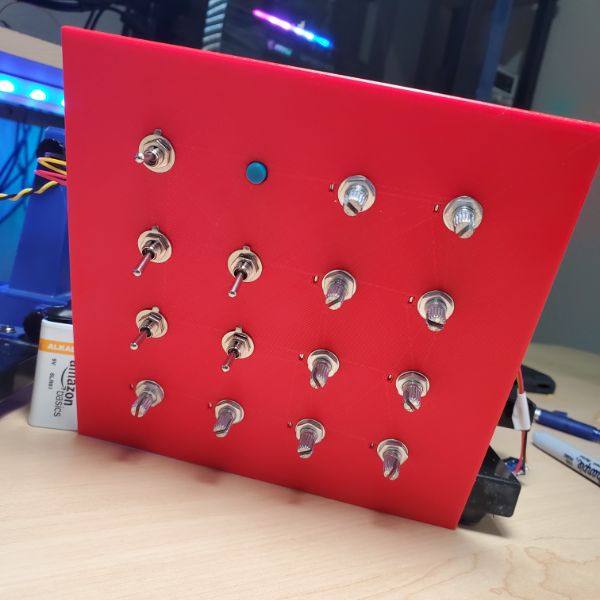
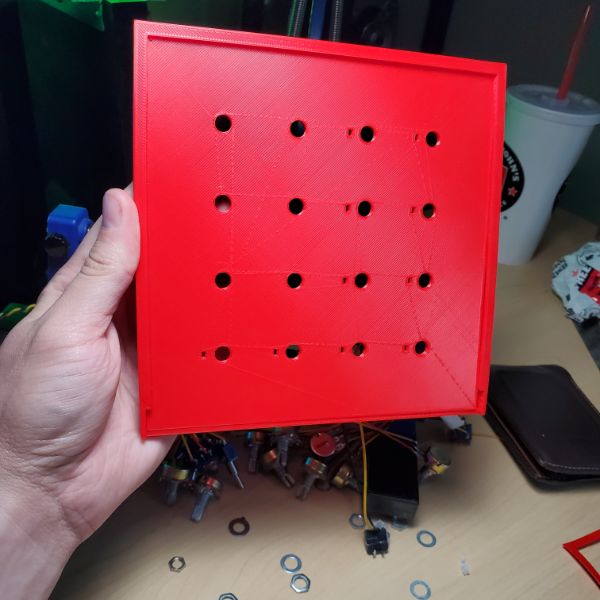
Since I have 17 UI ports, I’m thinking of putting the power port in the top side of the box and not in the panel, and then doing a 4×4 square grid for the other 16 ports.
I mapped them out on a paper with a layout
I’m thinking a 16cm square, so that there can be 40mm spacing between the center point of each UI node
This also gives me room for the 33-38mm x 12mm labels that the label maker produces. That way I can use the label maker instead of trying to
3d print text
write on it
laser etch?
The primary drawback of the label maker (other than being plain black and white) is the fact that I have to trim the edges off. I can use the straight cut, but the labels generally aren’t long enough to do that twice with a firm hold on the paper. The other option is to use scissors
the other final option is to use the exacto knife and pray
It’s not that big of a deal though, since the labels are literally disposable and I can print more at my leasure
I’ve mapped all the switches and knobs to alphanumeric indicators, and I’ll map those to the pcb refdes as well
Found an issue, there’s a switch that turns off AREG modulation in the VCO. It also didn’t make it into my front panel sketch. I was suspicious it didn’t do anything, but I didn’t confirm that its very slight effect is present until after I soldered it together.
I also confirmed that these 2xON switches contact on the opposite of the wires they’re leaning towards
meaning, if the switch is leaning to the RIGHT NC lead, the contact is touching the LEFT NC lead, with a hinge in the middle of the switch.
I learned this by soldering together all 3 pins of a JST connector -.-
FreeCAD Note:
When carving a shape into even segments, make sure the overlaid dividing lines are construction lines. Otherwise, the definition of the total shape’s outline will get confused and it won’t pad right