
8/1/2022 – 8/14/2022
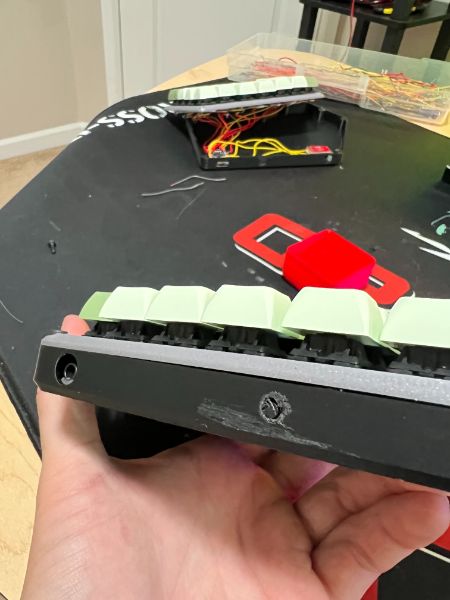
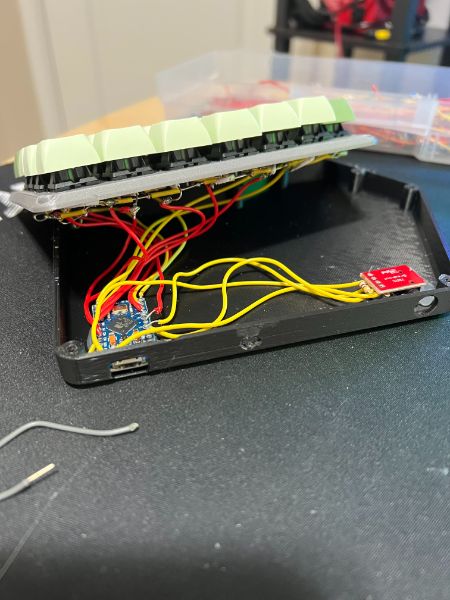
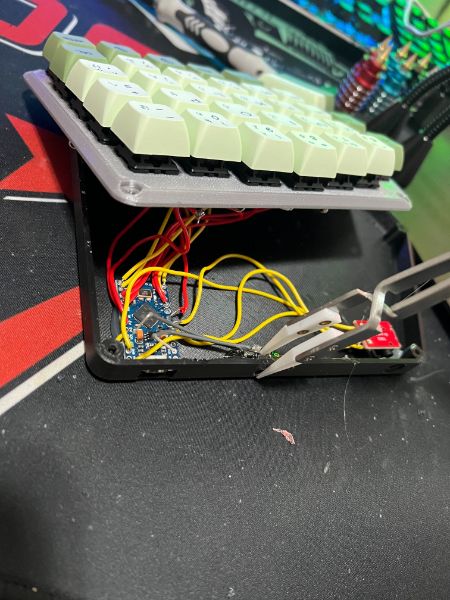
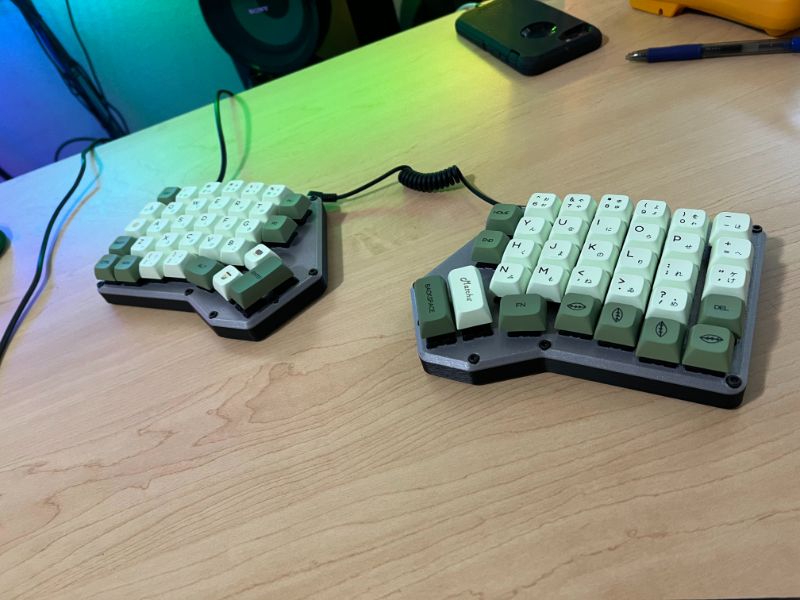
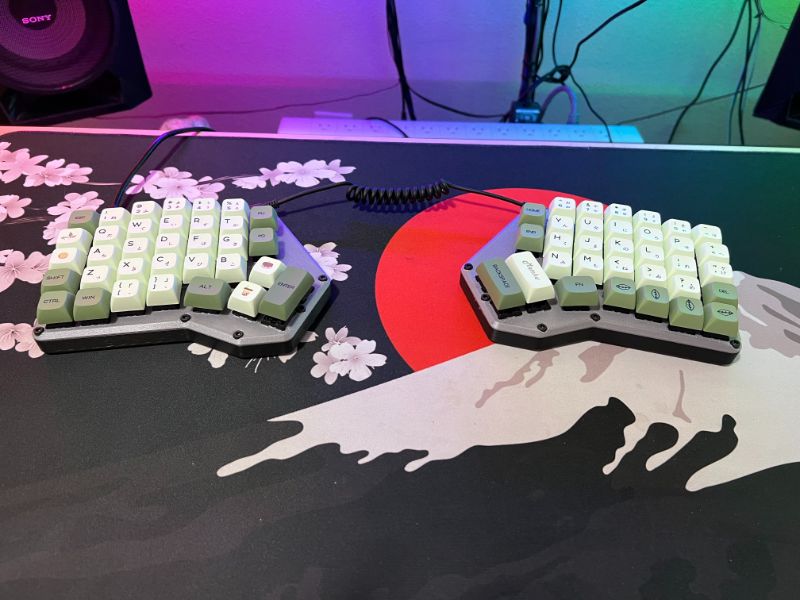
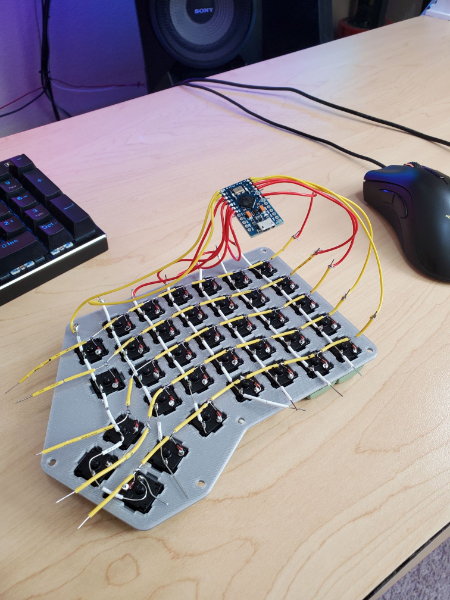
Summary: First couple weeks of lab work since moving. I finished up the Keyboard and it works pretty well. I practiced typing on it for about a week before the microUSB port on the arduino inside snapped off so now it’s out of commission already and I’m going to have to fix it to keep using it. Along with that, my hands have already gotten used to typing differently with that split style so now I can’t even use my normal keyboard right lol.
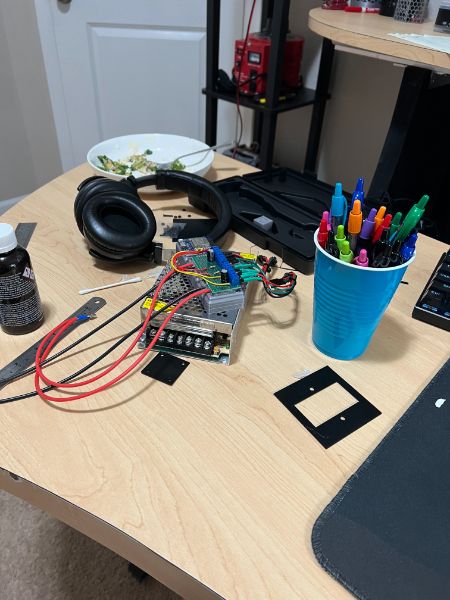
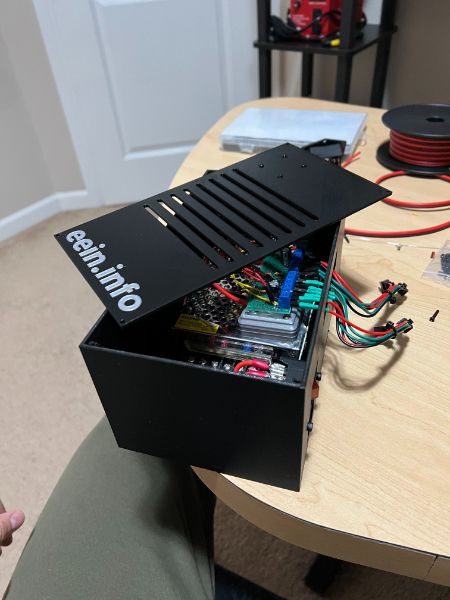
I designed, printed, and finished putting together the lightsbox for Mega Lights 2, and that project is officially done now. Nobody pointed out to me that there’s no fan holes for the fan to pull in air from outside! So the whole thing looks pretty silly now.
Youtube Demo. I also spent a few days trying to get MQTT connectivity on Minecraft and am happy to say that I succeeded. Still working on picking out a compatible modpack and putting together a server, but the end goal is to have a Minecraft server that acts as a real branch to Breadnet via redstone that could be accessed by others.
I also took some time to turn a new leaf for the lab and cleaned up the site’s design and pushed out some Project posts for that I’ve finished so far this year. With the keyboard, lights, and noise toaster all done now, I don’t have any more lingering open projects and can get started on something new, which is pretty exciting. I still think the best use of my time is grinding through the AoE textbook, so I’ll be making that a priority in the near term.


Polar Bear
Back in the saddle
Not sure if cricket startup is going to interfere with lab hours or not… Rather not go on hiatus but company takes priority
Project Ideas
Lightsbox Design And Print
Keep practicing with keyboard
Crab Wagon
Project Page Site Update
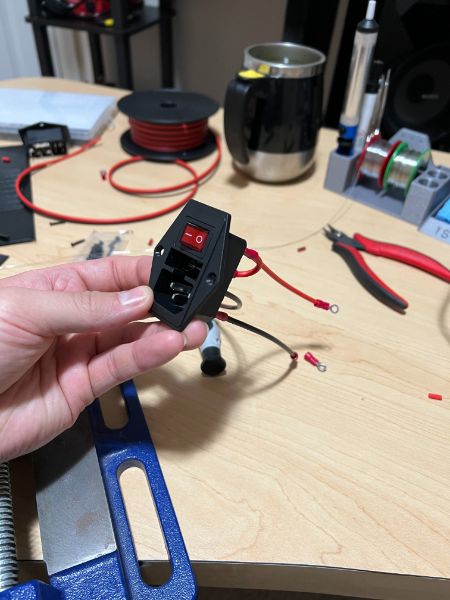
Electric Horn w MK Switches
Garage Sized CNC for Megadesk Production
Automatic Boba Machine
Pi Cruncher
Unity Game
Breadnet
Program Garage Door Clicker
Feed Garage Door Status Into Breadnet
Status Indicator Light on ML2
Create Breadnet Control Macropad
Get MQTT-Minecraft Online
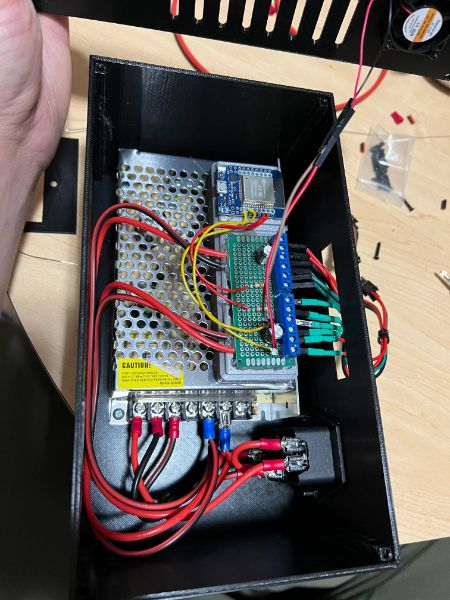
ML2 – Lightsbox [DONE!]
Dimensions are 9x5x4″
x 25.4
228.6
127
101.6
228 might be too big for build dimension
Thankfully I don’t need ALL that space
See if 210 or 200 works
200 should work fine
200 x 130 x 100
Need Holes over top to vent for PSU
Need Screw Mounts for PSU fan
Need 2 Cable Ports for Upper and Lower Lights
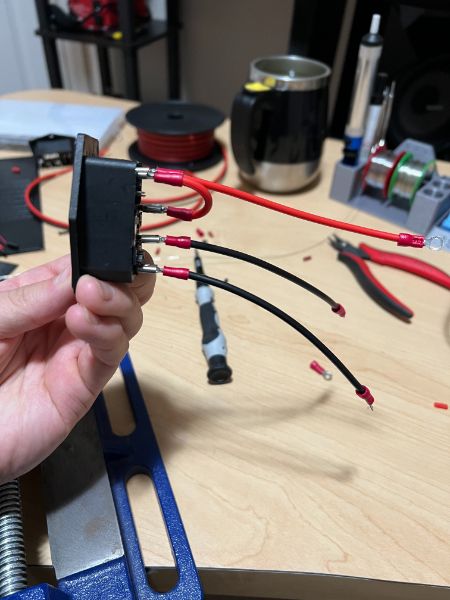
Need Port for AC Cable Input
Need Room for screwholes for mounting lid on
Doing a design similar to noise toaster case with a lidded box
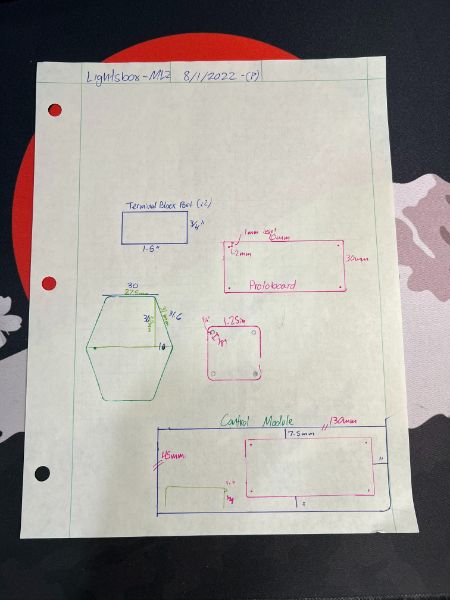
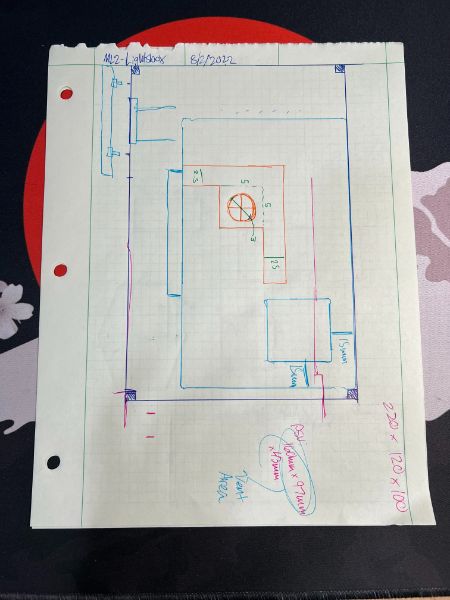
Measurements – First Pass
Fan
1.25″ square
Holes are 1/8″ inset 1/16″
Actually
30mm total
25mm center to center of holes
PSU
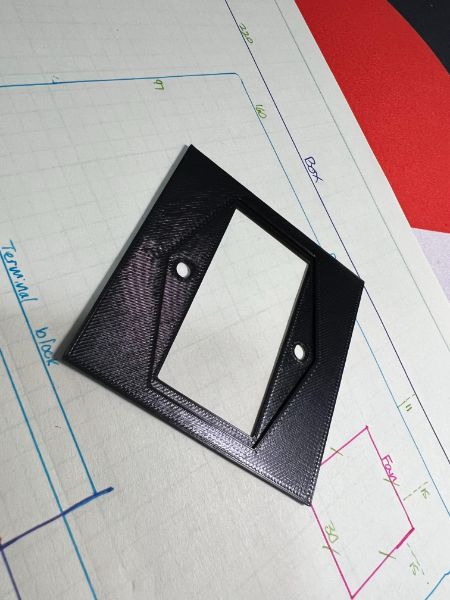
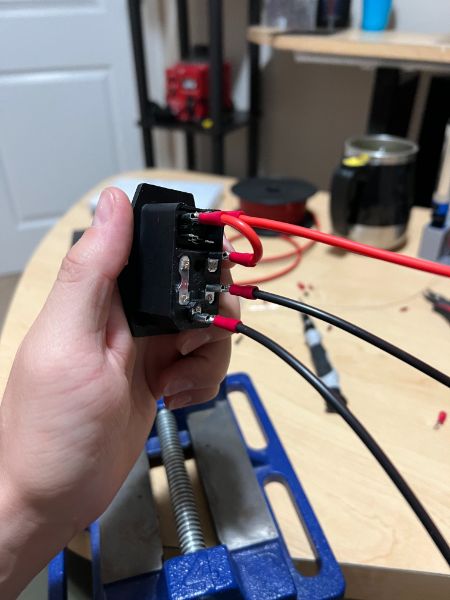
AC Socket
Start with a 30mm x 30mm rectangle
Extend 10mm
Hypotenuse should be 31.7mm
Hole center inset 4mm
3mm hole
Control Board
3×1 Gridfinity
45mm x 130mm
Protoboard
70mm x 30mm
1mm inset 2mm holes M2
Inset from control board 7.5mm on 3 sides
Terminal Block Port
2 of them
.75″ x 1.5″
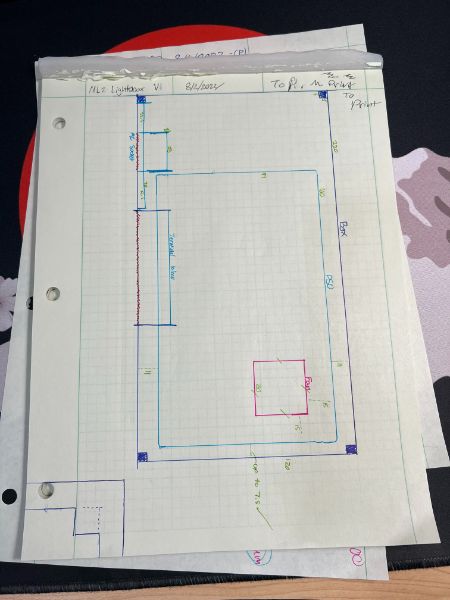
Measurements 2
Body
Interior
220x120x100
Exterior
225x125x100
2.5mm walls
5mm square screw slots
PSU
97x160x43
AC Socket
70mm square
60mm tall
10mm triangle extension
30 bottom edge
20 from center holes
4mm diameter holes
inner rectangular hole 28.5×55
Fan
30mm square
25mm center to center for fan holes
fan holes 3mm diameter
Terminal Block Port
70×15 Wall hole
starts 75mm from the open wall
65mm up from the floor
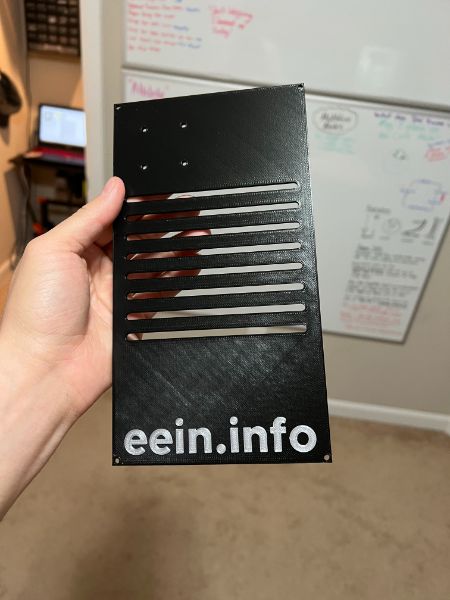
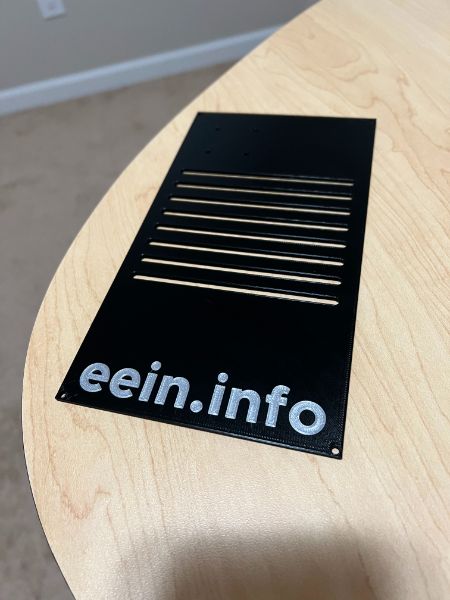
Lid
2.5 thick
220x120x2.5
3mm diameter holes, inset 2.5mm
Airflow slots not speckled holes but
||||||||||||| vent lines
Prints
After one print, both the fan mount and the AC Socket’s measurements were off
So you know I had to break out the Calipers on em
Changed AC Socket’s holes to being 19 mm away from center line
Measured Fan’s dimensions to be 30mm total, 25 mm line between circle centers
Now to design the actual box
AC Socket is perfect now
Fan holes are good enough
Designed both box and lid
lid 4.5 hours
box 13.5 hours
Print Measurement References
M3
Shaft
2.95mm
Hex Nut
5.55mm Hex OD
6.41mm Hex OD
corner to corner
2.6mm Depth
Bolt Head
5.60mm Circ OD
midpoint to midpoint
3.15mm Depth
Sketcher Keyboard Shortcuts
Carbon Copy
C then C (don’t press at the same time)
Close Shape
Ctrl + Shift + S
Constrain circle or arc
Shift + R
Copy
Ctrl + C
Connect edges
Ctrl + Shift + K
Constrain Angle
A
Constrain coincidently
C
Constrain Distance
Shift + D
Constrain Horizontal Distance
Shift H
Constrain Vertical Distance
Shift + V
Constrain Equal
E
Constrain Horizontally
H
Constrain Internal alignment
Ctrl + A
Constrain Parallel
Shift + P
Constrain perpendicular
N
Constrain onto object
Shift + O
Constrain Symmetrically
S
Constrain tangent
T
Constrain vertically
v
Create fillet
F
Create Line
L
Create rectangle
R
Extend Edge
T then E
Extend geometry
X
Move
Ctrl + M
Hide/Show internal geometry
Ctrl + Shift + E
Select conflicting constraints
Select constraints
Ctrl + Shift + C
Select elements with constraints
Select the horizontal axis
Ctrl + Shift + H
Select Origin
Ctrl + Shift + O
Select redundant constrains
Ctrl + Shift + R
Select the vertical axis
Ctrl + Shift + V
Toggle construction geometry
C then M (don’t press at the same time)
Trim edge
T then R (don’t press at the same time)
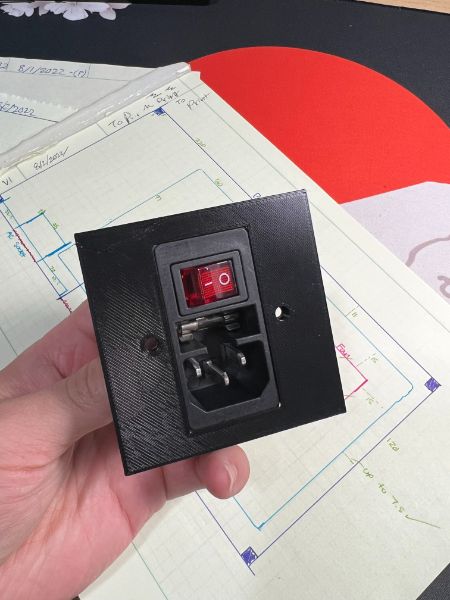
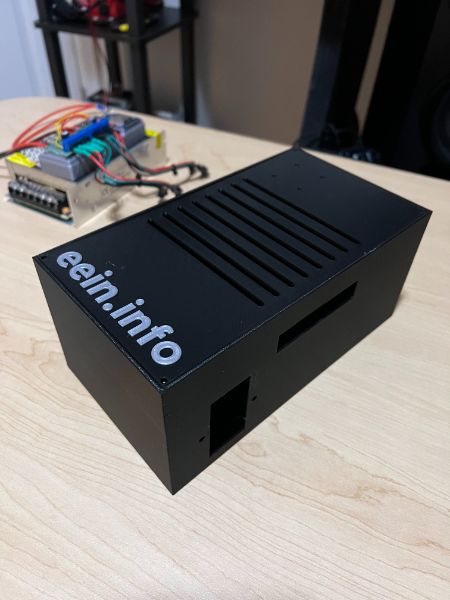
Print went great
Everything fit exactly as it should have.
Only one thing went wrong really: I didn’t even realize that there was no ventilation for the fan. Just four holes to mount it but it doesn’t have any intake lol
Nobody called me on it and I didn’t notice until I had already screwed everything in
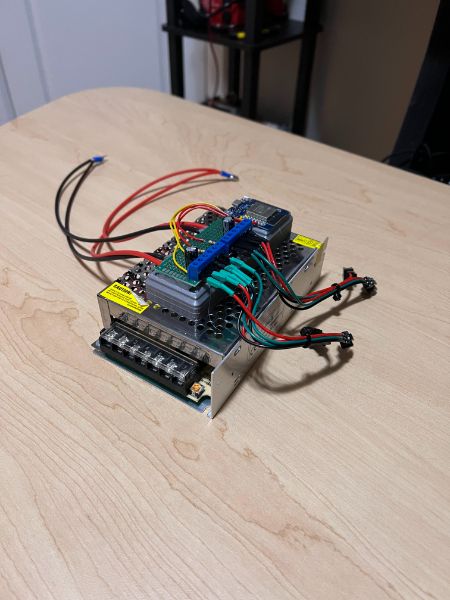
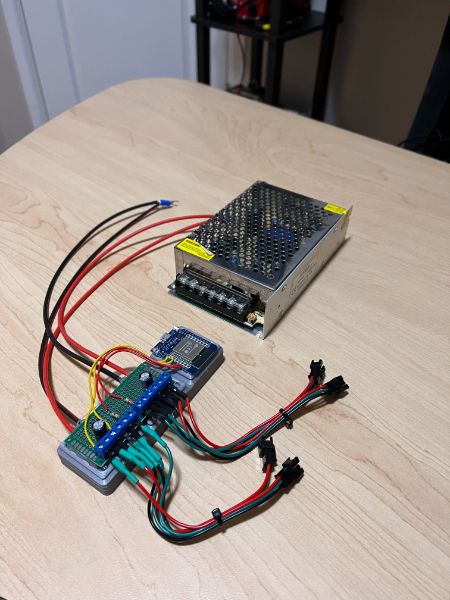
Box works great now. had to solder the L connectors together so the strips don’t lose signal integrity over the most gentle mechanical disturbance. I technically can’t take them apart that easily anymore, but that just means some extra cable will hang on the desk when it’s moved (which is how I moved it anyway)
Box feels like it’s way bigger than it needed to be and I feel like I should’ve found a way for breadnet to fit in there, since ML2 and Breadnet are both going to be in the same place anyway (on the desk, next to the tower)
If I really wanted to integrate, I’d just put Breadnet inside my PC tower lol
ML2 is now officially done. Anything else I’ll do with this project will be on the software side through Node-RED manipulations.
MCMQ – MQTT in Minecraft [DONE!]
ScriptCraft Path
Links
The talking skull in the castle
https://youtu.be/rR05VC3vPI0
https://www.bouvet.no/bouvet-deler/utbrudd/an-internet-of-things-demo-using-raspberry-pi-arduino-minecraft-and-mqtt
ScriptCraft Plugin
https://dev.curseforge.com/projects/scriptcraft/files/773004
ScriptCraft Official Page
https://dev.bukkit.org/projects/scriptcraft
https://github.com/walterhiggins/ScriptCraft
ScriptCraft Extras: MQTT
https://github.com/walterhiggins/scriptcraft-extras-mqtt
Minecraft Bedrock Edition
Written in C++
Looks like it’s closely managed by Microsoft, and doesn’t have modding
Which means any modding has to be done in Java
It also feels super weird, like the hand is breathing, the gravity is weaker, and menus are laggier
It has 50 chunk render distance by default
When you’re flying and sprinting there’s no sliding, you just instantly stop after letting go of W
CraftBukkit
Set up a basic craftbukkit server on 1.12.2, :25590
ScriptCraft
there’s a ScriptCraft/plugins folder in the root folder of the minecraft server
It stores all the .js files that can be executed in game with commands like
/js greet(self)
/js spawn cow
In Minecraft
played with some of the sample scripts
Got to hello world on a command block
idk enough about javascript or minecraft event handling to create a simple script to like, /time set night
i get the command block can do that but i’m trying to create that even using the js
so i’ll have to table this for now
Minecraft Modding Tutorial
https://youtu.be/3sZtN_1q0ug?list=PLKGarocXCE1EMxeBvqsOWZVkYD_Vd_uwW
How to Start Minecraft Modding 1.16.5 with Forge | Forge 1.16.5 Modding #1
https://youtu.be/3sZtN_1q0ug?list=PLKGarocXCE1EMxeBvqsOWZVkYD_Vd_uwW
Install OpenJDK 8 + JVM HotSpot
IDE: IntelliJ IDEA
Can I use VSCode?
Java Knowledge – You cannot download this, you need to know some Java
Need to know the basics of OOP and lamdas
Minecraft Forge
Extract Forge into a folder, open that folder in the IntelliJ IDE
It will build the environment for forge
This takes a while ~5 min
>gradlew genIntellijRun
this rebuilds it
define version, username, modid
replace examplemod with the modid name
Nahh this is wack
Mineduino Path (SUCCESSFUL)
Spigot-Mineduino
C:\Users\iantr\Dropbox\Root\Lab\Projects\MCMQ – MQTT in Minecraft\Spigot R2\BuildTools\PortableGit
Set up Spigot using Build Tools
Originally did it on 1.12.2 before realizing that Mineduino was actually built for 1.14, so I had to rebuild the server after getting a successful connection but not being able to use it in game
Once I set it up on 1.14, it worked like a charm. The mod is much more well made than the Scriptcraft one. I want to see if it functions properly on higher versions, and then see if I can integrate it into a modpack or not, because I don’t really want to try and work with 1.14 vanilla just for the MQTT feature. It kind of defeats the purpose
If I can get it working on a higher version’s modpack for input and output of 0-15 range redstone signals then the only thing left will be to build a mocked up API that will let me pass redstone signals to specific lights on the upper light array. But that’s intersecting with another project that I haven’t started in earnest yet so we’re gonna call this one a little early
Mineduino Guidelines
ANVIL -> Redstone item
Naming Convention makes it a MQTT IO point
MD/identifier/type
example
MD/botlux1/raw
Identifiers can be whatever, just a name
types are Raw and Simple, not sure the difference
Simple Signal Output ranged [0-15]
Can be any signal source, Lever, Button, Plate, etc.
Simple Signal Input Source: IRON BLOCK
can also do it to repeaters and dust itself
Modpacks
A bit of everything 3
1.16.5
All the Fabric 3
1.18.2
Brass
1.16.5
Spigot Instructions
Go into buildtools folder under desktop/spigot/buildtools
in cmd
https://www.spigotmc.org/wiki/buildtools/
paste whatever command to build whatever server version you want
Good News (BAD NEWS)
Mineduino was designed for 1.14, hasn’t been updated since 1.15, but works the same in 1.16.5, which makes you think it’d be compatible with modern modpacks
But it actually is only for Spigot, which is a plugins only, no-mods platform
Sponge is another framework in development that allows plugins and forge mods, but the 1.16.5 version is incomplete, so it doesn’t look like the world is not ready for mods+mineduino
SDO – Site Design miniOverhaul
eein.info Projects Page:
Current Projects
Breadnet IV
Mega Lights 2
Analog Synthesizer
Mobile Power Supply
Portfolio Projects
3D Printer Upgrades
Thereminator
Blasteroids
Mega Lights
I2C on Eater’s 6502
Lab Notebook Website
Breadbox
Cricket Colony II
MEGADESK
Past Projects
3D Printer Upgrades
Breadnet
nChan
Sugar Rockets
Homemade PCB
Breadnet to RGB
I2C on Eater’s 6502
MEGADESK
Thereminator
eein.info
Breadbox
Future Projects
Danger Laser
Future Project List
CRAB
Crab Wagon – Ridable Robot
PIG
Pi Cruncher – Unity Game
BNM
Breadnet Macropad
PBS
Plasma Driven Bluetooth Speaker
SDO
Site Design miniOverhaul
Approx. New Project List
NT
Noise Toaster
BN4
Breadnet
MKB
Keyboard
ML2
Mega Lights 2
MCMQ
Minecraft MQTT
Old Project List
Megadesk
Cricket Colony
Breadbox
nChan
6502
Blasteroids
Thereminator
eein.info
Projects that will get deleted
Homemade PCB
Sugar Rockets
Breadnet to RGB
Breadnet: Old
3D Printer Upgrades
Mobile Power Supply
Commentary
Re-arranging issue
I FINALLY fixed the issue I was having with rearranging the projects listing order
I found that if I add 25px padding to both sides I can consistently get them to arrange properly,
But since I only need to rearrange every once in a while, I can just add 100px of padding to both top and bottom, copy, and paste style to all the projects
This will space them out so much that it’ll be easy to rearrange them.
Then, I can set the padding back to 0 once they’re arranged, and publish. That way it’s easier to work with and consistent, and I don’t have to sacrifice the UI to make editing easier
Projects List Page
I designed this a long time ago, and there’s probably a better way to do it now.
First off, there’s too many duplicates and they’re not even named the same thing
Second, there are projects here that only consisted of maybe 2 hours of effort, and others that took 200
Third, The portfolio projects doesn’t consist of enough Completed Projects
Fourth, Past Projects needs to be trimmed
Future Projects Needs to be Presented Differently and not present as though it directs to a full page
Current Projects and Future Projects should not direct to a page
Portfolio projects can probably just GO
I think I can just put a gold star next to projects I’m proud of that showcase my skill or something
Past Projects should be trimmed to things actually worth documenting
Assets of a Project Listing
Thumbnail
Should be a picture of the finished project
Link
see below
Title
New titling system includes Acronyms, which should also help with url slugs
Description
description is vague and wandering, not specific nor succinct
Maybe format it like an Objective, since that’s the inspirational basis for most projects anyway
MCMQ
Objective:
Establish two way MQTT communication between Minecraft Redstone and Breadnet.
MKB
Objective:
Walk through the process of 3D Printing, Handwiring, and Flashing a mechanical keyboard from scratch to replace old keyboard and explore keeb-making as a potential side business
ML2
Objective:
Permanently install individually addressable LED strips onto Megadesk as professionally as possible, and then create a controller module that connects the system to Breadnet
BN4
Objective:
Use MQTT, Node-RED, and ESP32 to create a modular, integrated, and adaptable IoT server to serve as a backbone for future projects
NT
Objective:
Design and Build an Analog Synthesizer out of the Make: Analog Synthesizers Book as an exercise in LTSpice, KiCAD, FreeCAD, and End-to-end electronics design
Project Status
Ambiguous and arbitrary – does nothing
delete?
If I only post finished projects on here that have legitimate documentation, how many projects do I actually have?
aka – how much have I done since I started using treesheets? lol
Some of these project pages don’t have treesheets notes or a lot of pictures, so I’ll probably end up leaving them as is an publishing new ones on the new format
Sample Project Page
Layout of a Project Page
Zone 1
TITLE
Project Concept
Loose Specifications
Core Concept Photo
Zone 2
Project Media
4 Images
4 Captions
Zone 3
Updates and Documentation
Project Status
Serialized Updates
Other Documents
Sample Project Post Layout
HEADING
Landing Picture
Summary – Technical Overview
Finished Gallery
Summary – Personal Overview
Cost Breakdown
Timeline Breakdown
WIP Gallery
Notes Export
1/2/4 Post Format
0 – Heading
1
Landing Picture
1x picture
Summary – Technical Overview
1x detail
2
Finished Gallery
2x pictures
Summary – Personal Overview
2x details
Cost Breakdown
2x details
Timeline Breakdown
2x details
4
WIP Gallery
4x pictures
Notes Export
4x details
This format seems a little confused at first glance because it intermittently switches between pictures and text a lot, but I think this is the best way to linearly consume the content. Small amount of relevant and necessary text associated immediately with the most relevant pictures.
As you scroll down, the images become smaller and more in number, while the text becomes longer and more detailed.
That way you can look at the very top and be satisfied, and then scroll down and consume twice as much content in twice as much space, and then 4x and 4x basically
I think the Project Pages themselves could take a lot from the Post Template
Set up SPP as an example, it works pretty well but I’m a little nervous to forfeit the versatility of a page. I think the post format ultimately is better though because it dramatically simplifies the reading process, and is analogous to the biweekly post system so the user doesn’t have to interpret 2 vastly different formats for the content
Still need a list of projects to post in this manner
Home Page
No good posts zone – even posts has a clunky, spaced out UI with multiple pages, so i have to make a zone with all the posts for the year in one spot
added them to the landing page, overlaid onto the zen garden image.
highlighted to show progress, not yet completed, and current sprint
works pretty well, i’m happy with it
also added a copy of the same below the ABOUT THIS SITE zone
That way the home page can act as a master list of all the Sprints, perfect.
So if this site is still around in 5 years, there will be about 130 buttons each representing 2 weeks of work. All visible and accessible from the same page. Perfect.
Other issues
LAB CORE Slow to Navigate
LAB CORE is extremely bloated and does not lend well to adding any files to it
Might be worth seeing if the reference material, project notes, and sprint notes should all go into different files?
SOLVED: Simply turn off Autosaving under Options when working with LAB CORE
I haven’t had any autosave issues, or been saved by autosave yet, so I’m not sure how big of a deal it would be if I forgot to turn it back on, or just left it off.