
7/31/2023 – 8/13/2023
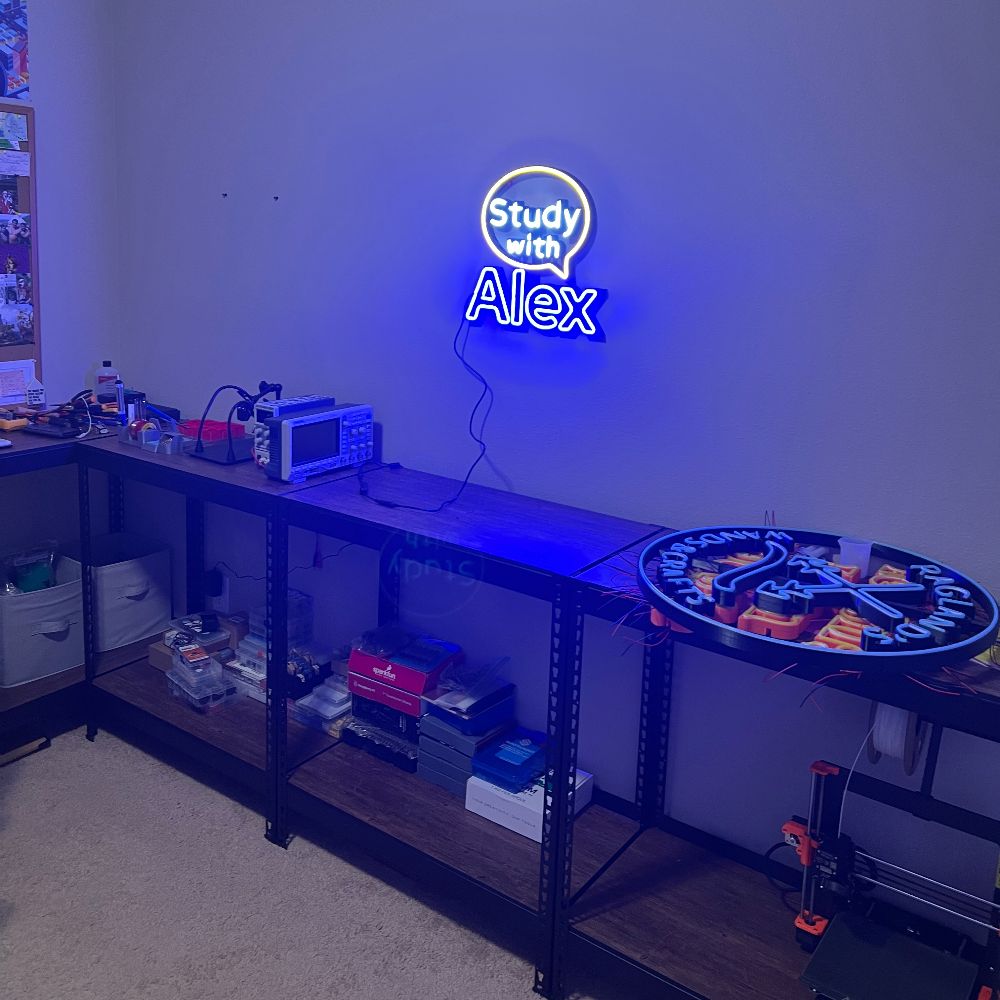
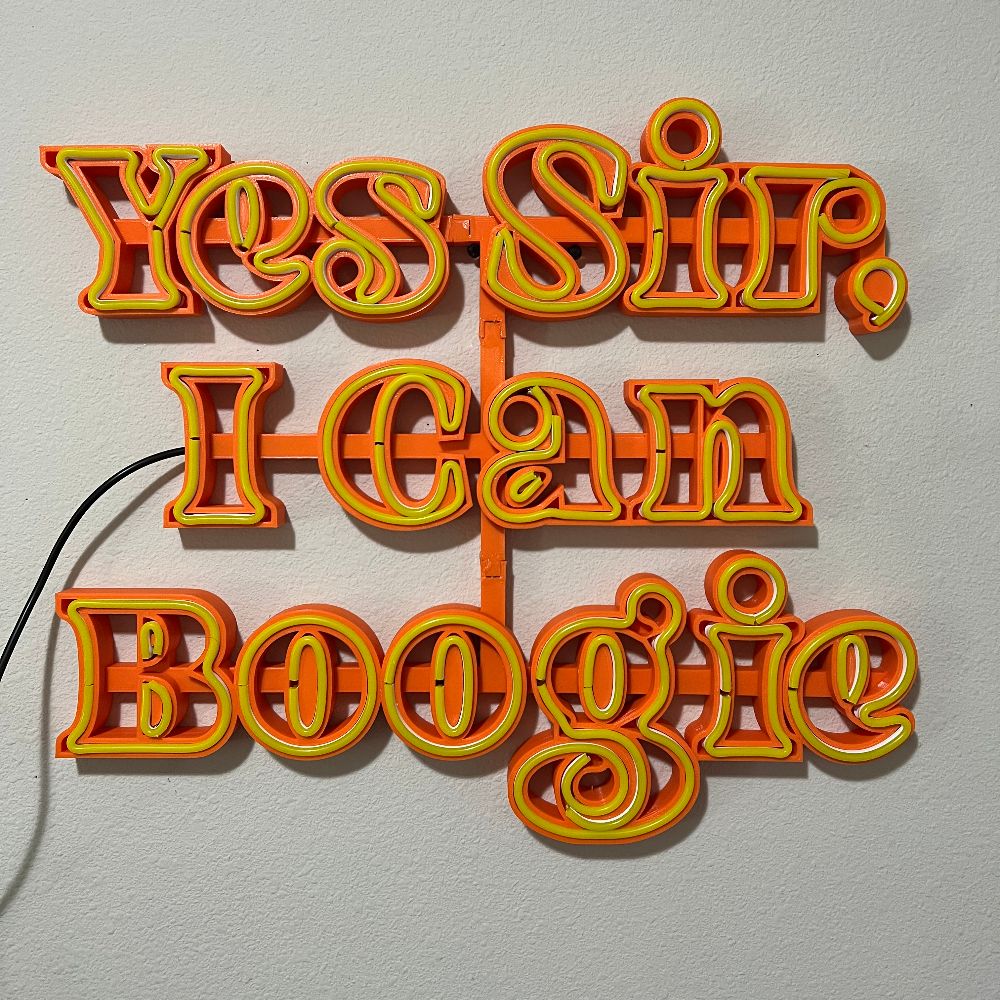
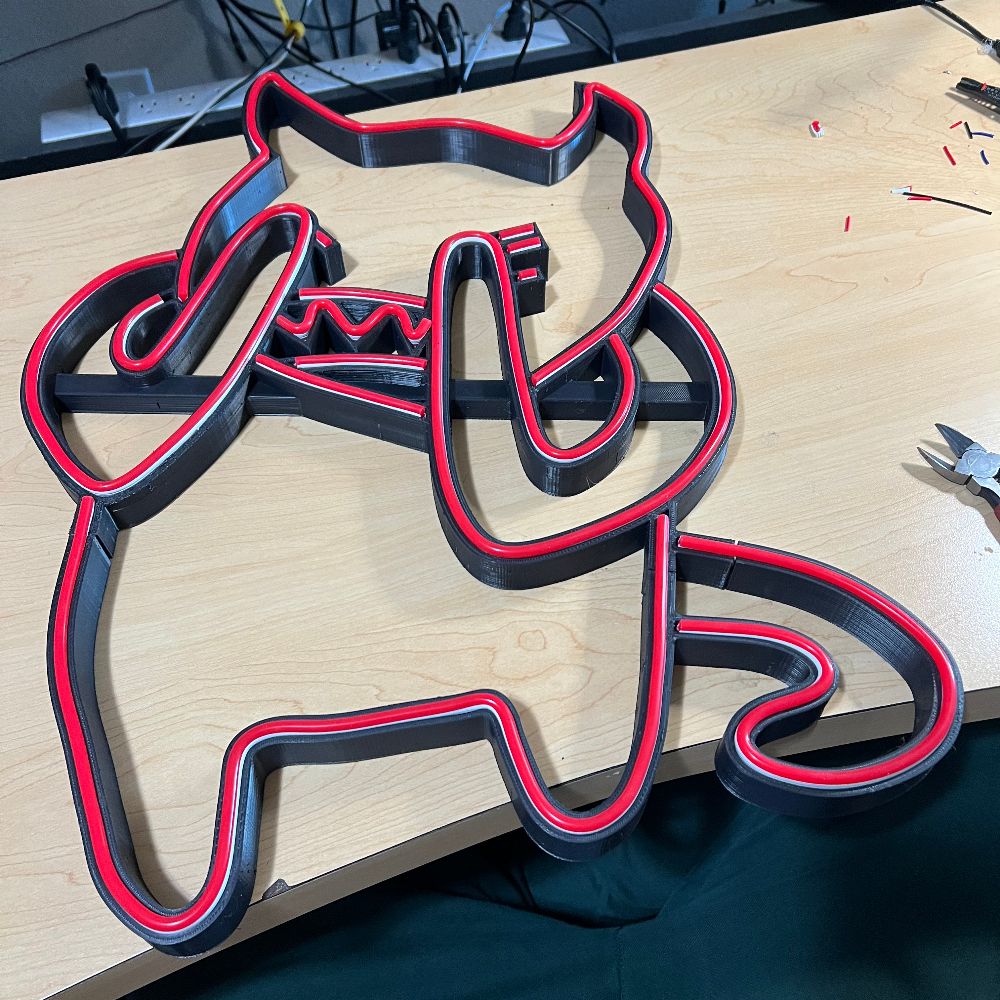
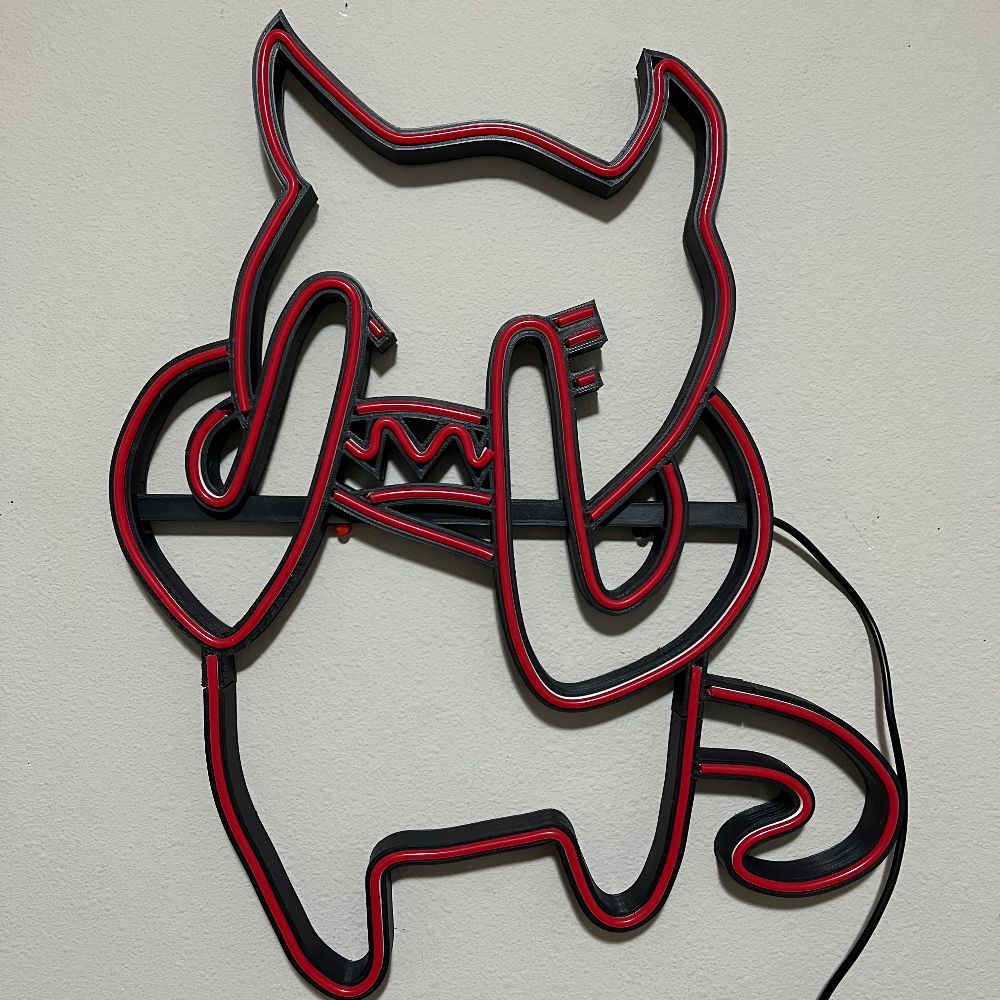
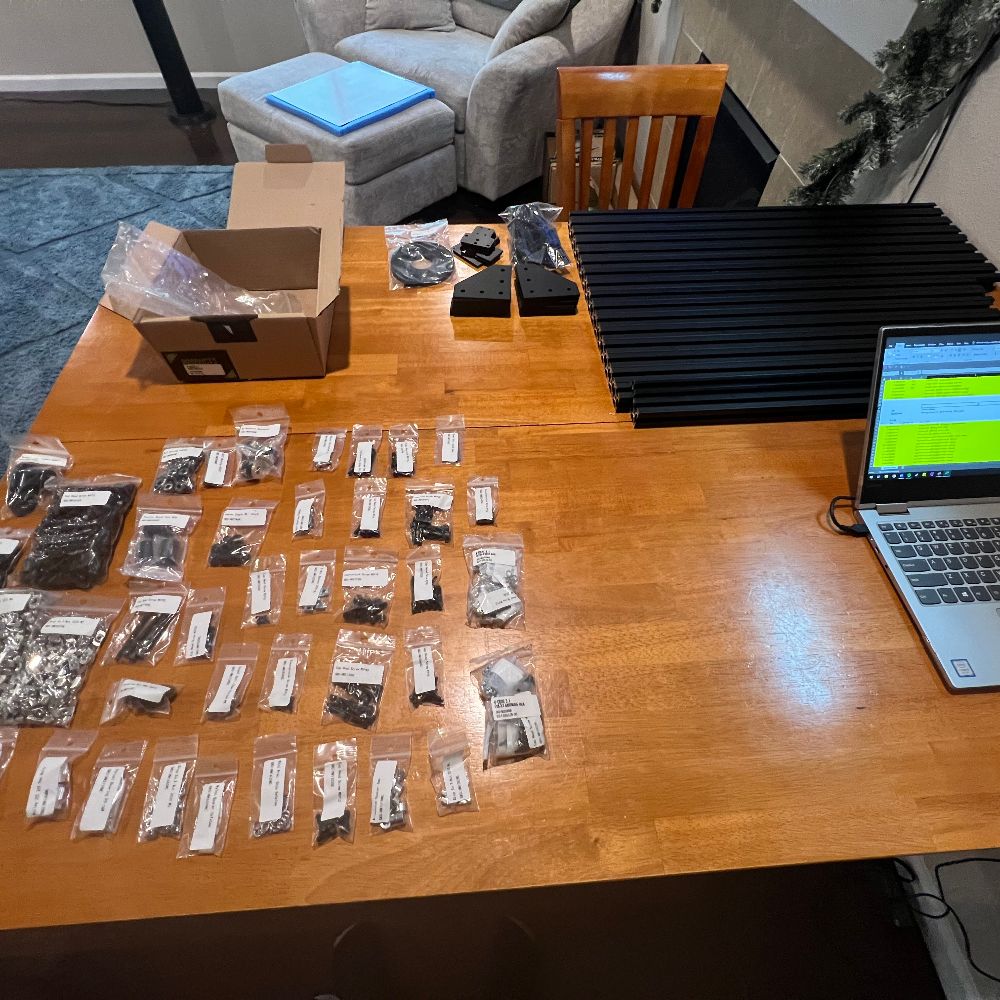
Summary: Busy! Lots of pictures. Installed the BJJ Sign on the wall. It’s been up there about two weeks now and as far as I can tell they haven’t turned it off, nor has it had any issues. I also got the replacement parts for the Rat Rig, and built the whole thing over the course of a week long obsessive episode.
The BJJ Sign Mount was really involved. I had to get a uhaul, and then load it in with a tool bag. Then we used a useless stud finder to mark the studs, and found the sign won’t be aligned with the studs on either side. Since the sign is about <100lbs either way, three 1/2″x4″ lag bolts on one side should be enough to support it. The other 3 on the other side aren’t loose but not in a stud.
I had to stand at the very top of a 12′ extension ladder with a teenager at the bottom holding me from falling back as I pushed into whatever concrete wood that wall was made of, as hard as I could with the limited leverage I had. The whole thing was extremely non-OSHA. All the while, the owner was hoisting the sign up with some paracord we looped through the top holes. The same holes I was drilling through. So there was a chance the cord snapped from the drilling and the hole sign fell down. Just one of those one-bad-idea-after-another scenarios. But we weren’t punished for it. Sign went up just fine and nobody got hurt. So how bad were they really?
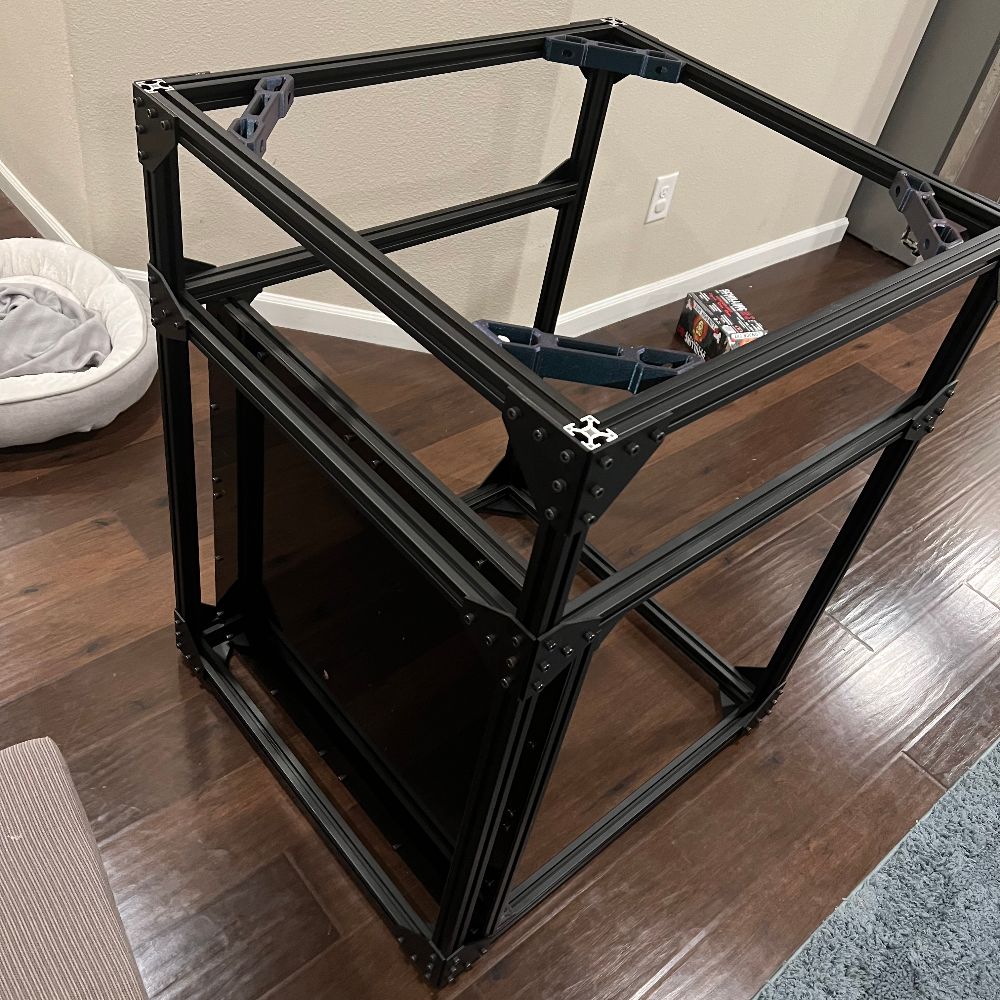
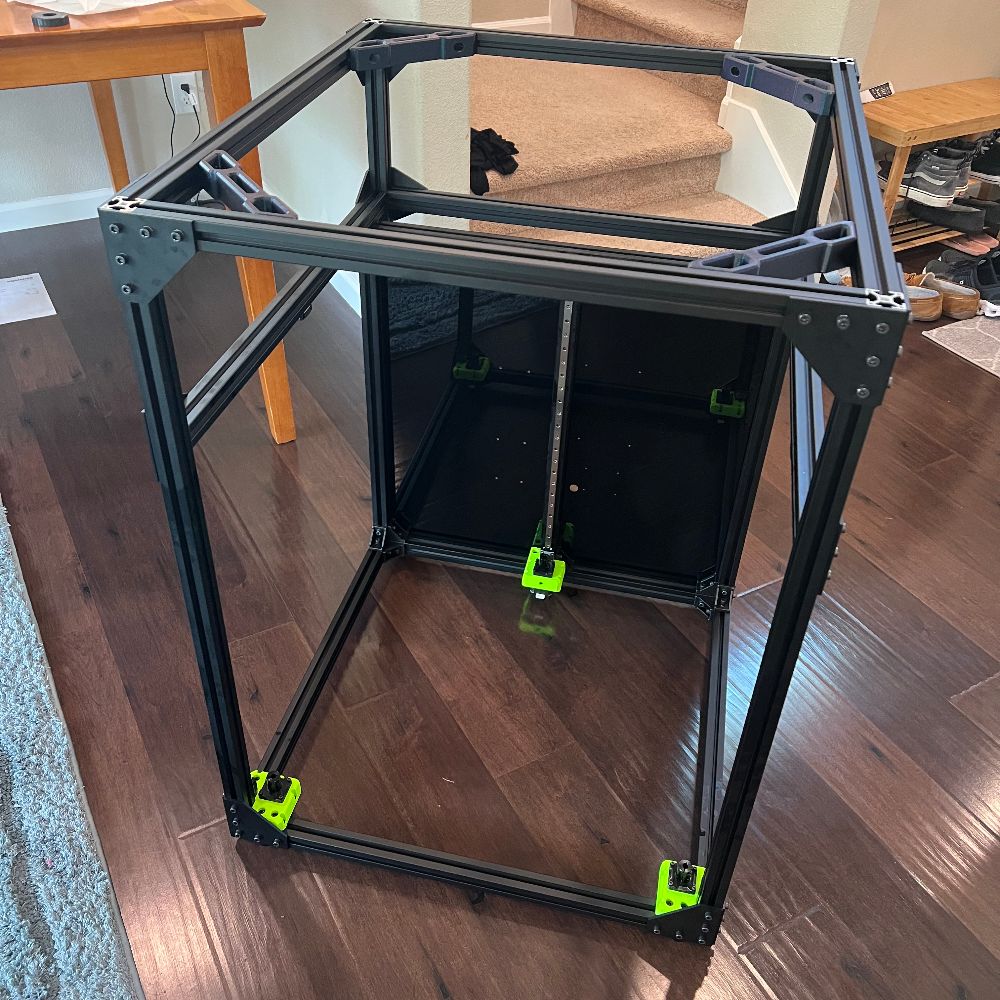
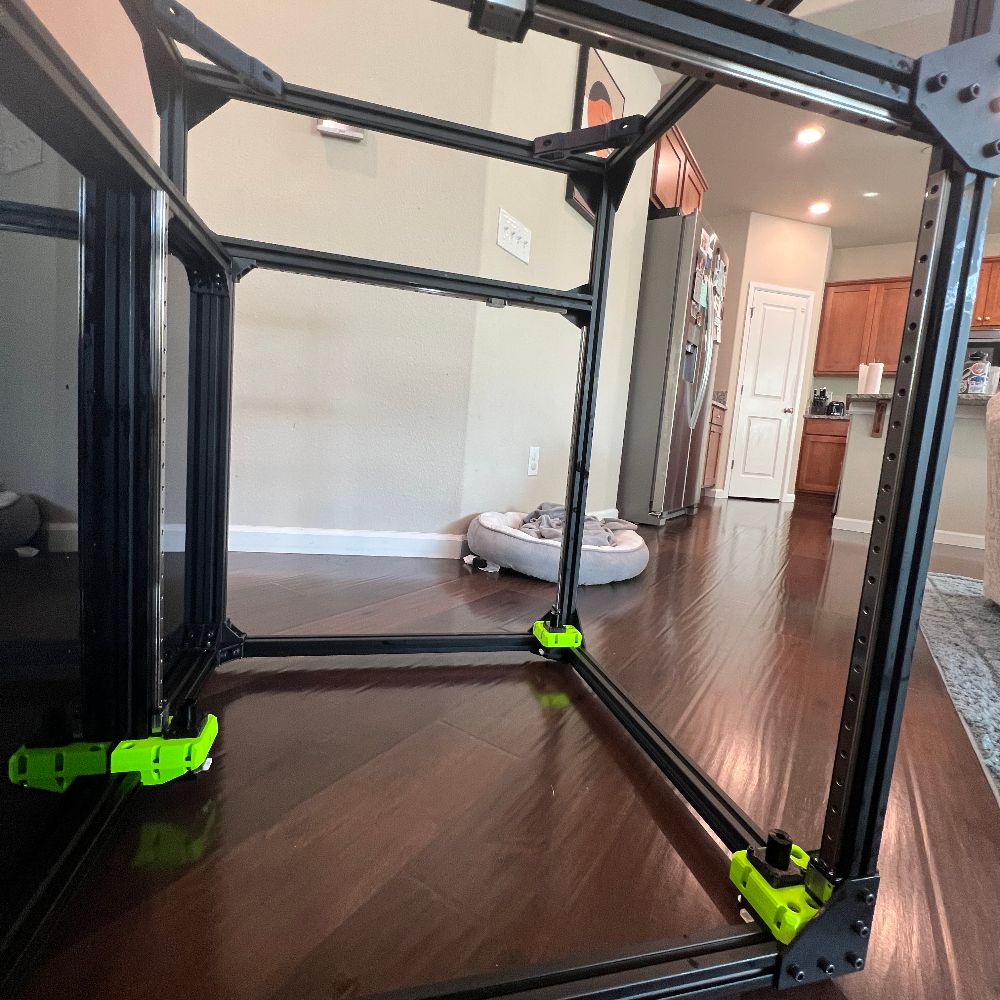
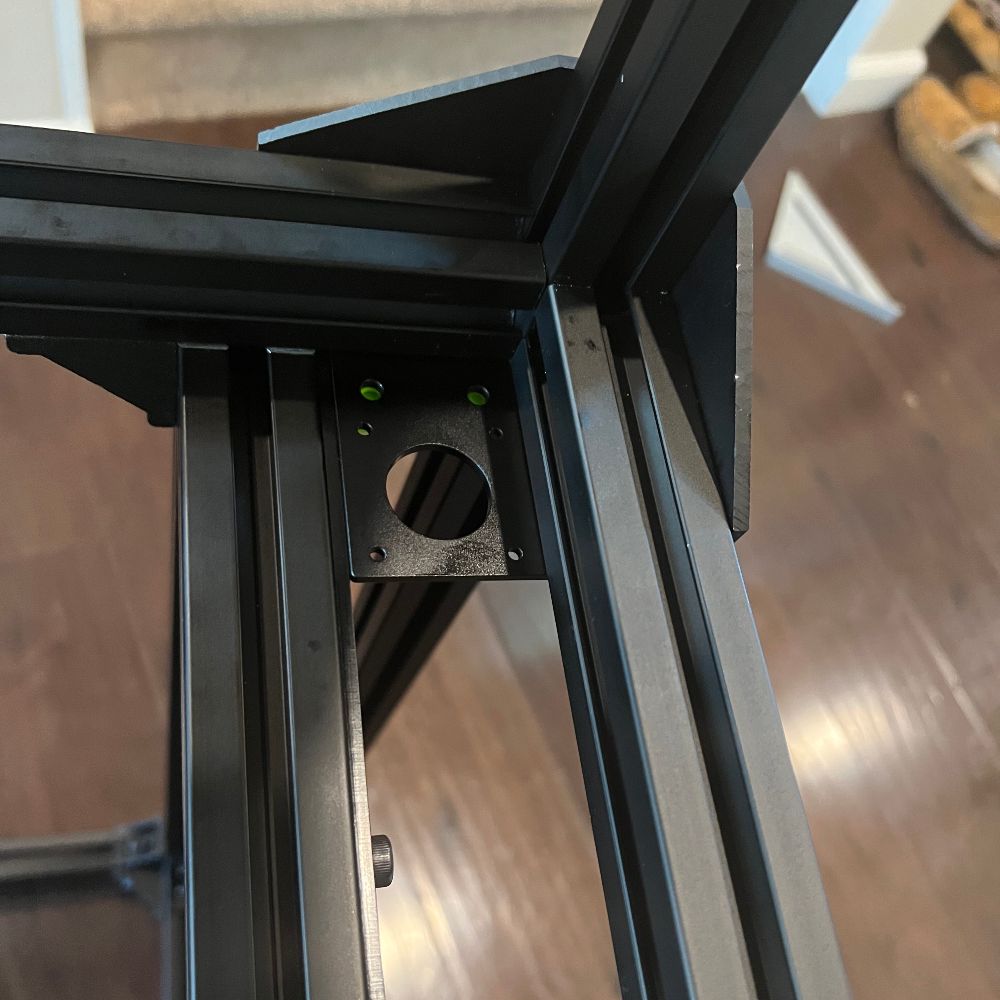
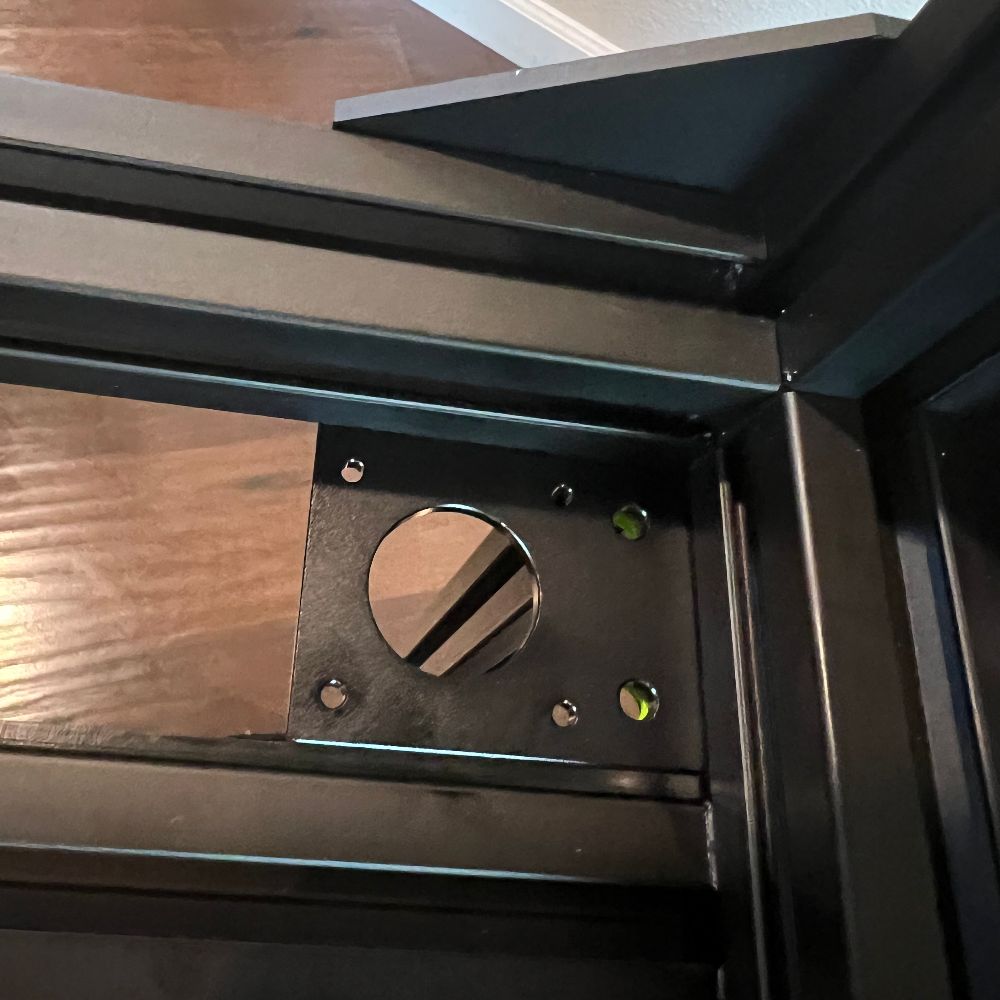
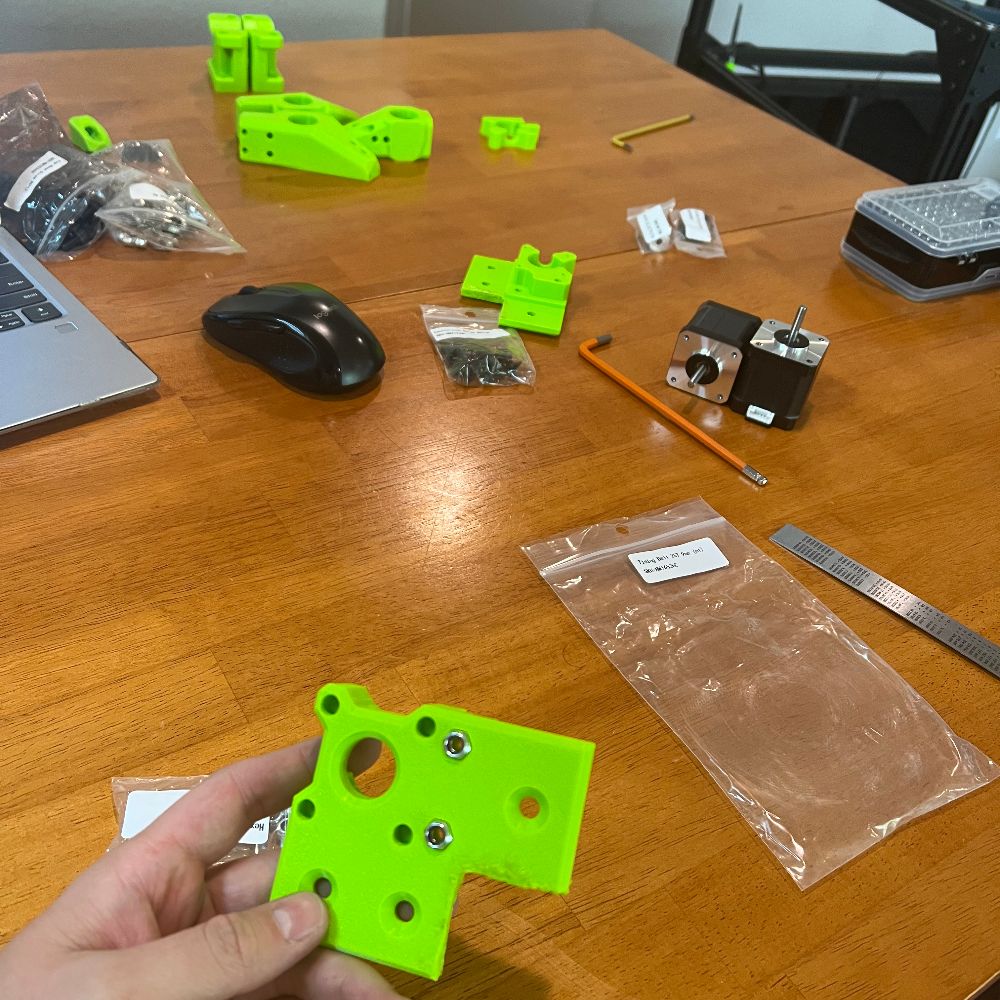
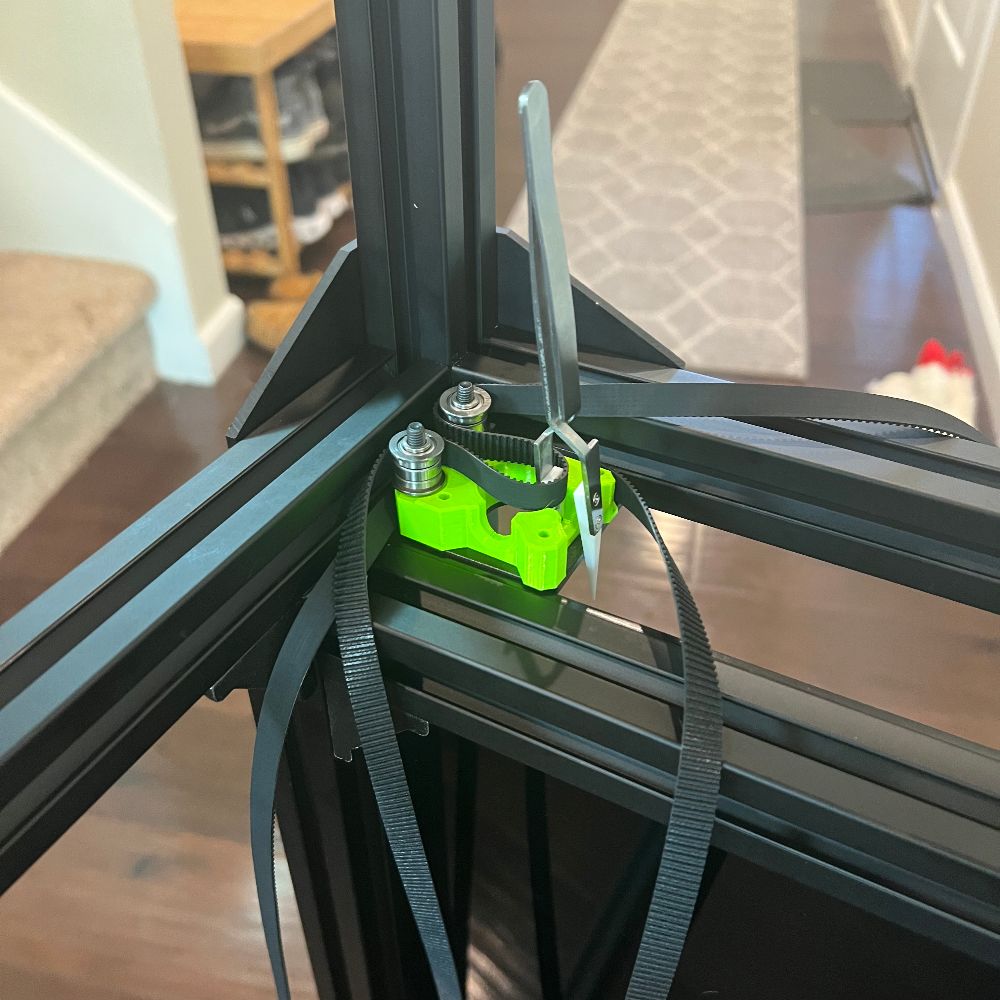
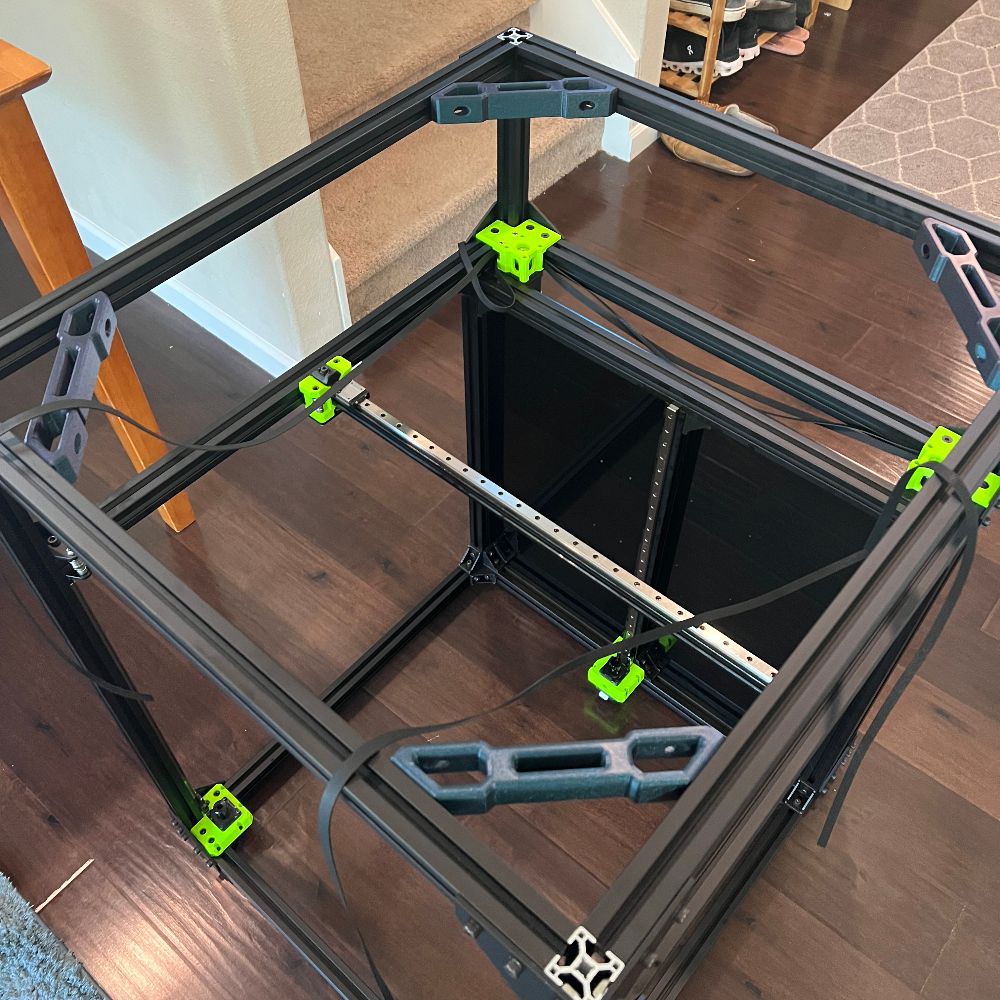
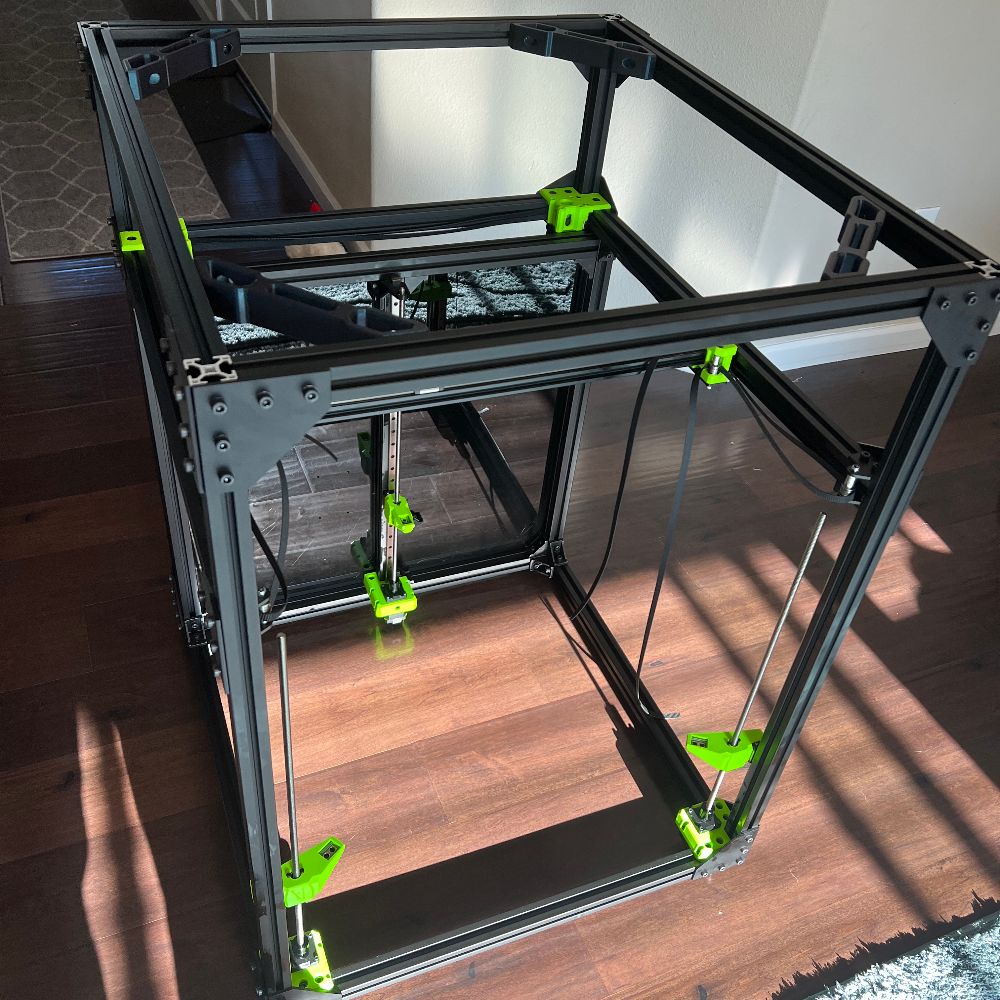
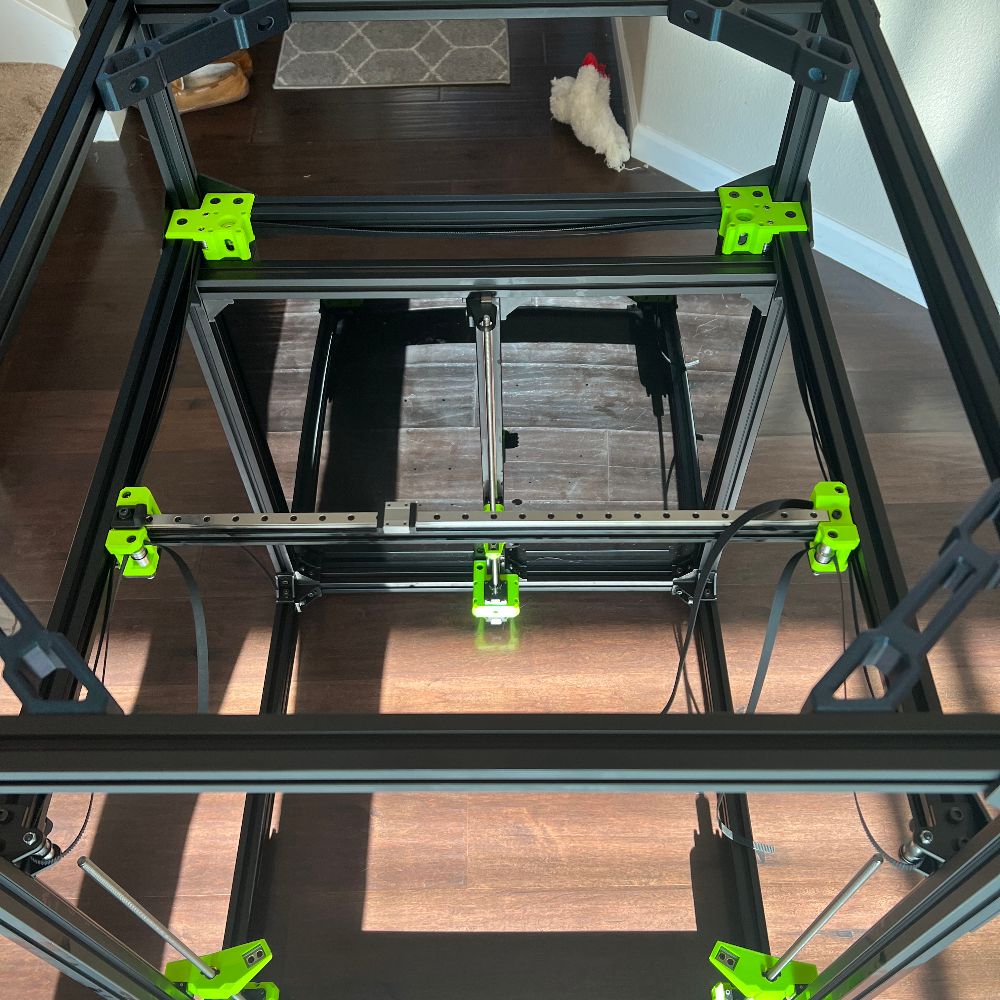
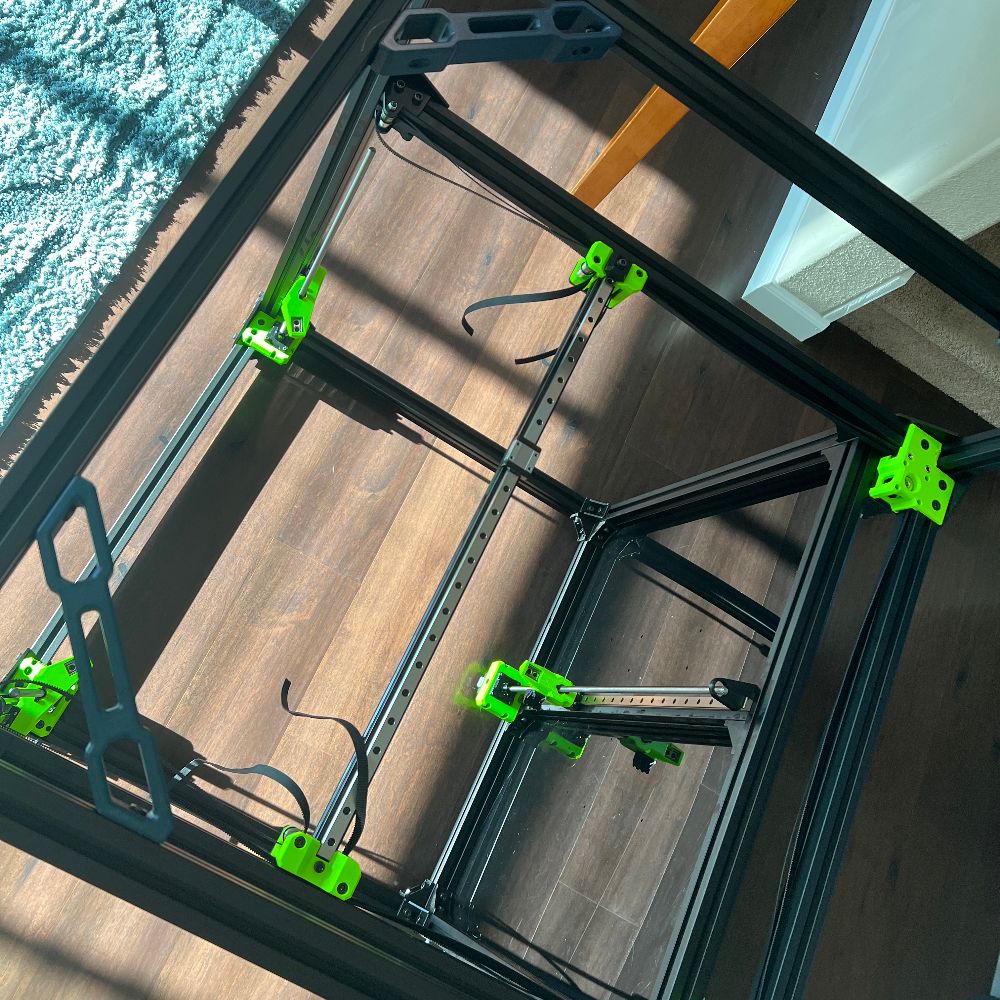
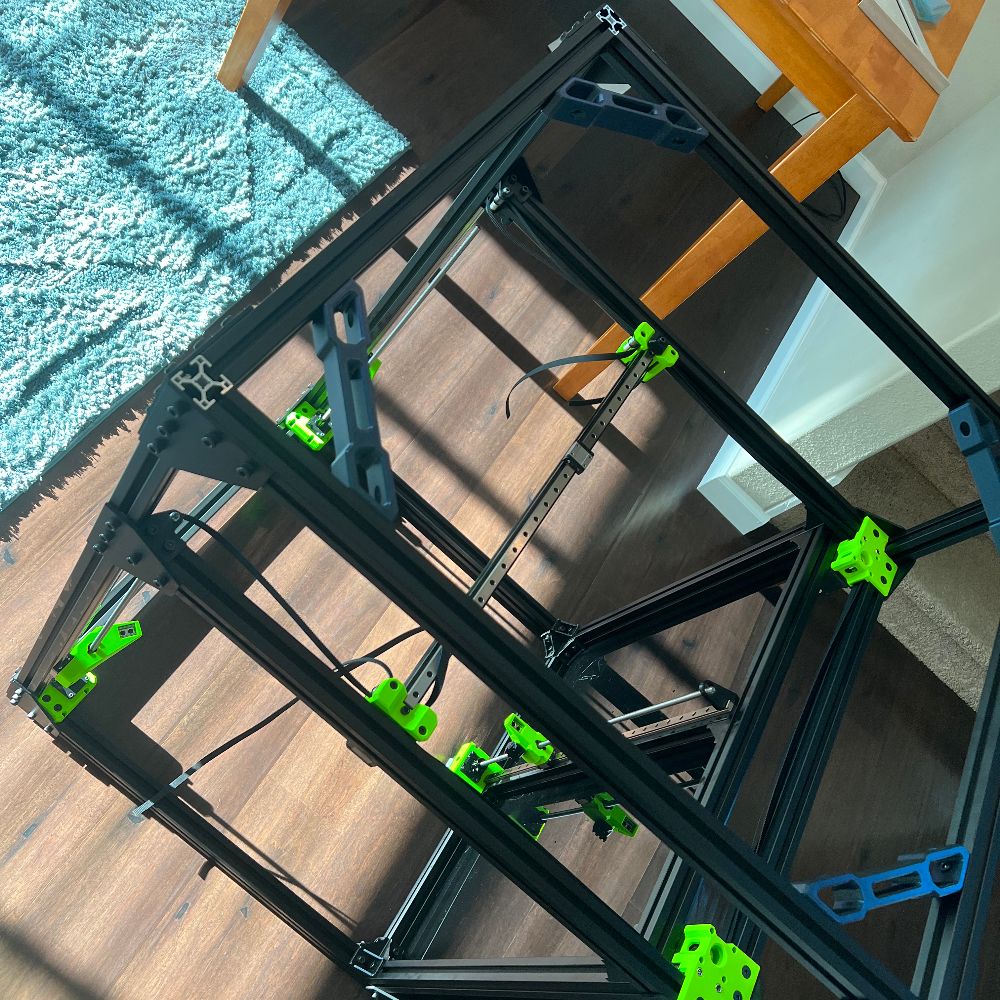
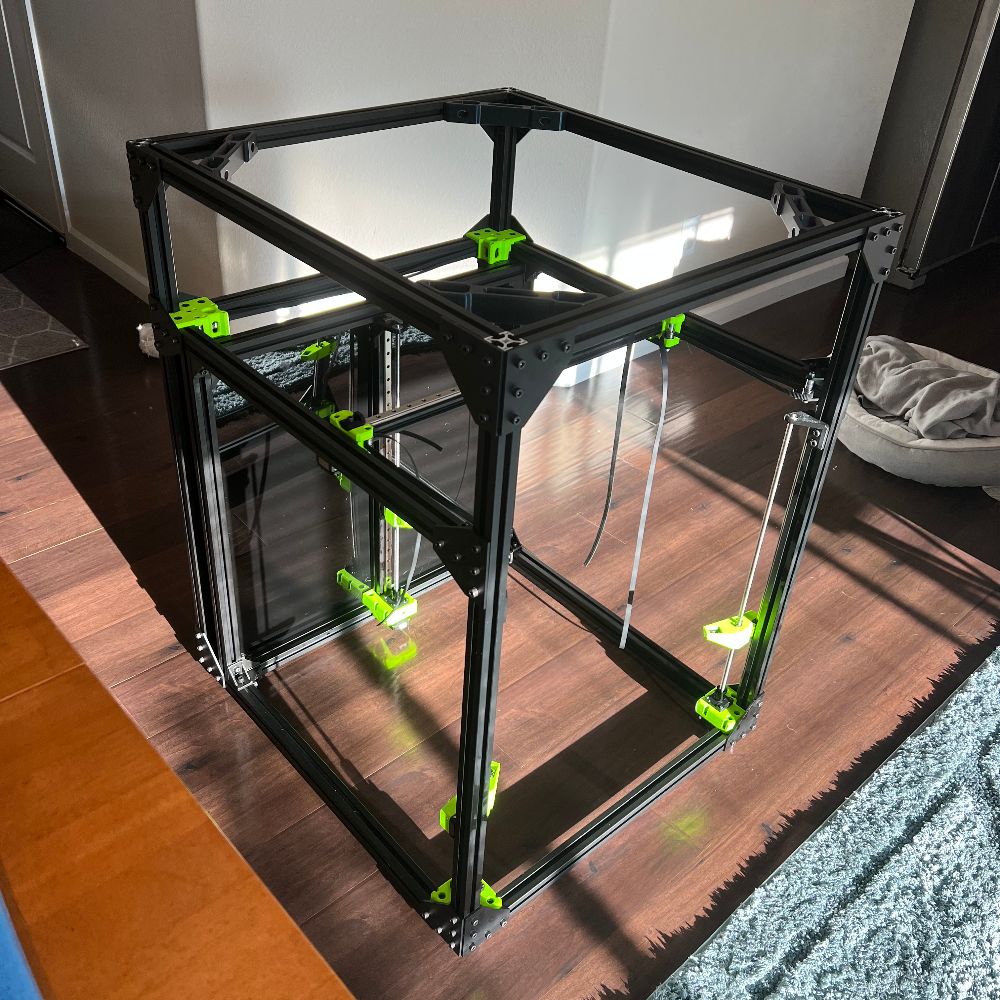
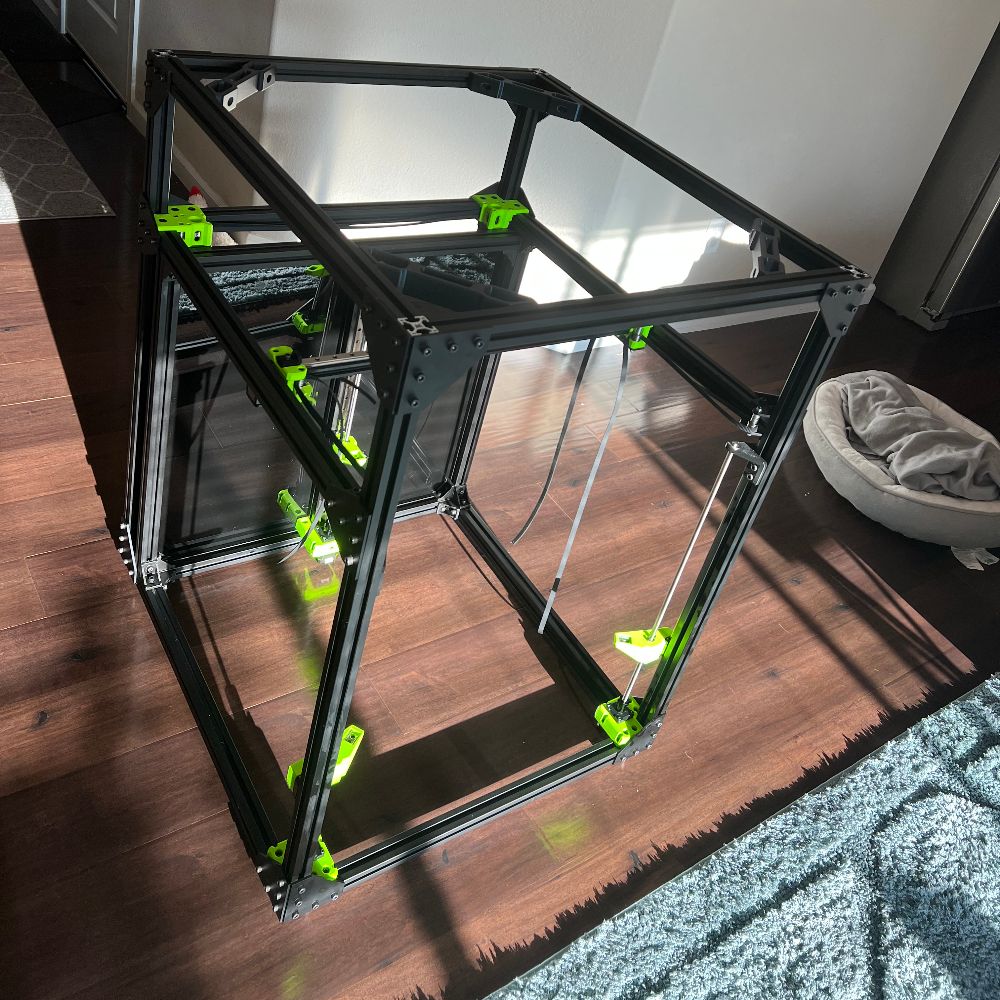
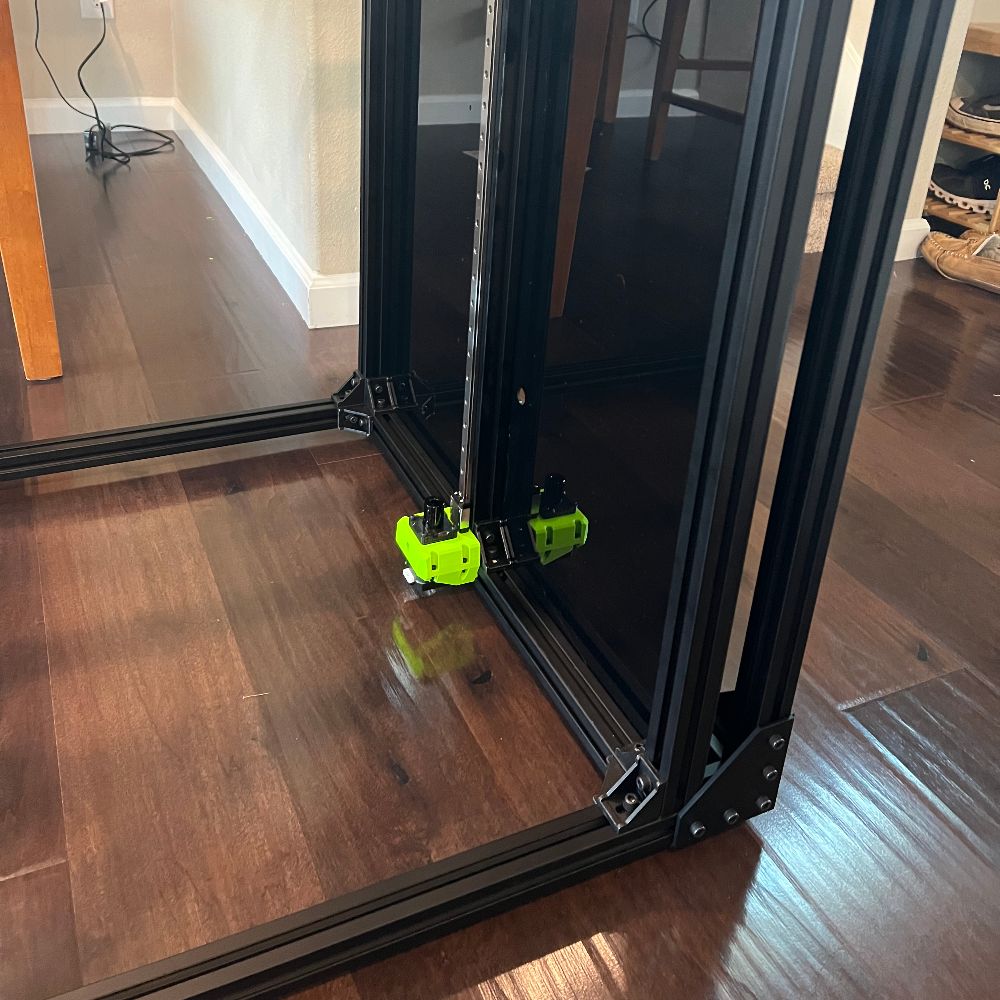
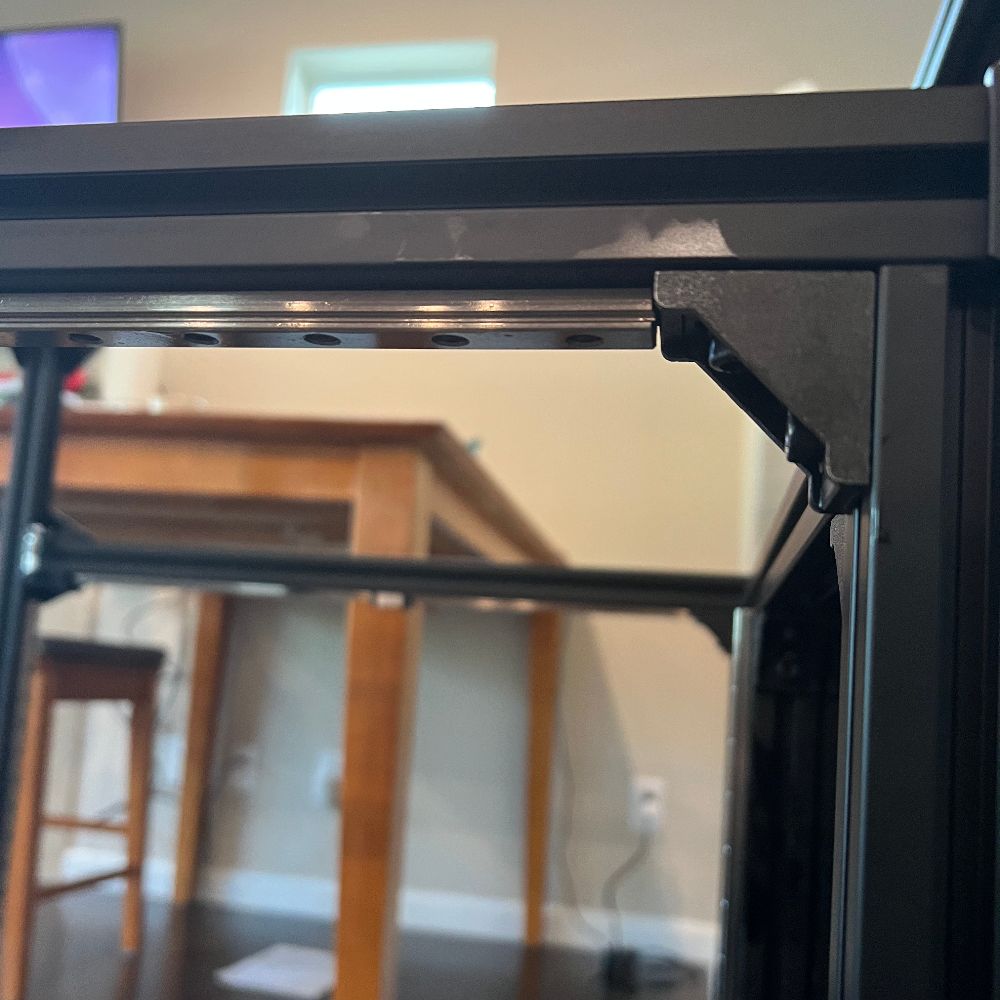
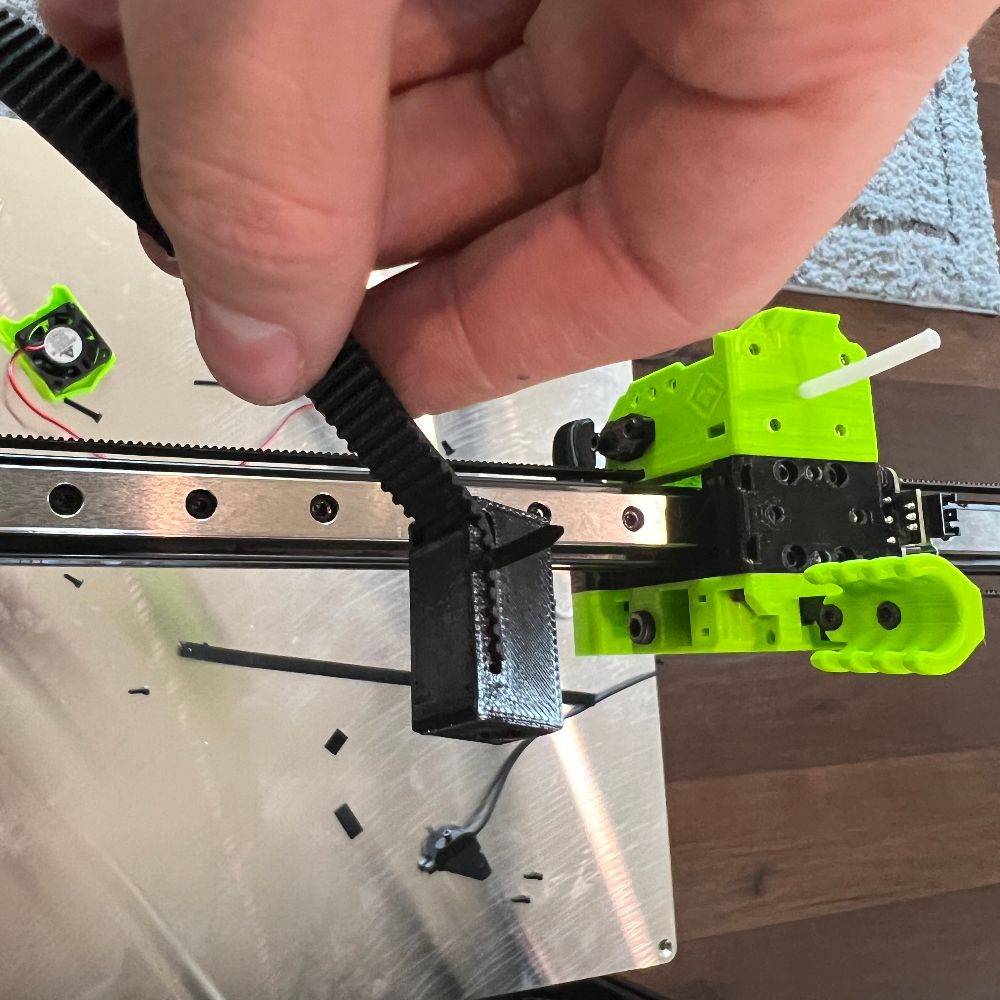
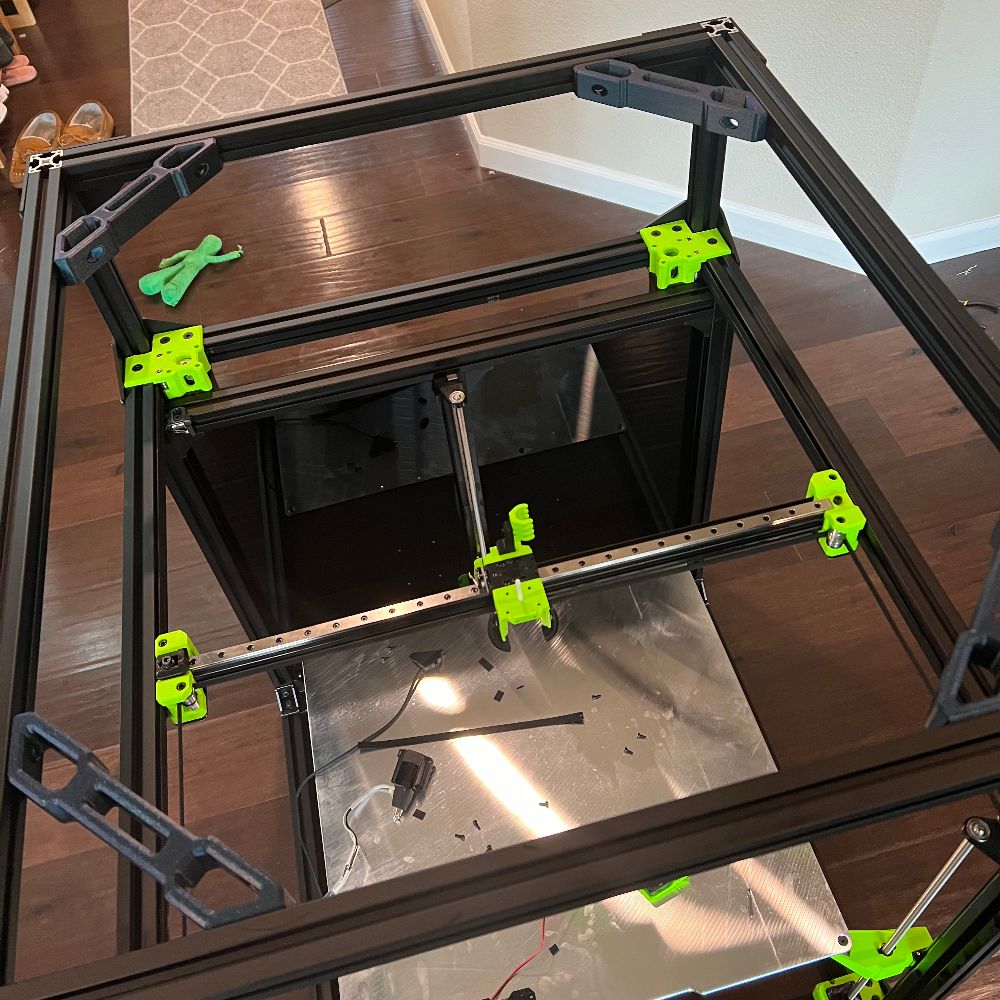
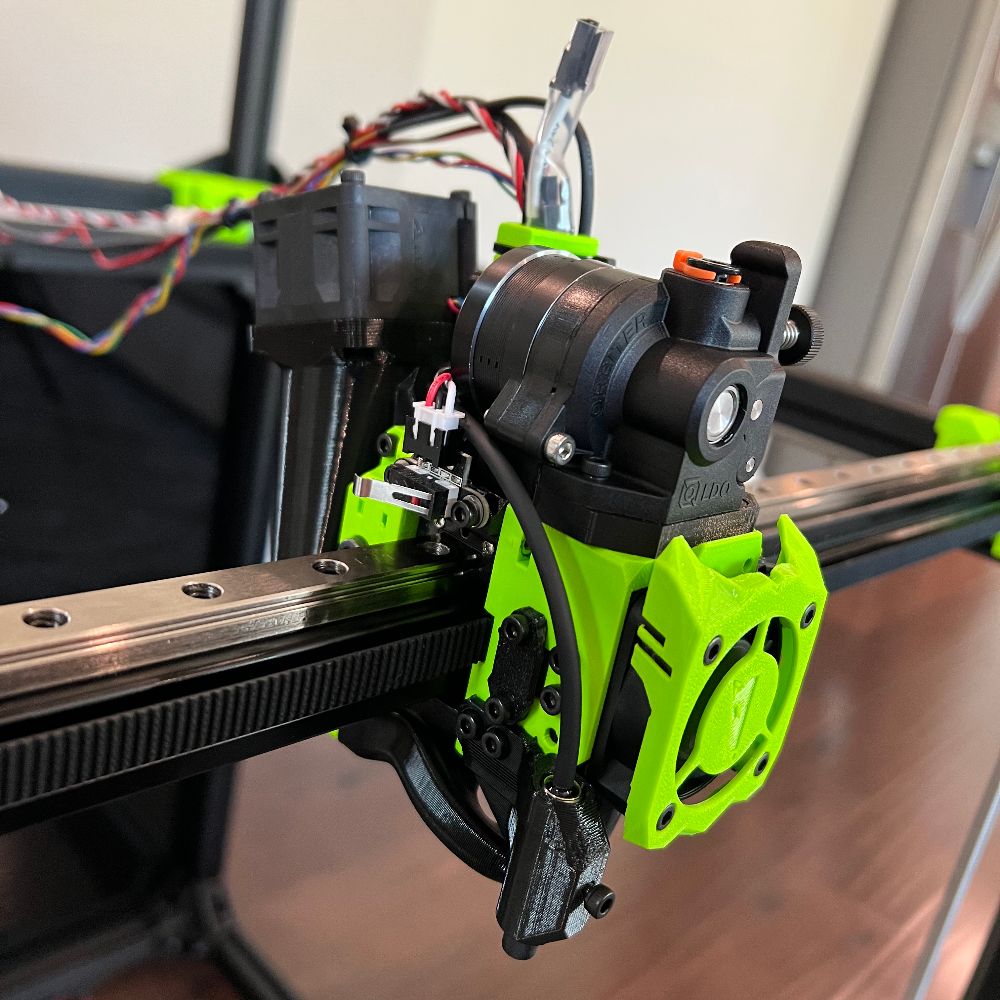
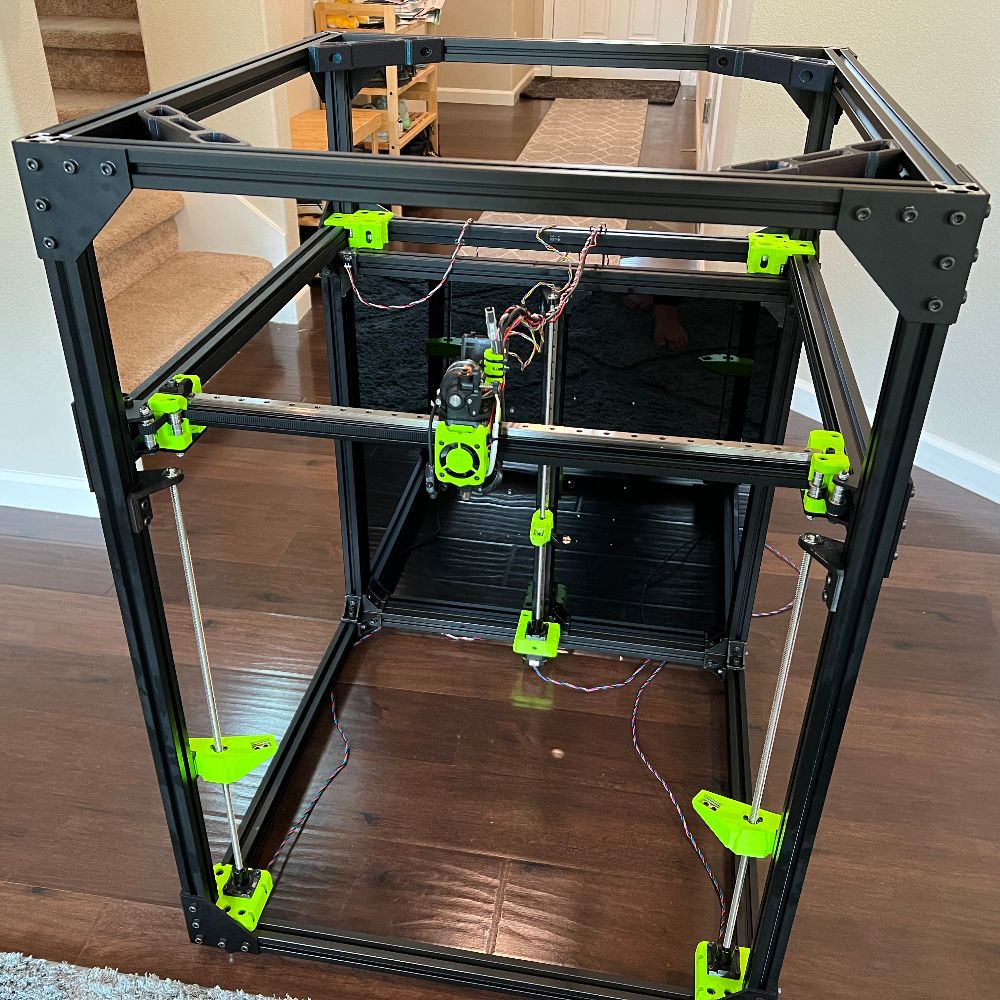
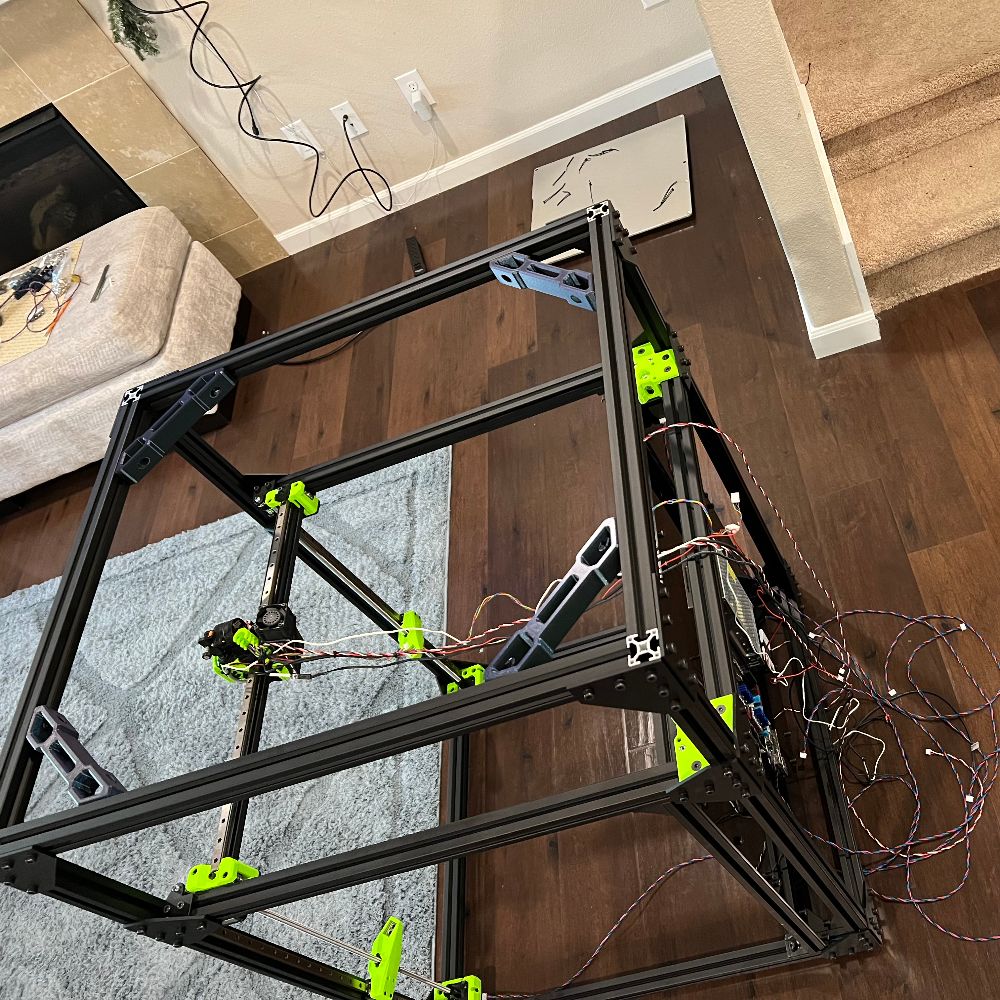
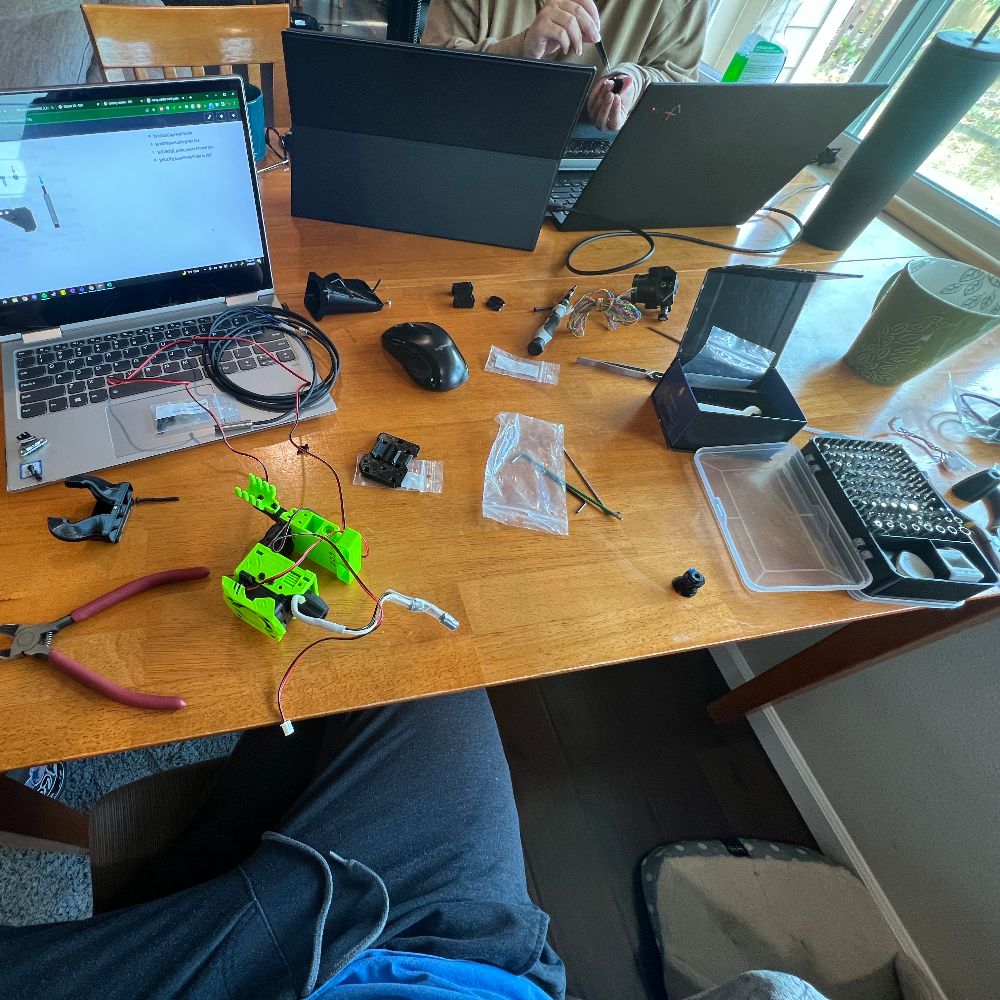
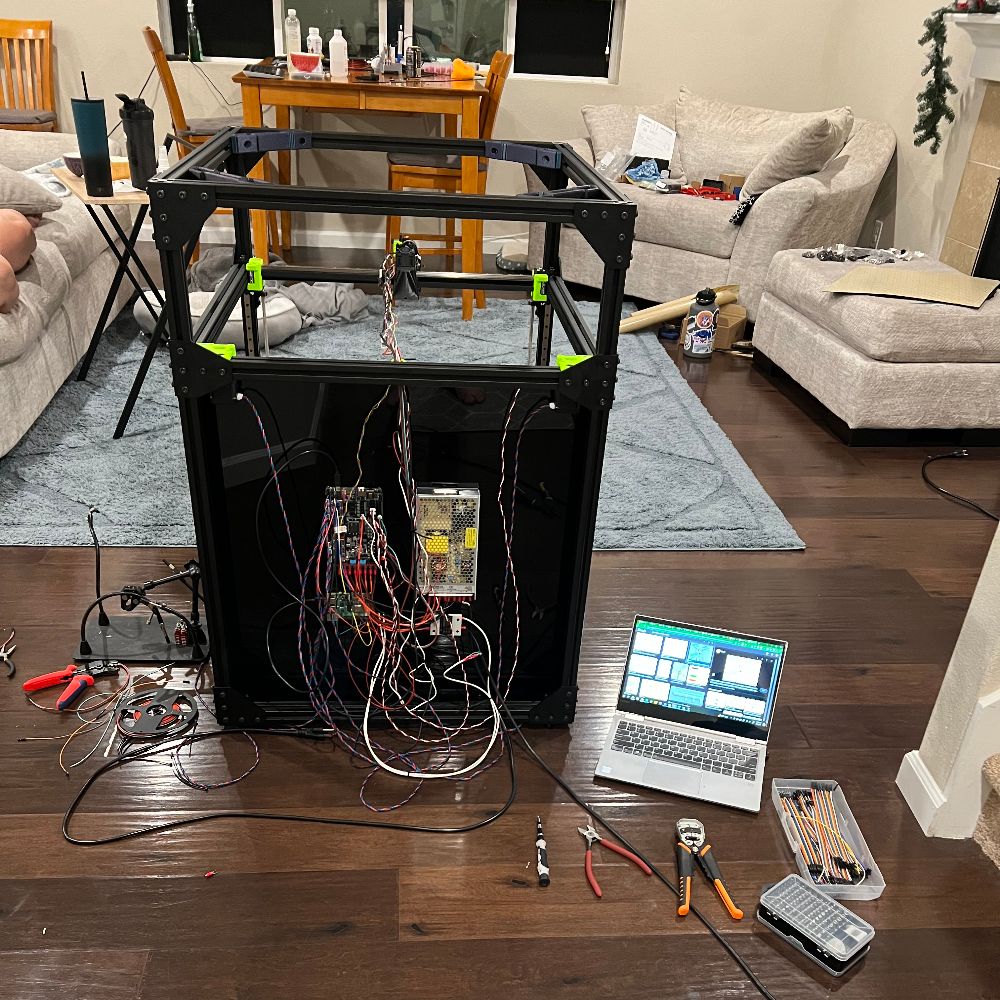
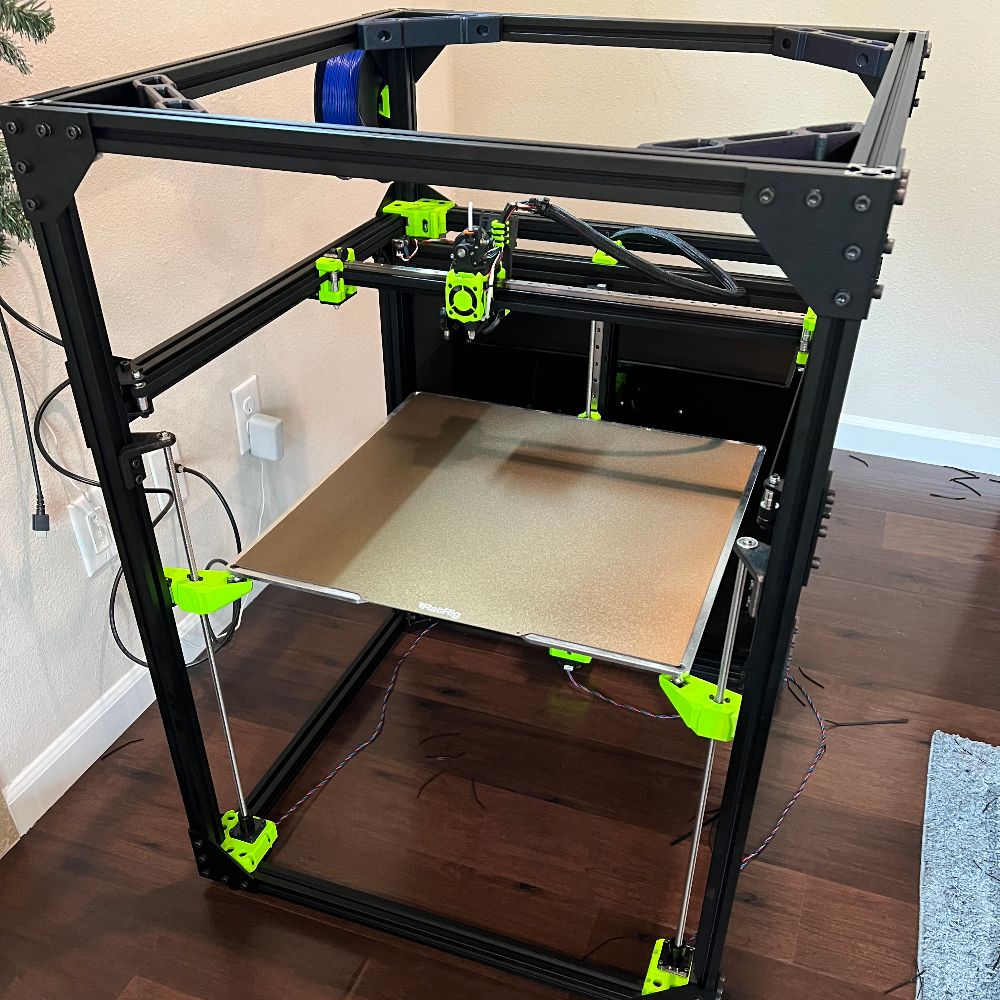
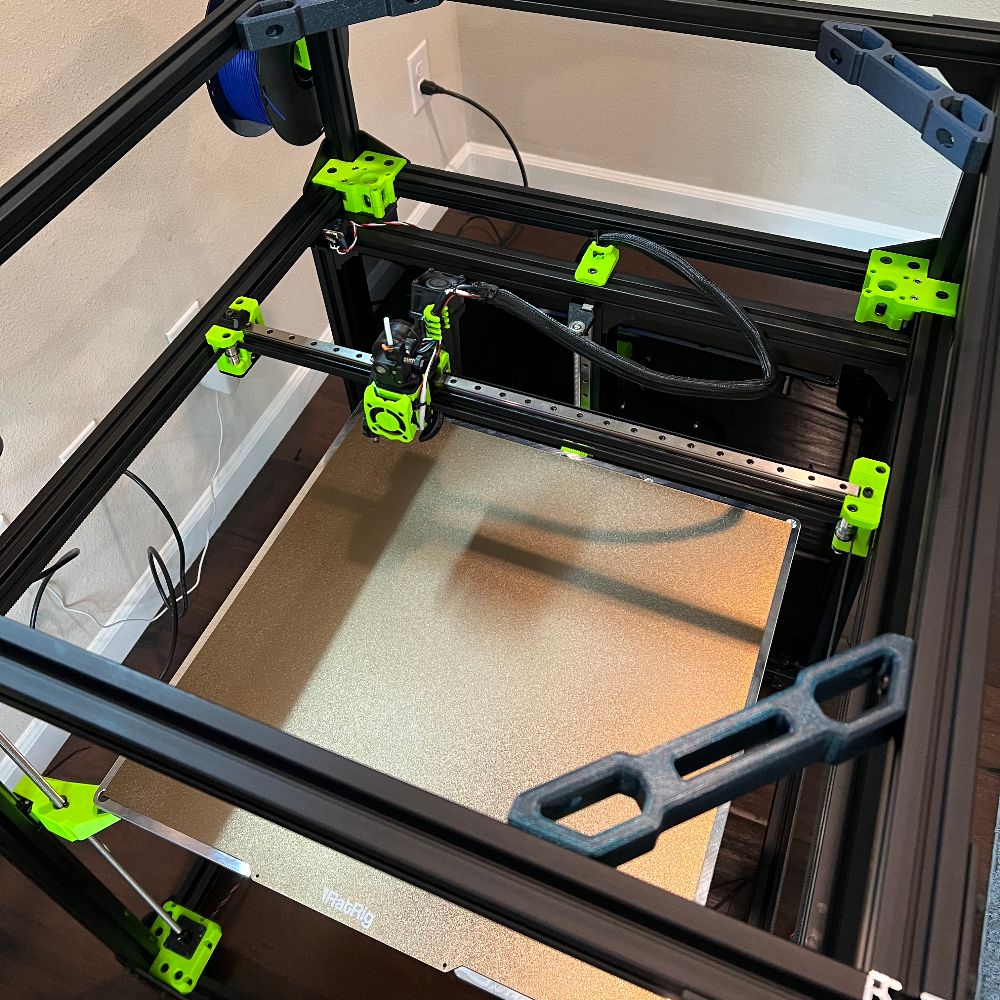
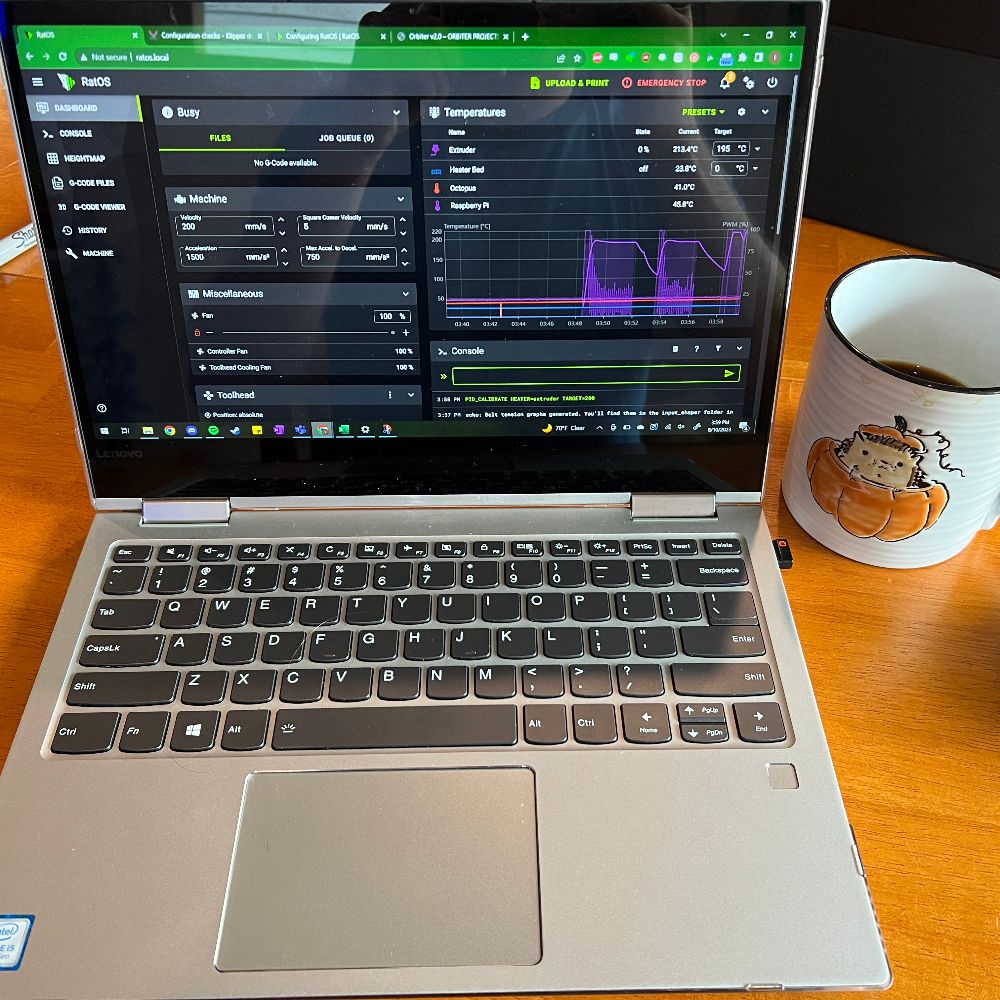
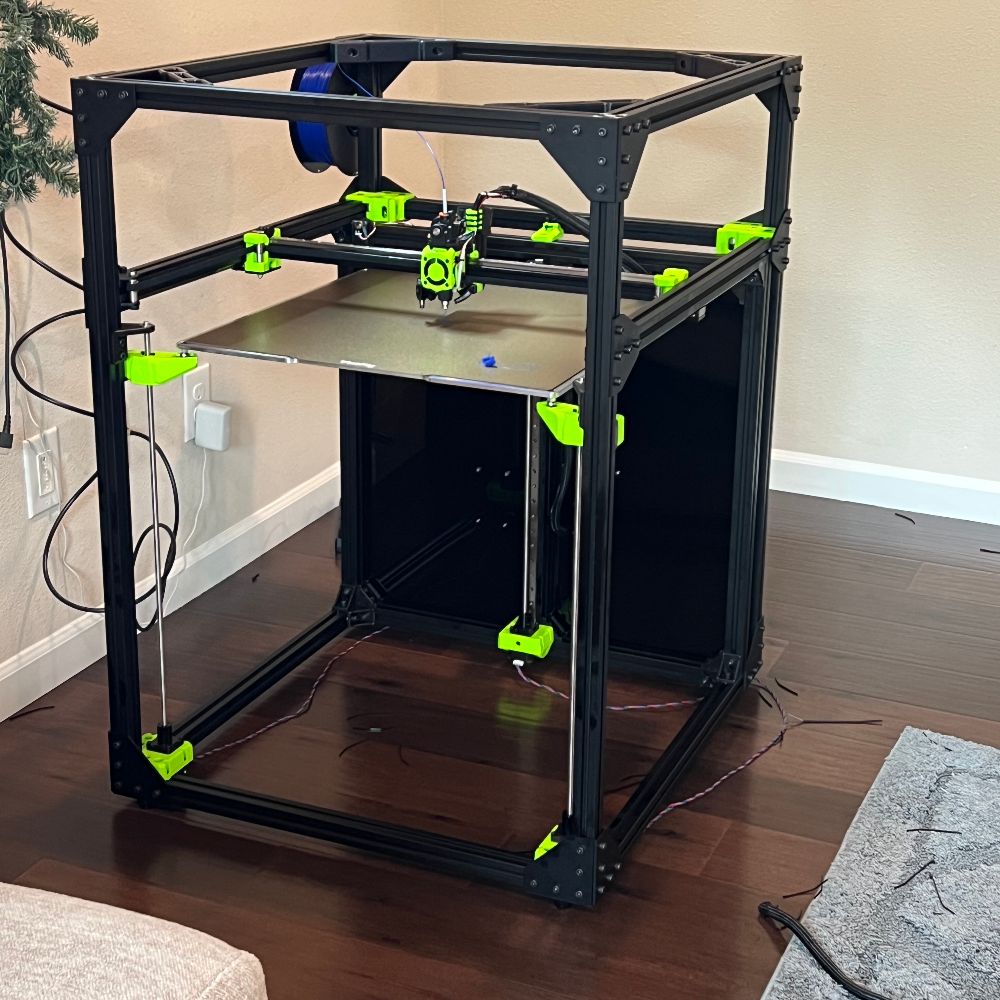
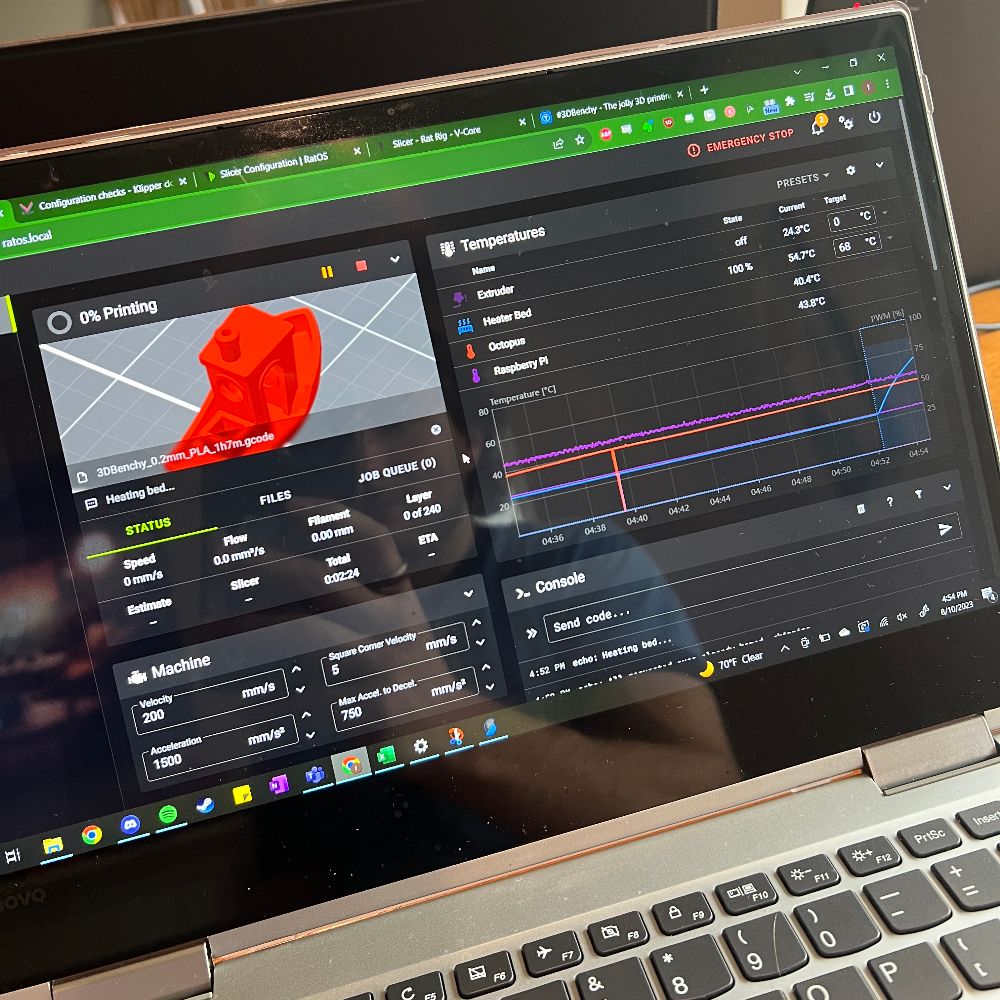
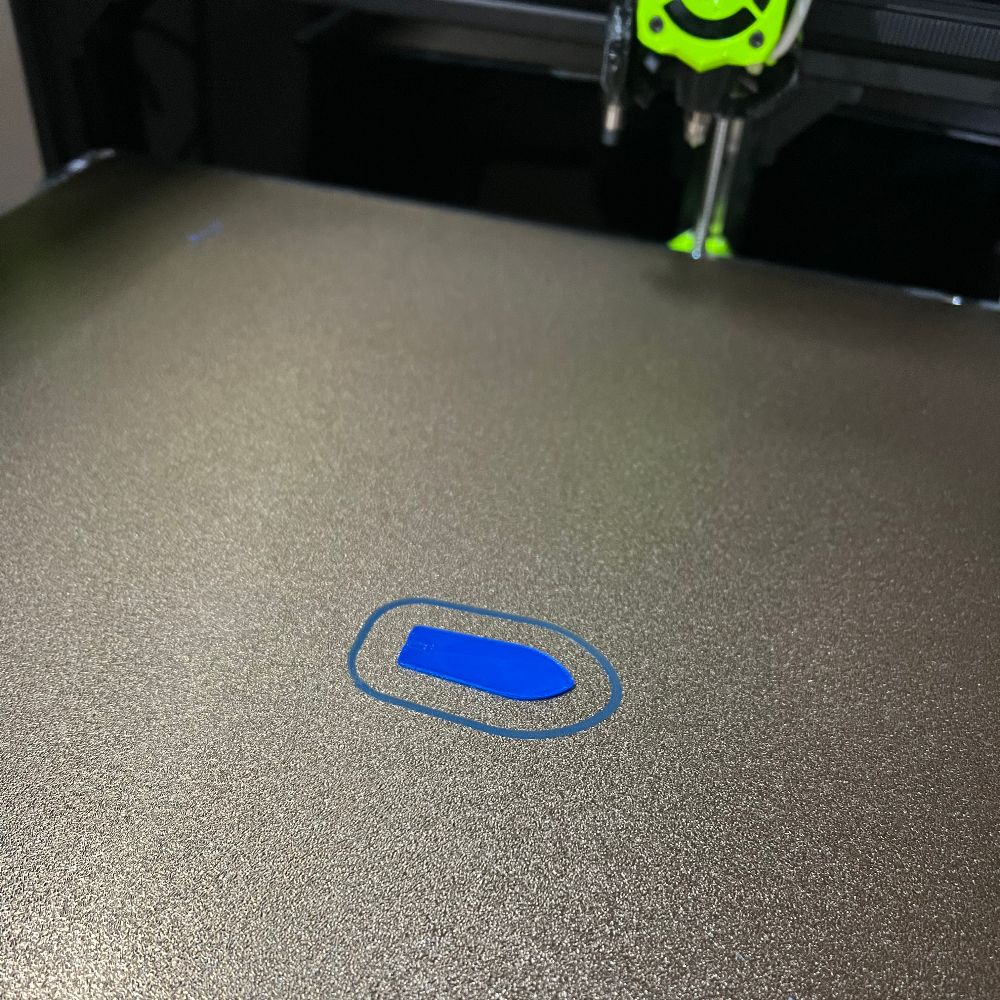
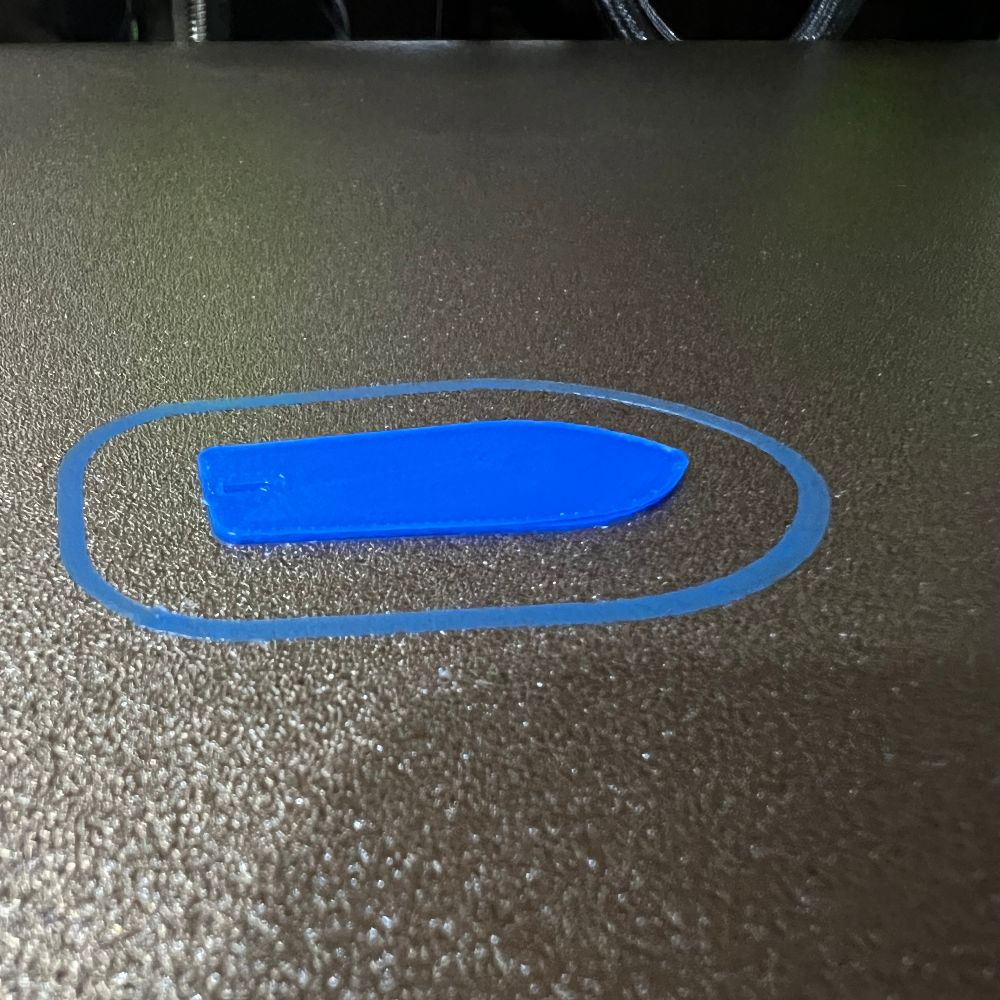
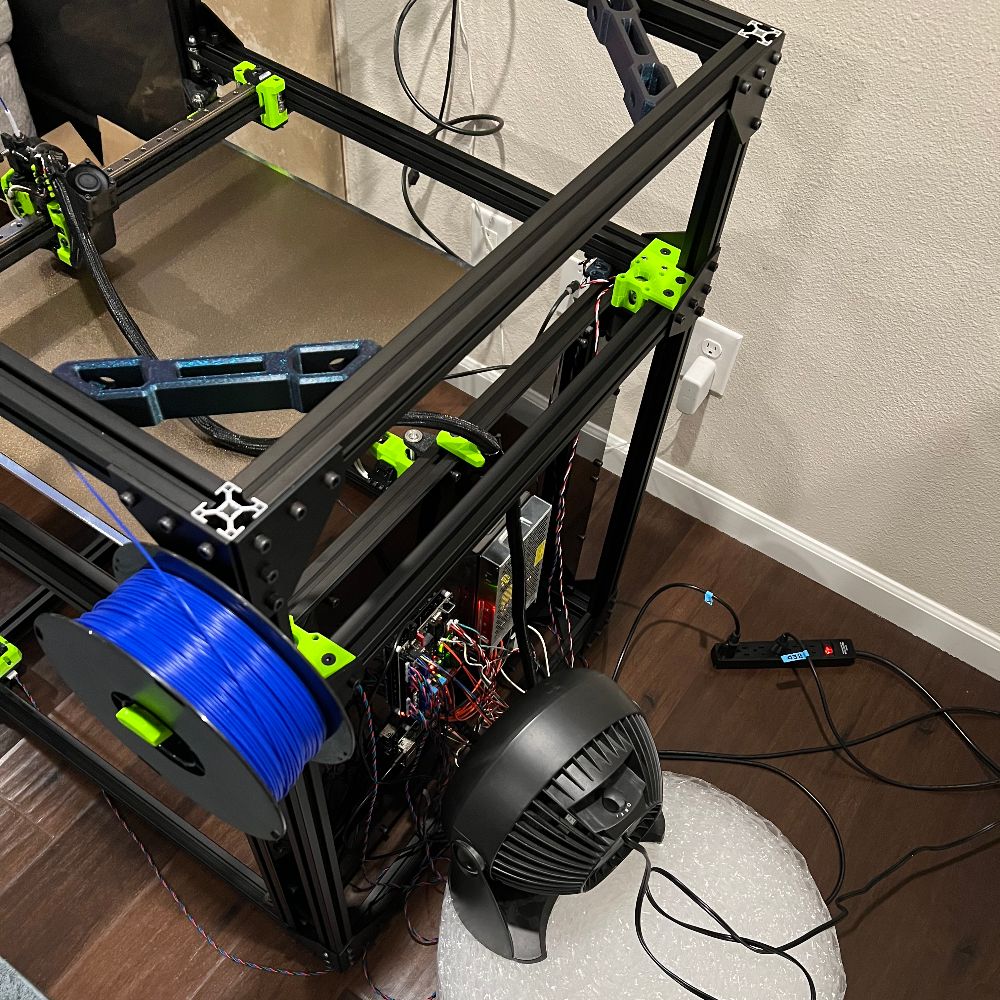
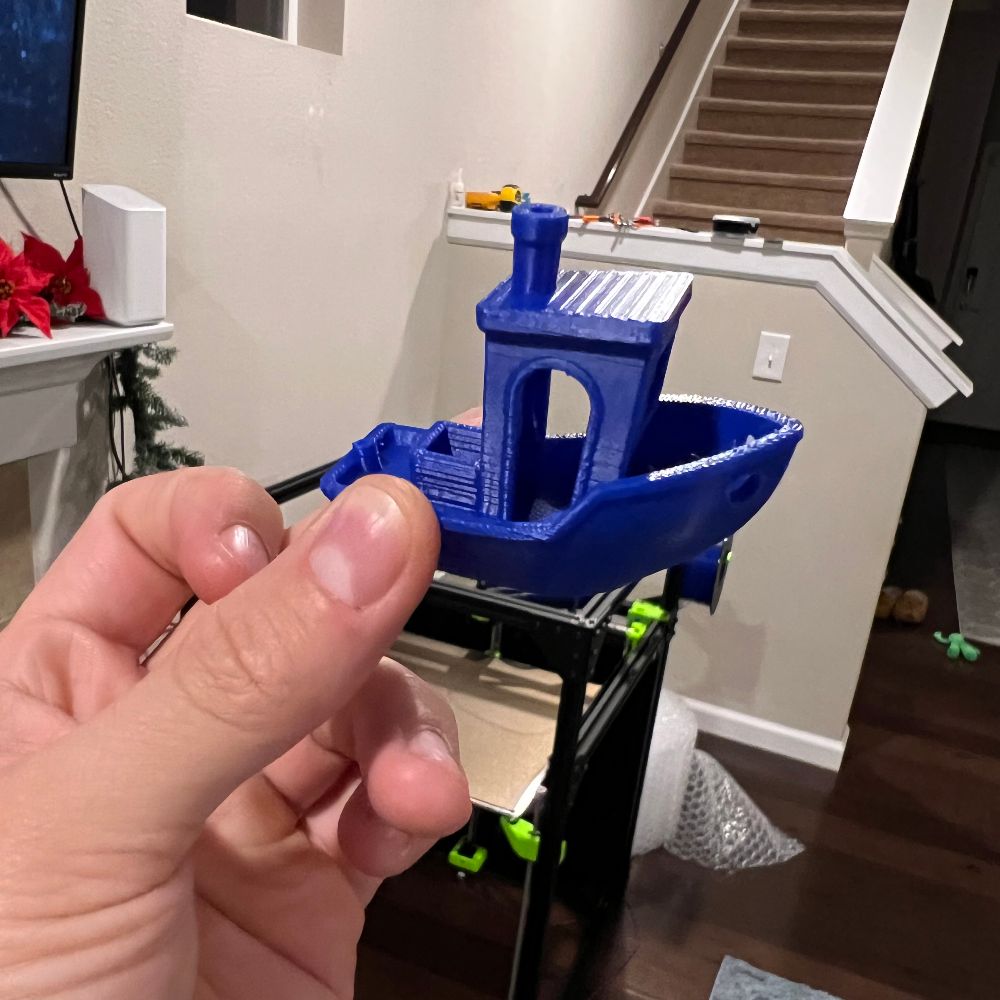
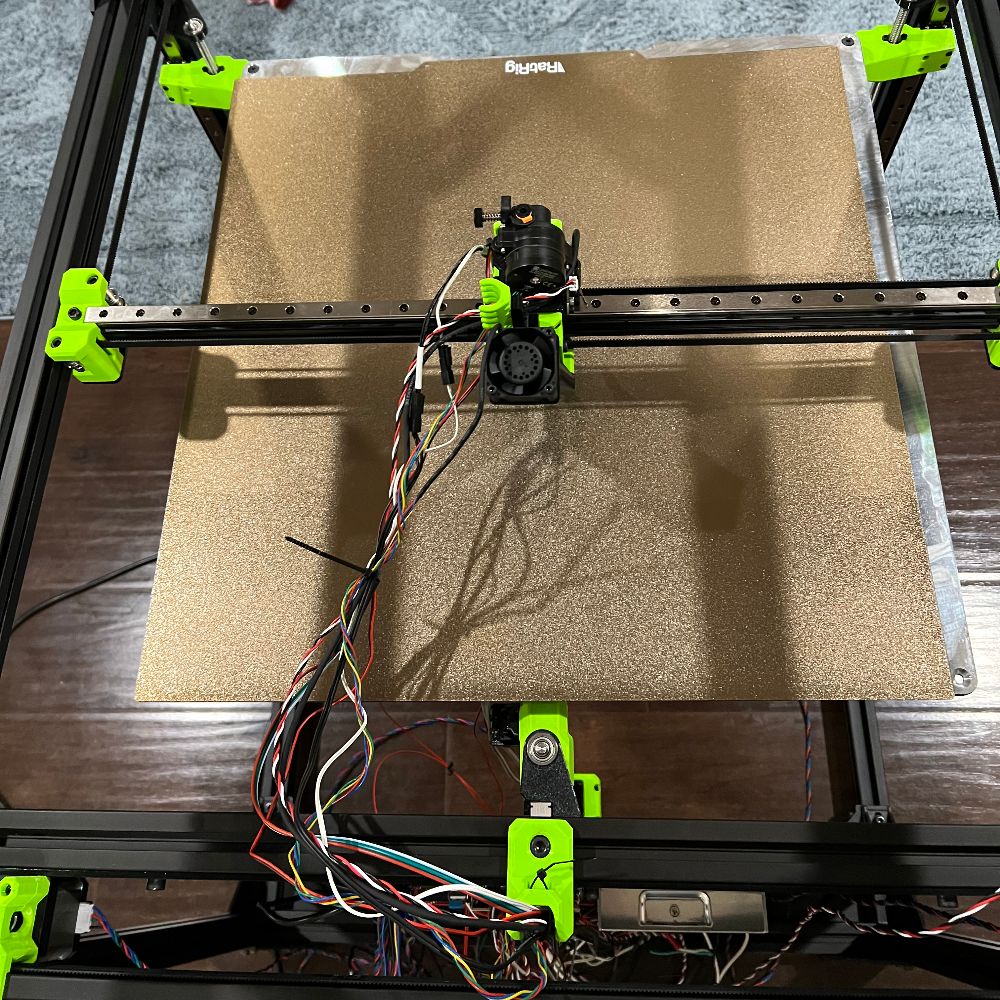
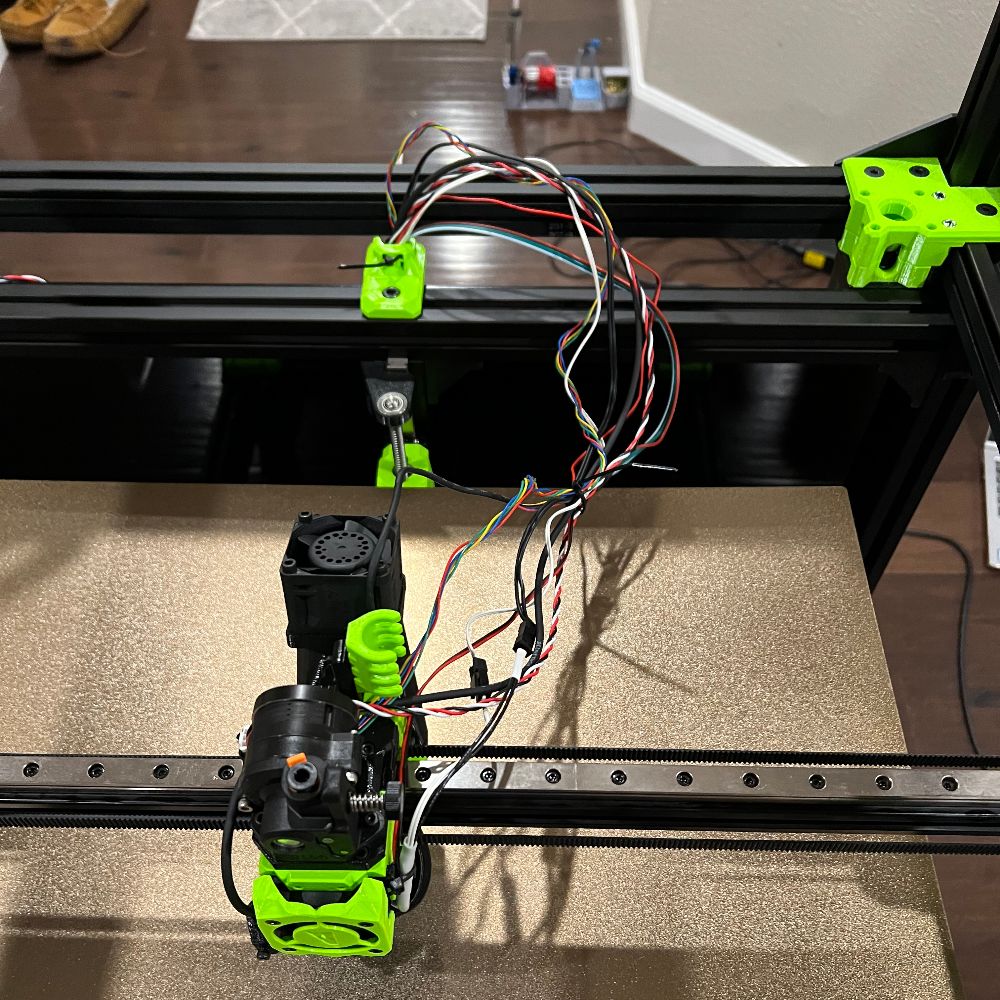
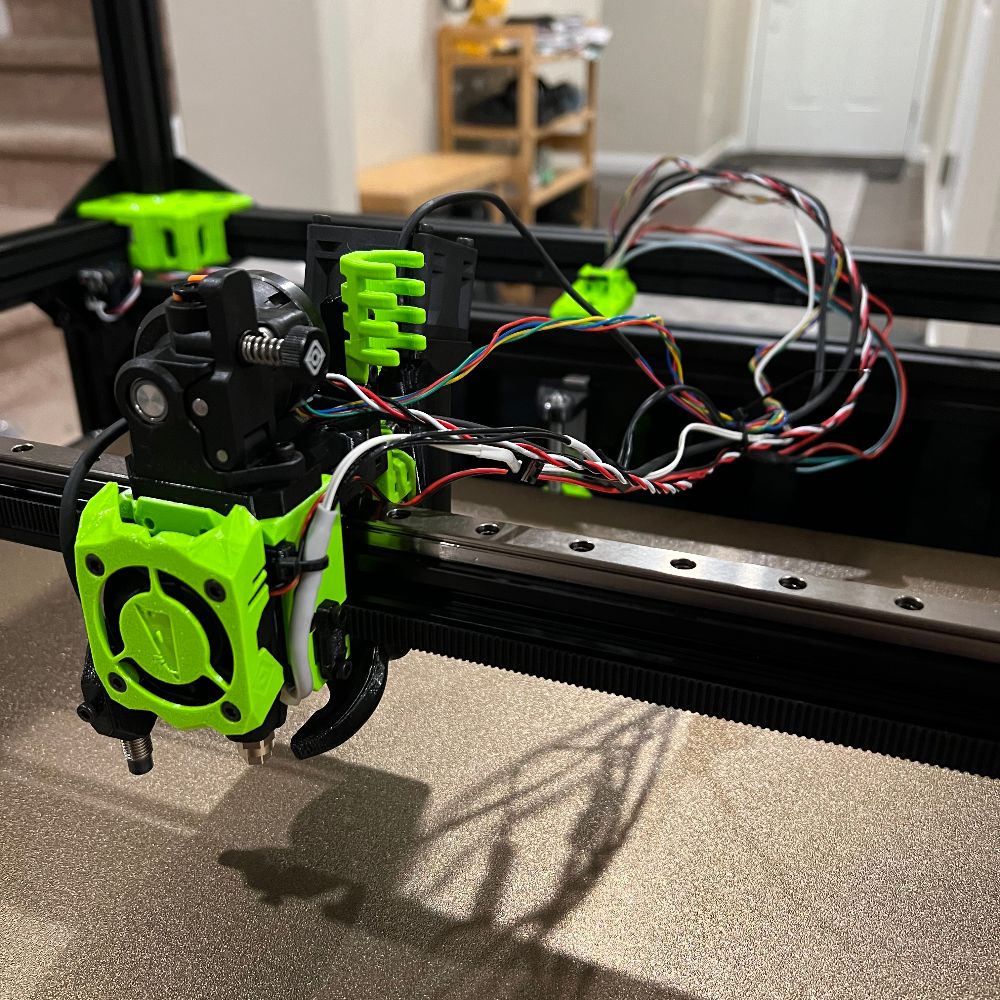
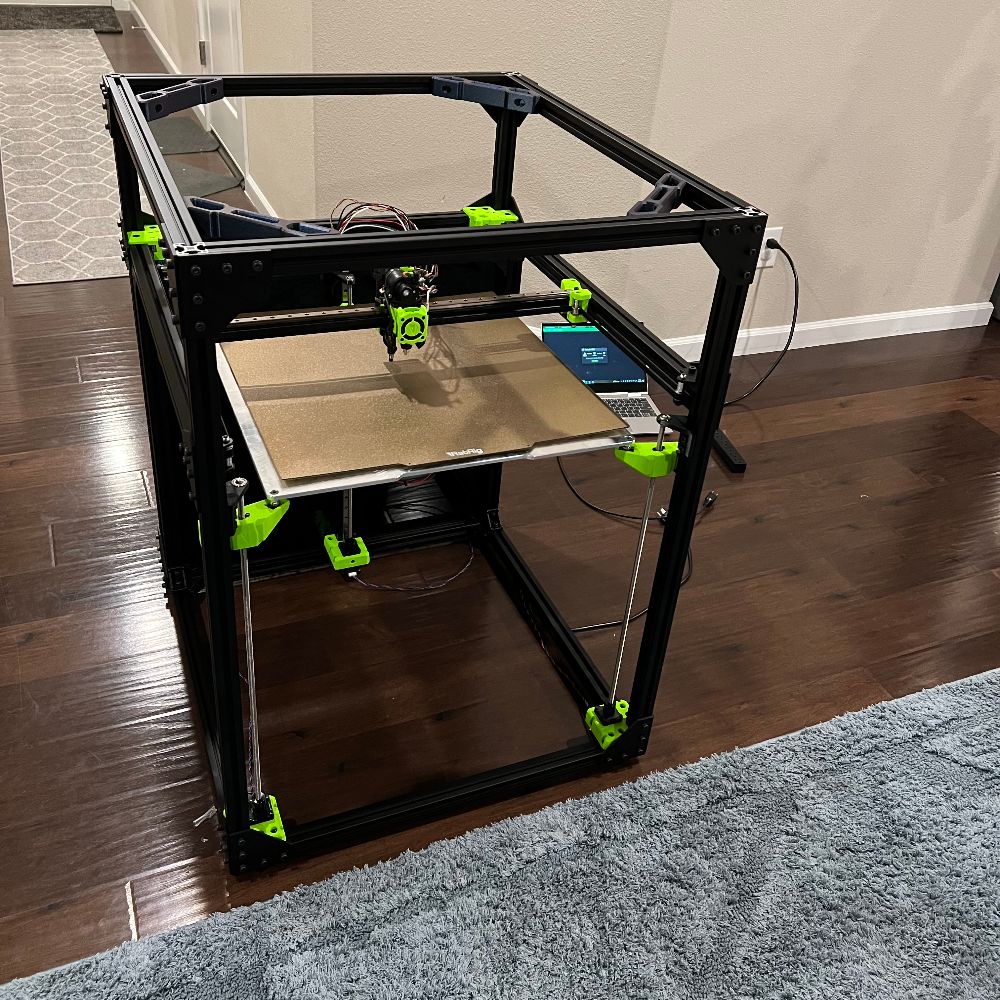
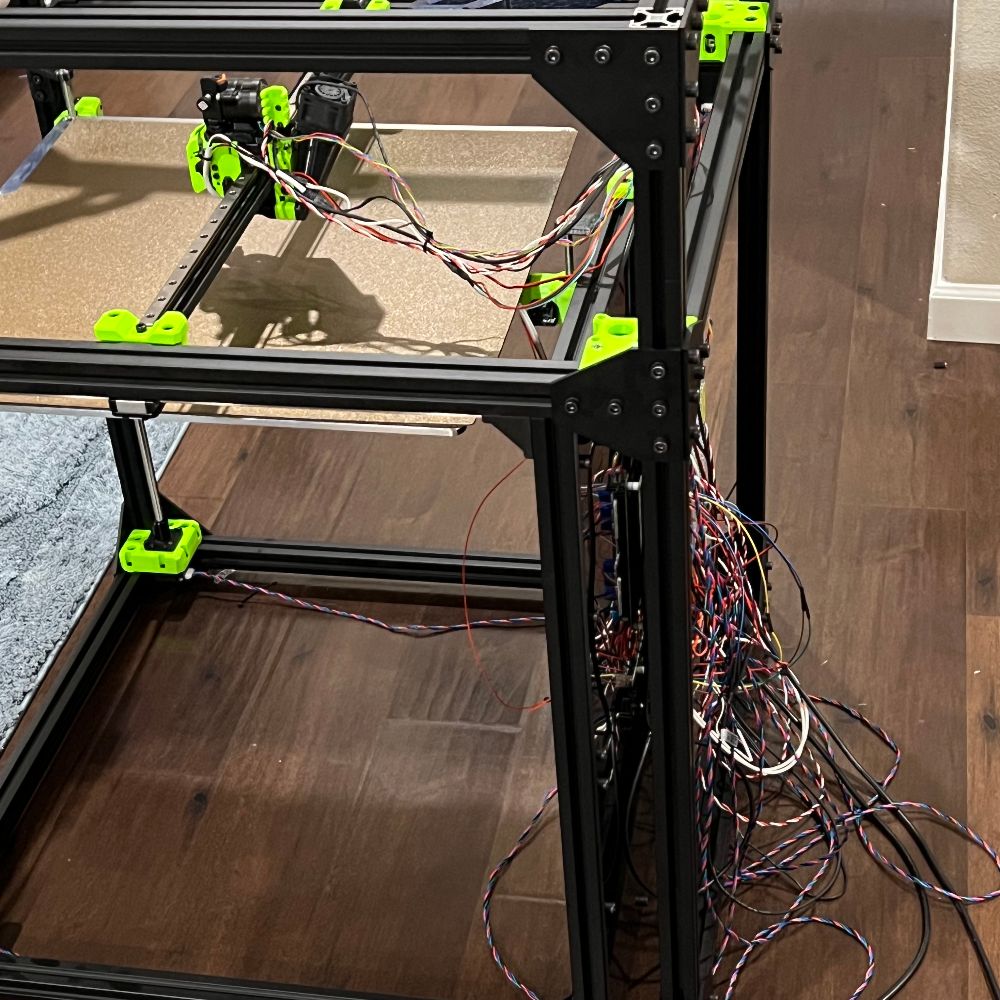
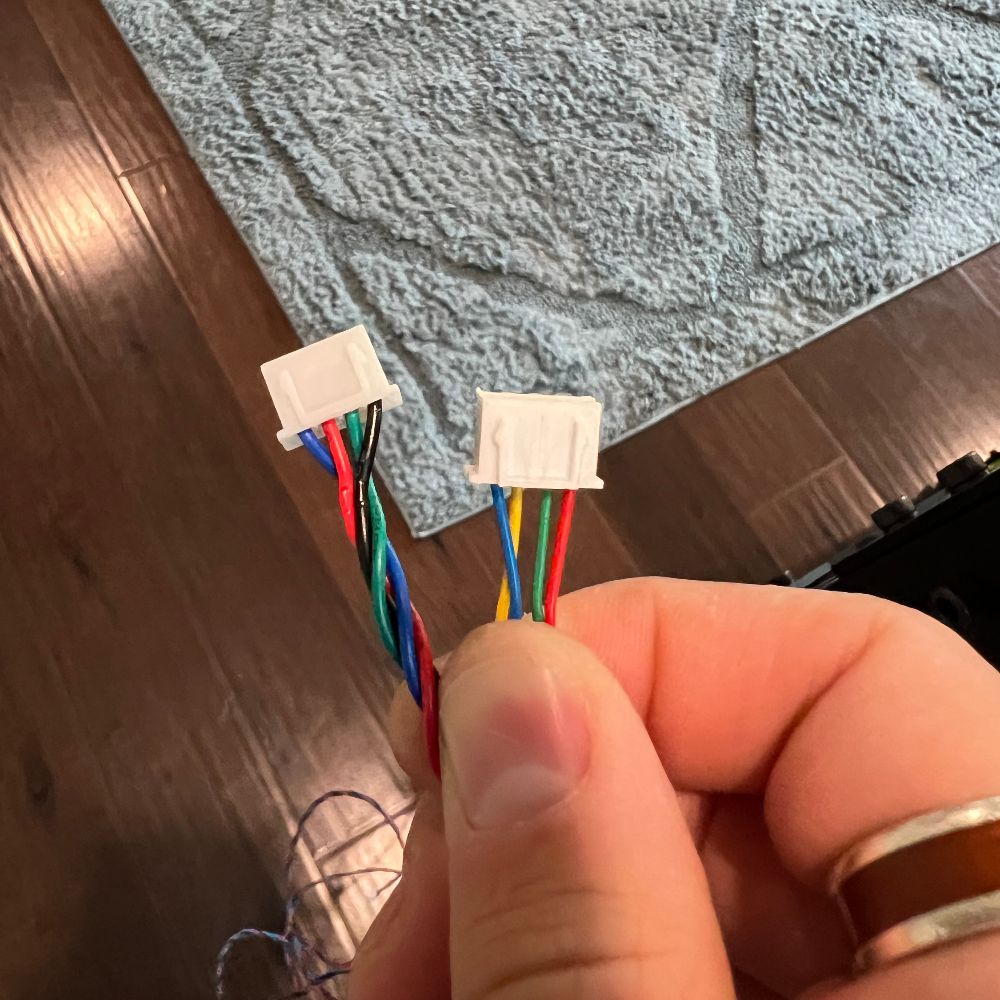
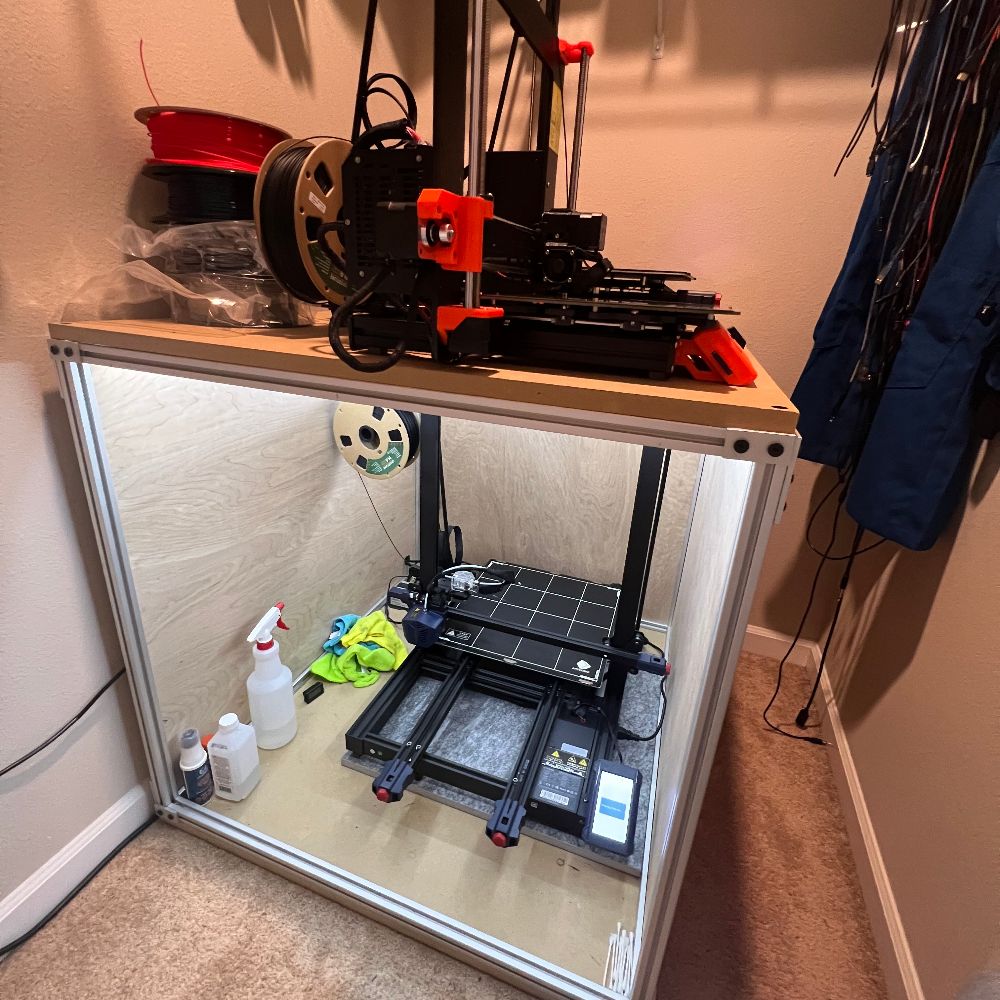
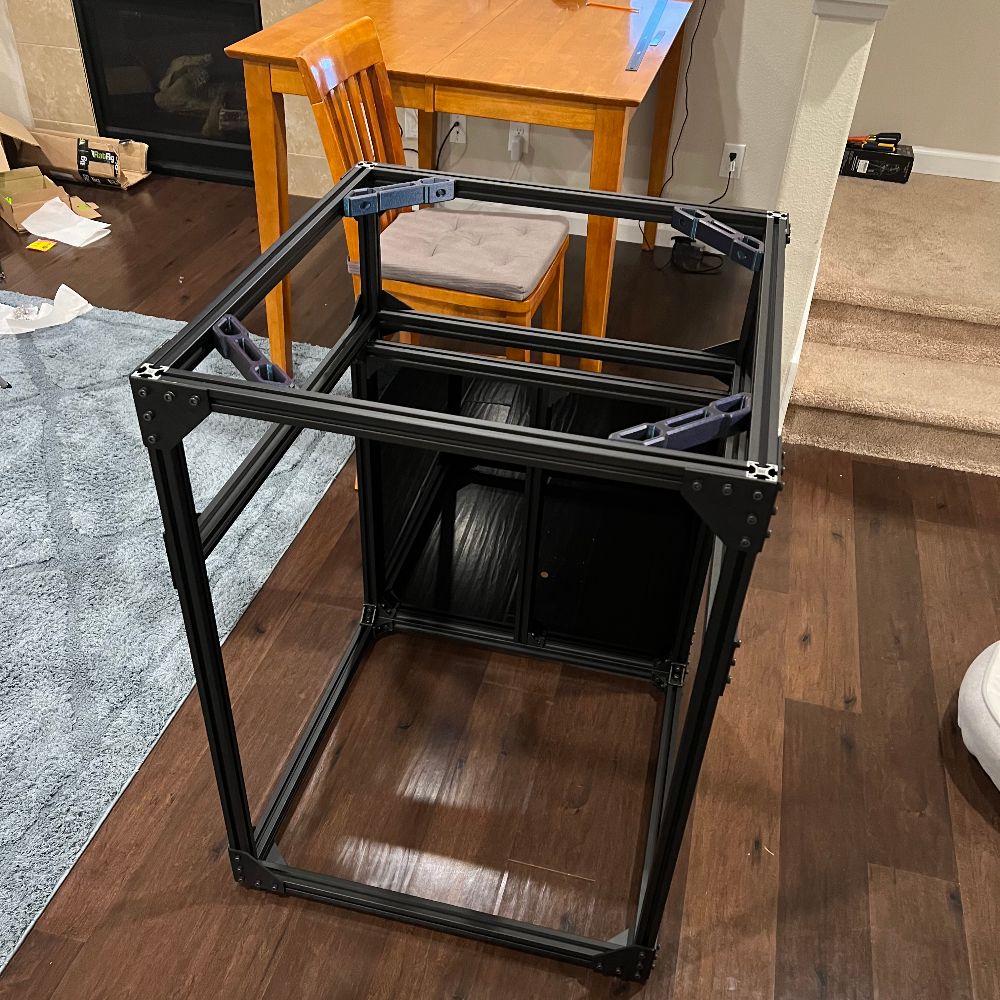
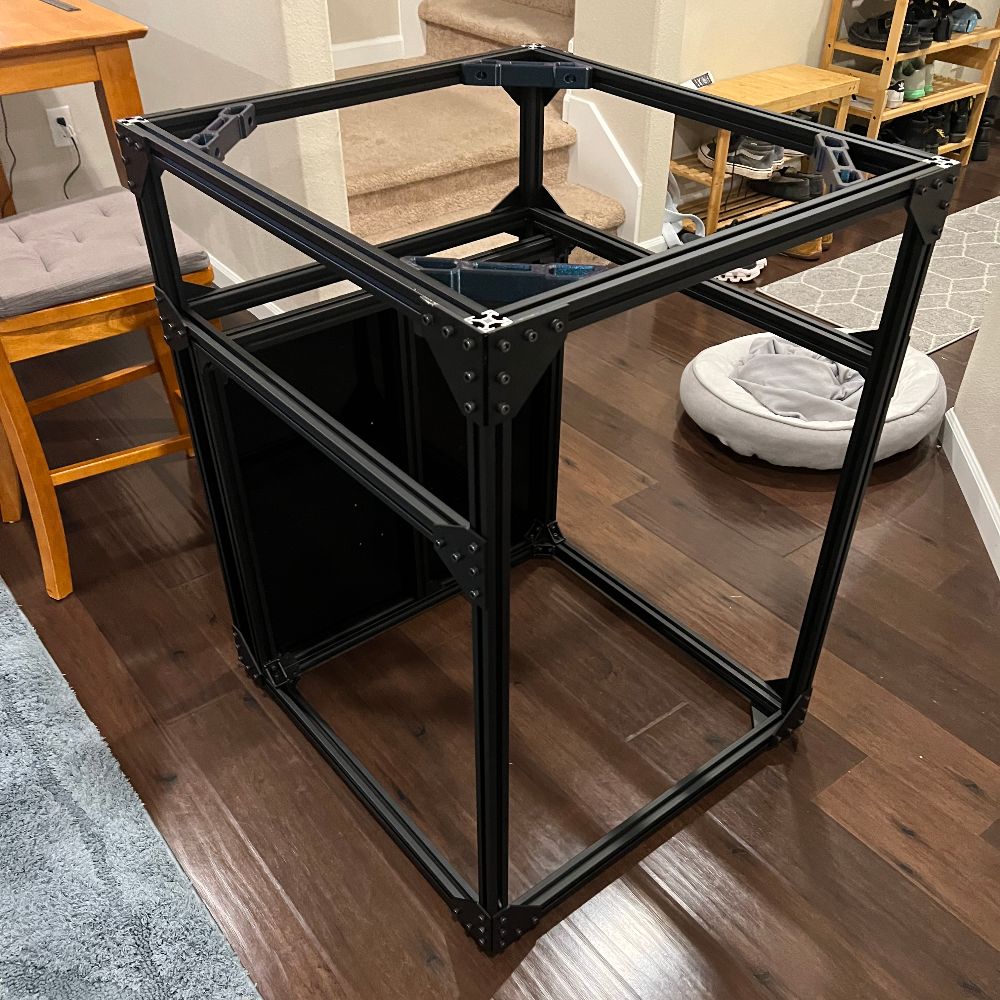
The Rat Rig Build was super fun. I got really OCD about making sure the frame was as square as I could possibly get it. Once I built everything up, I was able to print a benchy at default settings at about 1 hour. I am so so so so glad everything worked first try. I double checked all the wires several times, and was super worried the 1200W heated bed was just going to burst into flames, or the mobo was just going to pop and fry on first contact. But everything worked. I still crashed the nozzle into the bed a few times calibrating everything, but no damage. I’m guessing the z-decoupling system and the sheer girth of the steel bed can handle a hit or two.
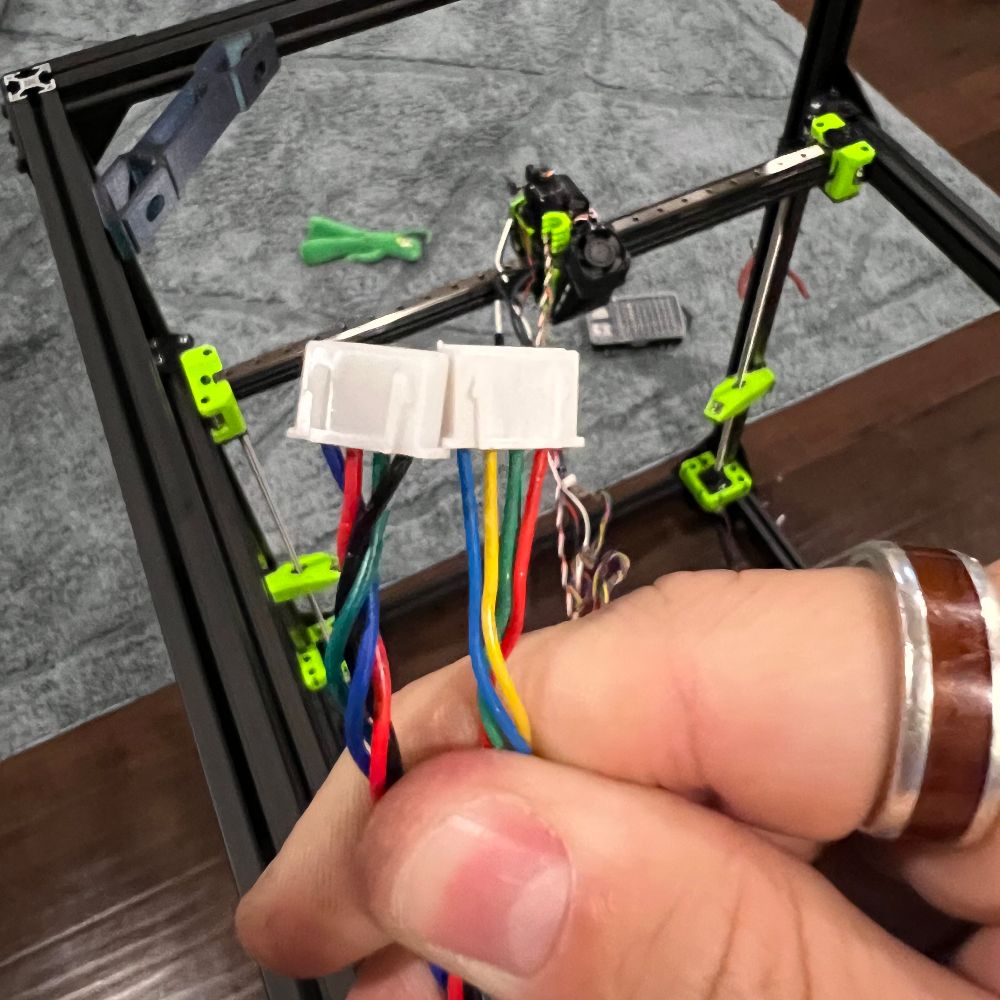
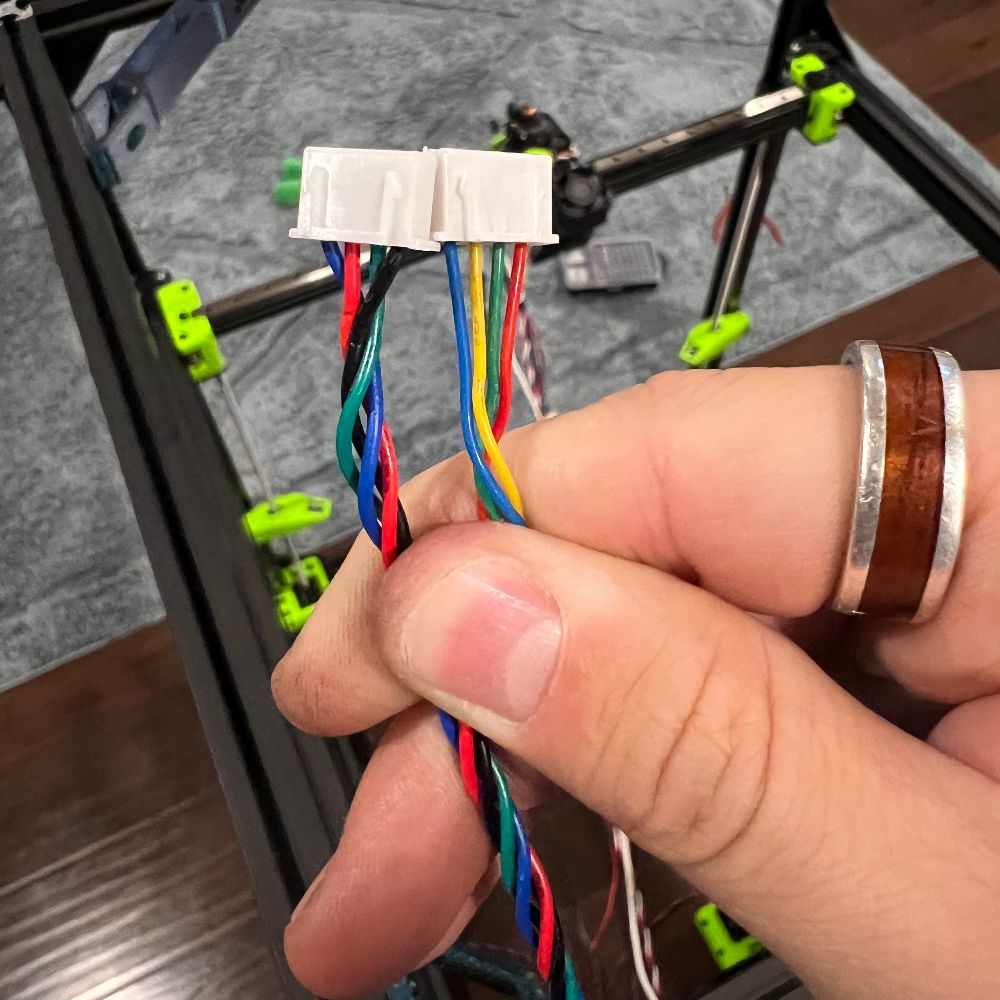
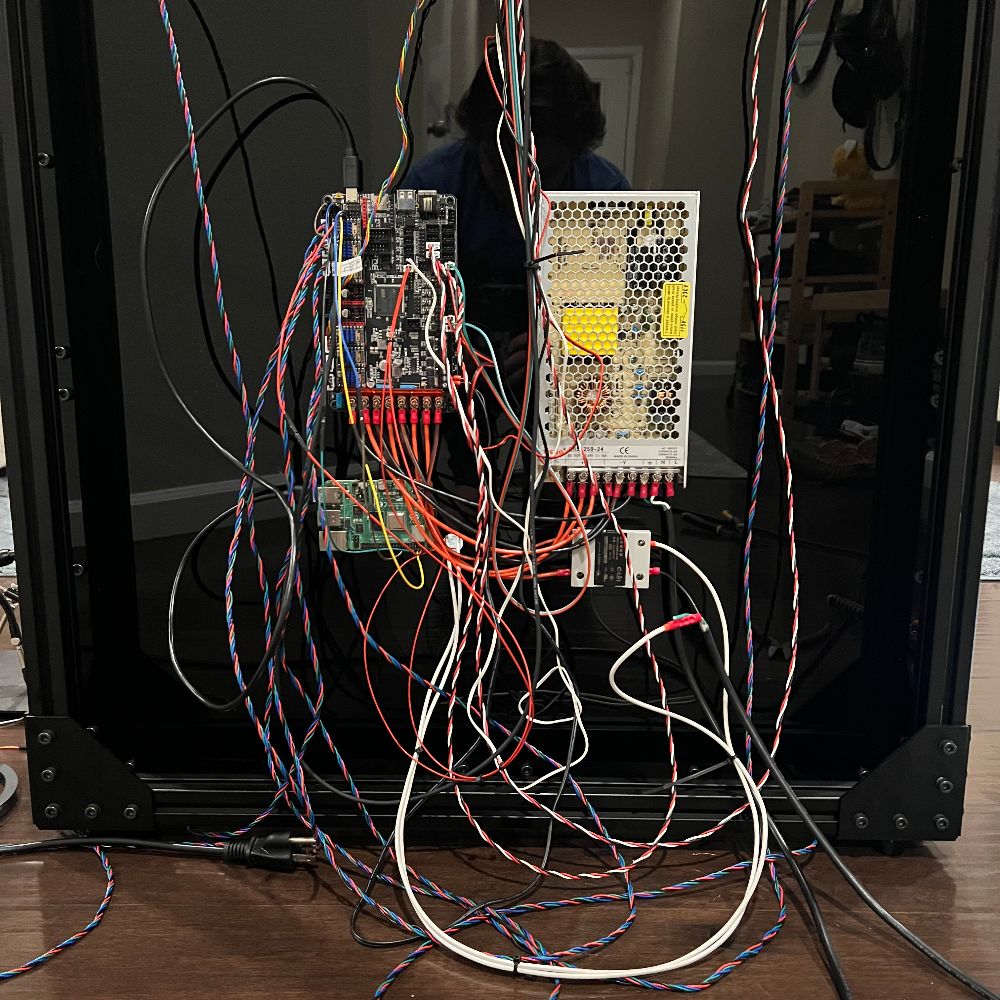
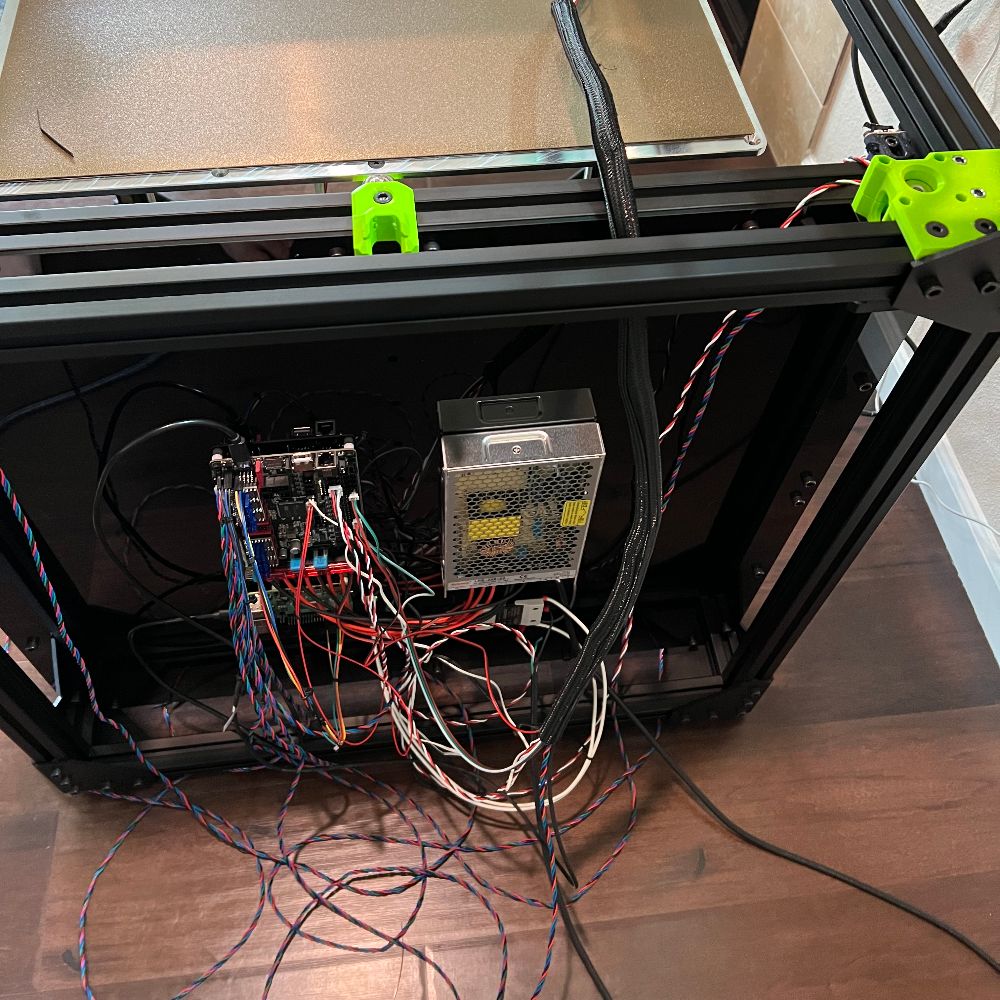
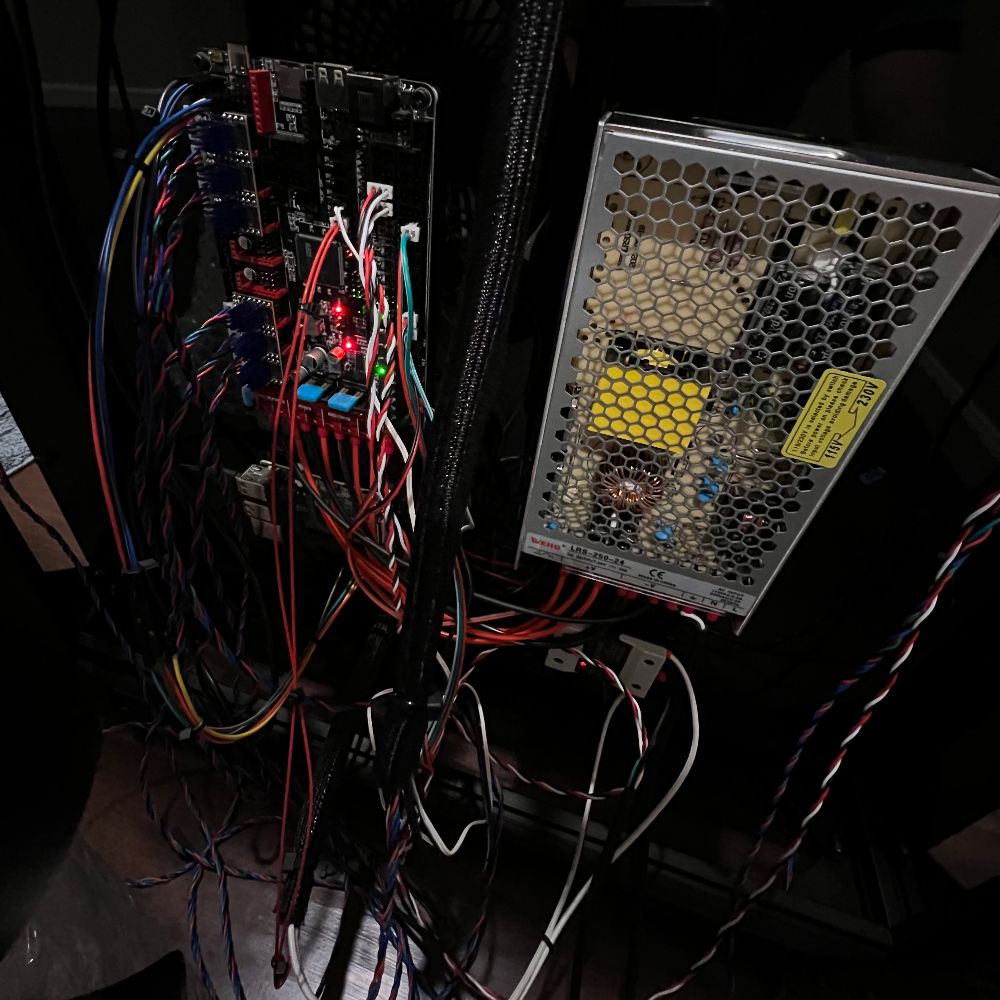
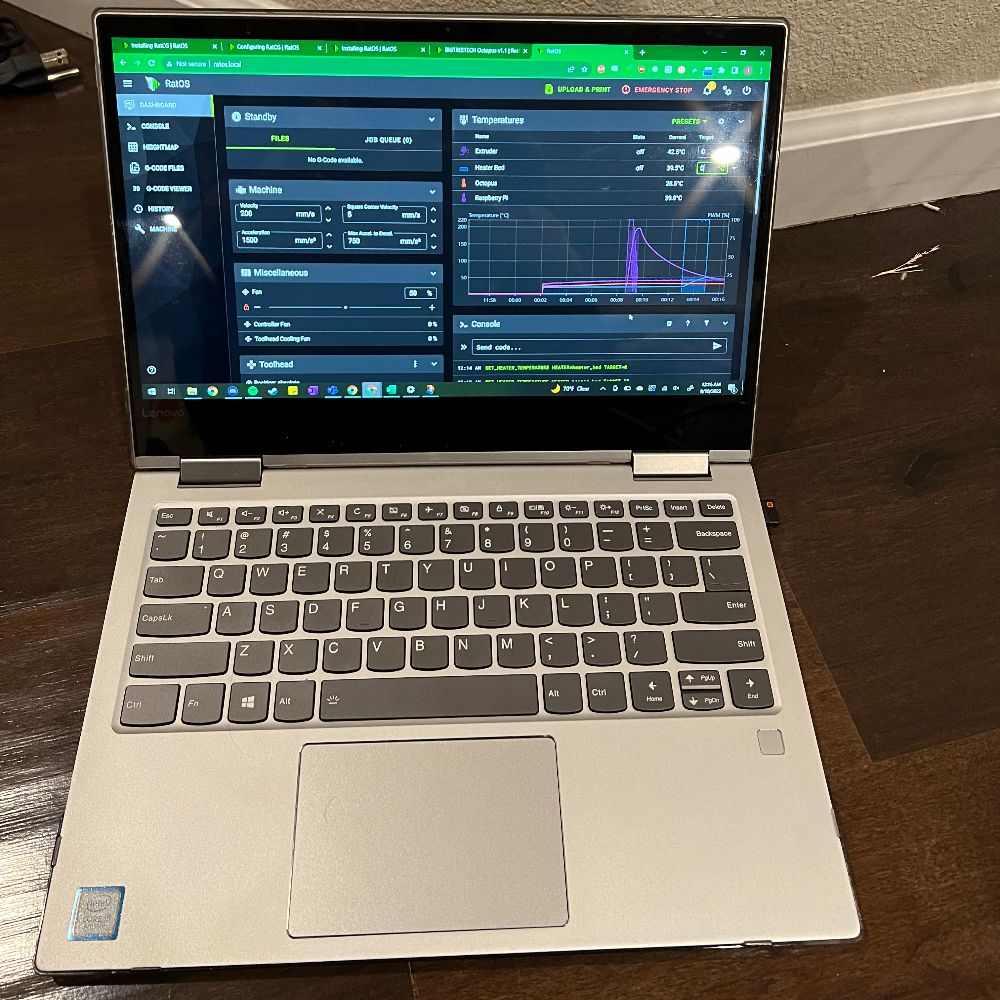
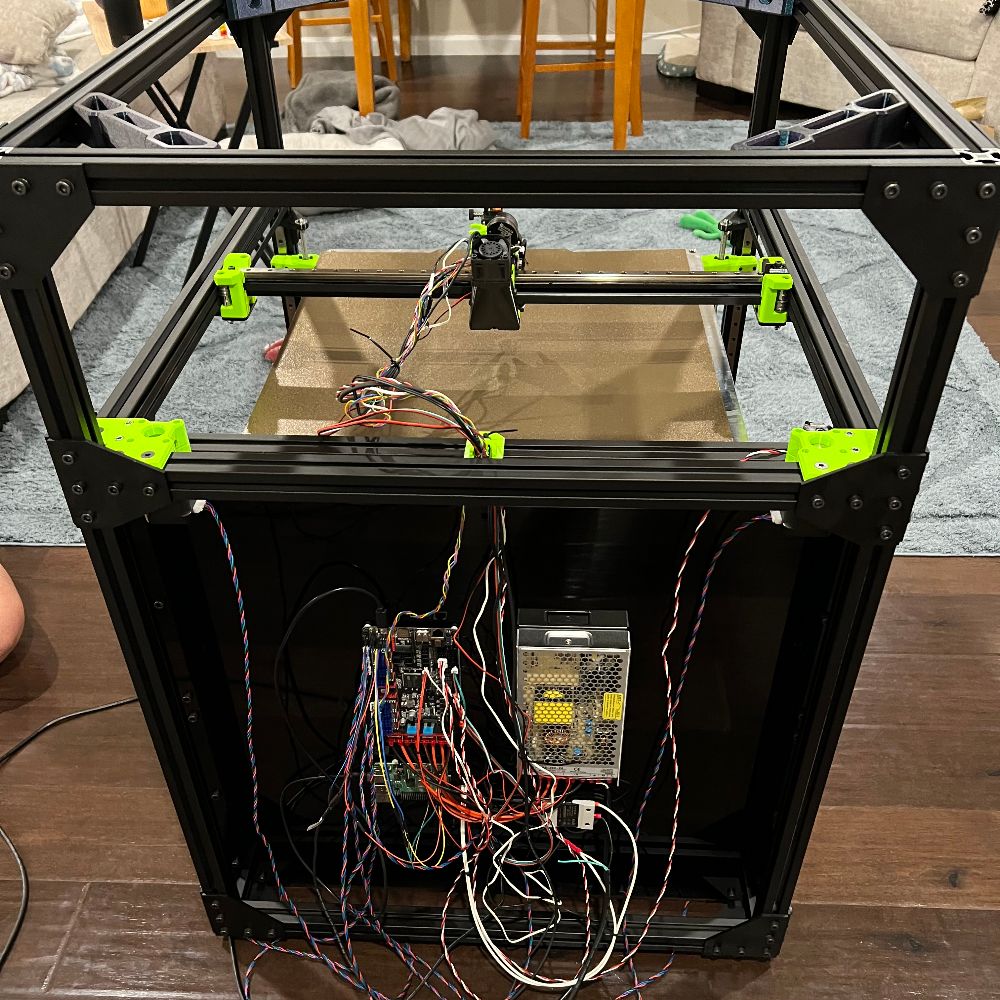
I did find that the stepper drivers started losing the steps and the gantry began to crash into walls and such. I read that they overheat easily and require active cooling. Some people even get custom extra long pin headers so they can put heatsinks on both sides of the chips. For now, I just put a table fan pointed at them, and it works great. In the future, I’m liable to replace them with 48V stepper drivers, and active cooling is a planned upgrade now either way. For the time being, all the electronics are just hanging out the back totally exposed. As I install more and more mods I’ll eventually dis- and re-assemble the frame & such. I’m just waiting on some lube/oil before I start using it more.
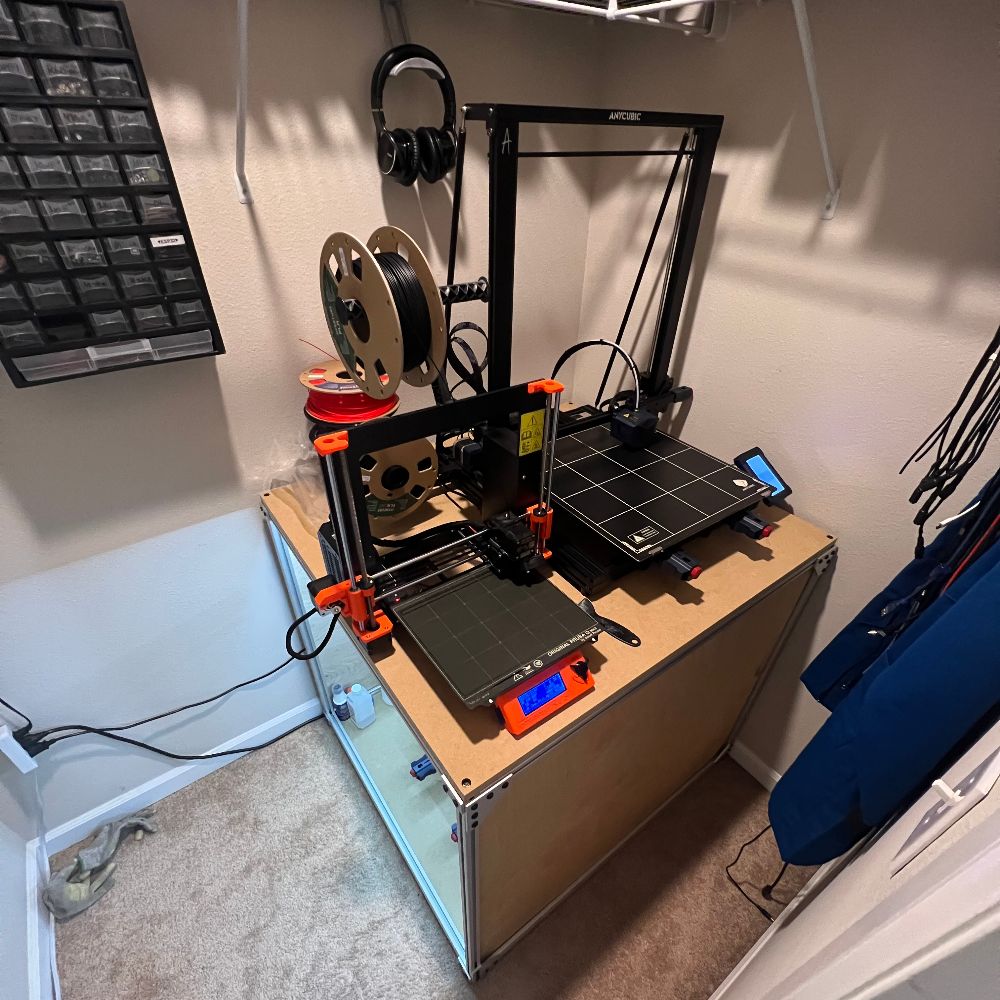
During this time I also wired up a bunch of my outstanding sign orders. But I ran out of the wirecover backings and pretty much all 3 of my other printers were in a state of disrepair after the BJJ sign print, so I have to maintenance those before I can print the covers and then I can ship them.
I also did some of my course on git but only here and there. Rat Rig was way more interesting, obviously.


PorygonZ
P
7/31-8/13
Radiohead Sign
Boogie Sign
Raglands Sign
Hot Wheels Sign
Alex Sign
BJJ Sign
Obtain Rat Rig Acrylics
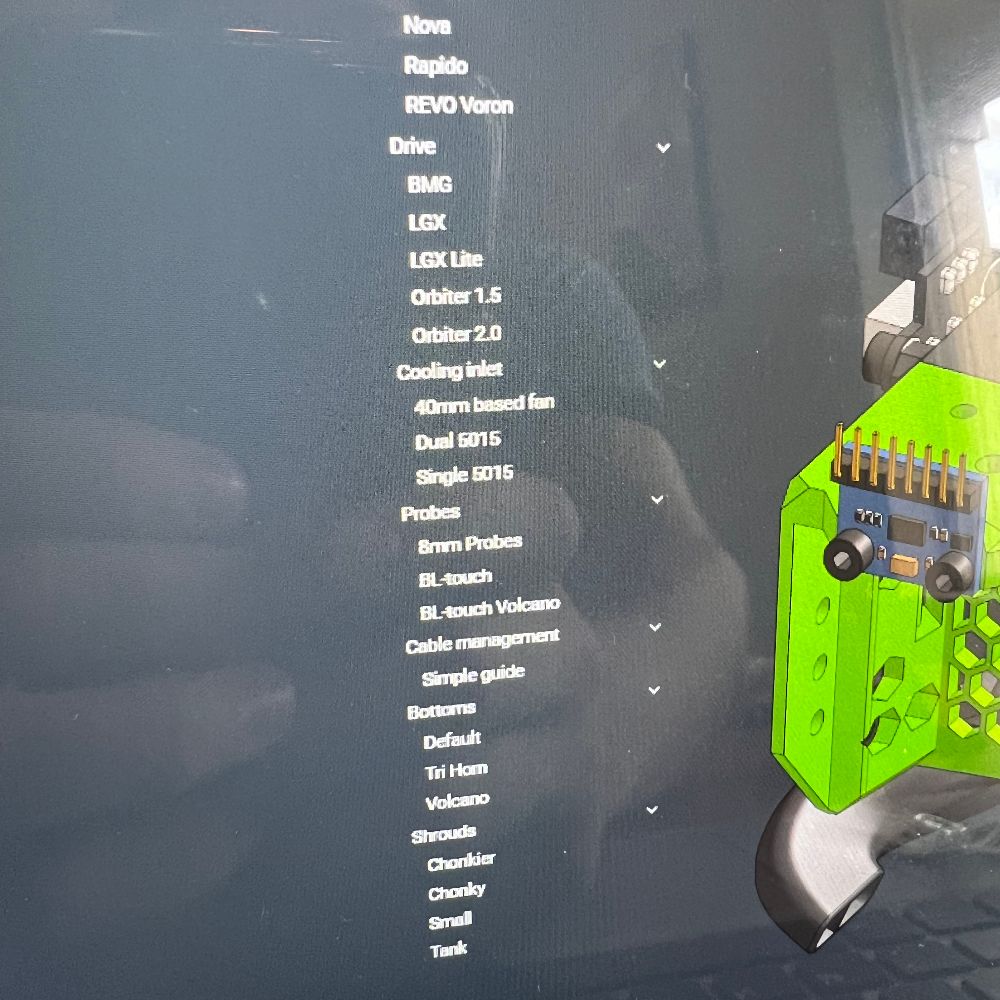
Review Rat Rig Build Guides
Buy necessary tools
Finish Git Course, Summarize
Notes
ToDo
Radiohead Sign
Boogie Sign
Raglands Sign
Hot Wheels Sign
Alex Sign
BJJ Sign
Obtain Rat Rig Acrylics
Review Rat Rig Build Guides
Buy necessary tools
Finish Git Course, Summarize
Git Course
need to refresh on merging and time traveling
Misc
Suneater Labs
eein.info
fishPointer Labs
Ultra Dungeon
Pondered Scrap
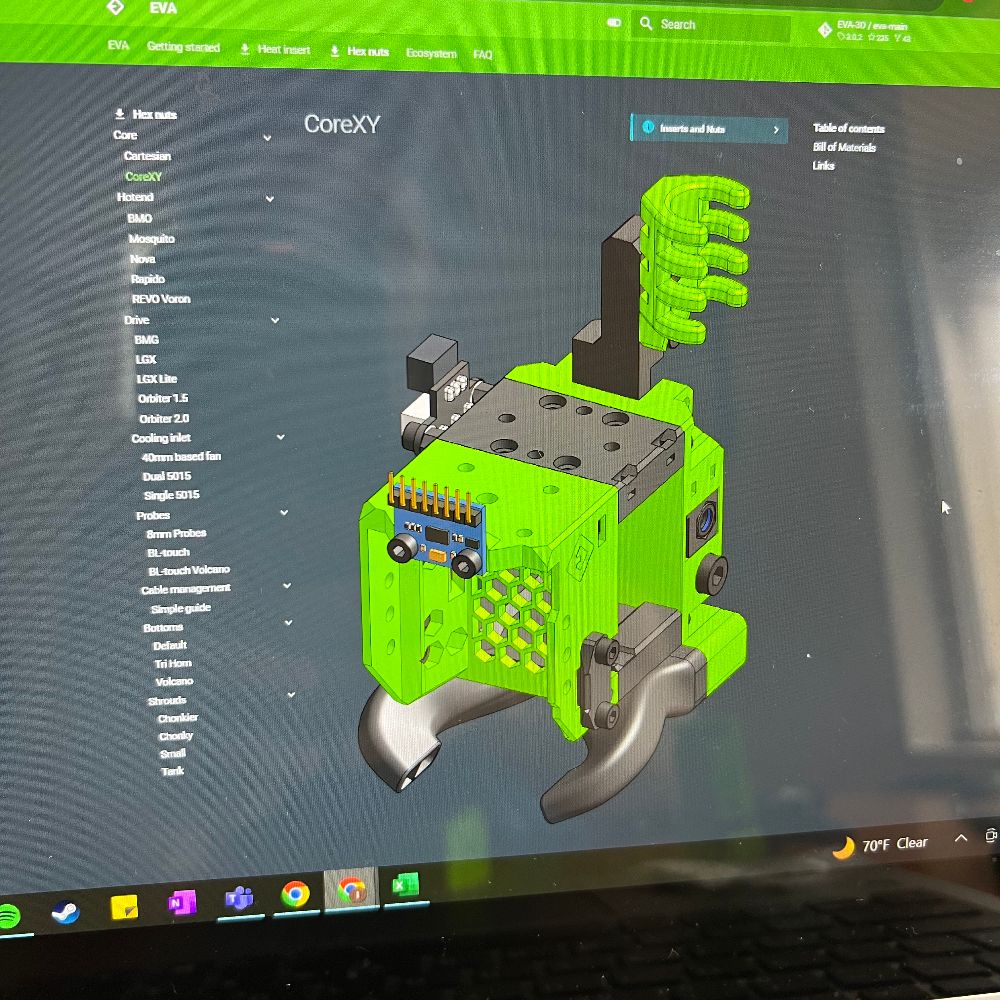
Rat Rig
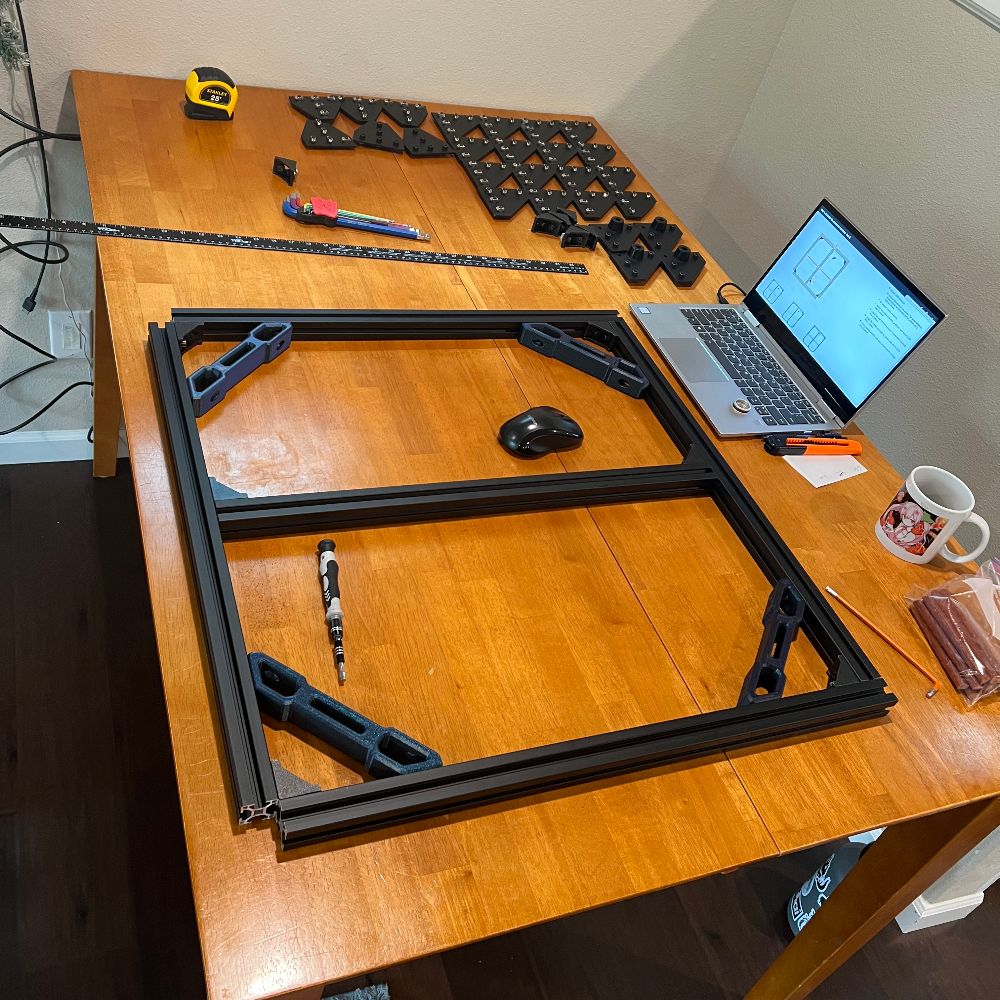
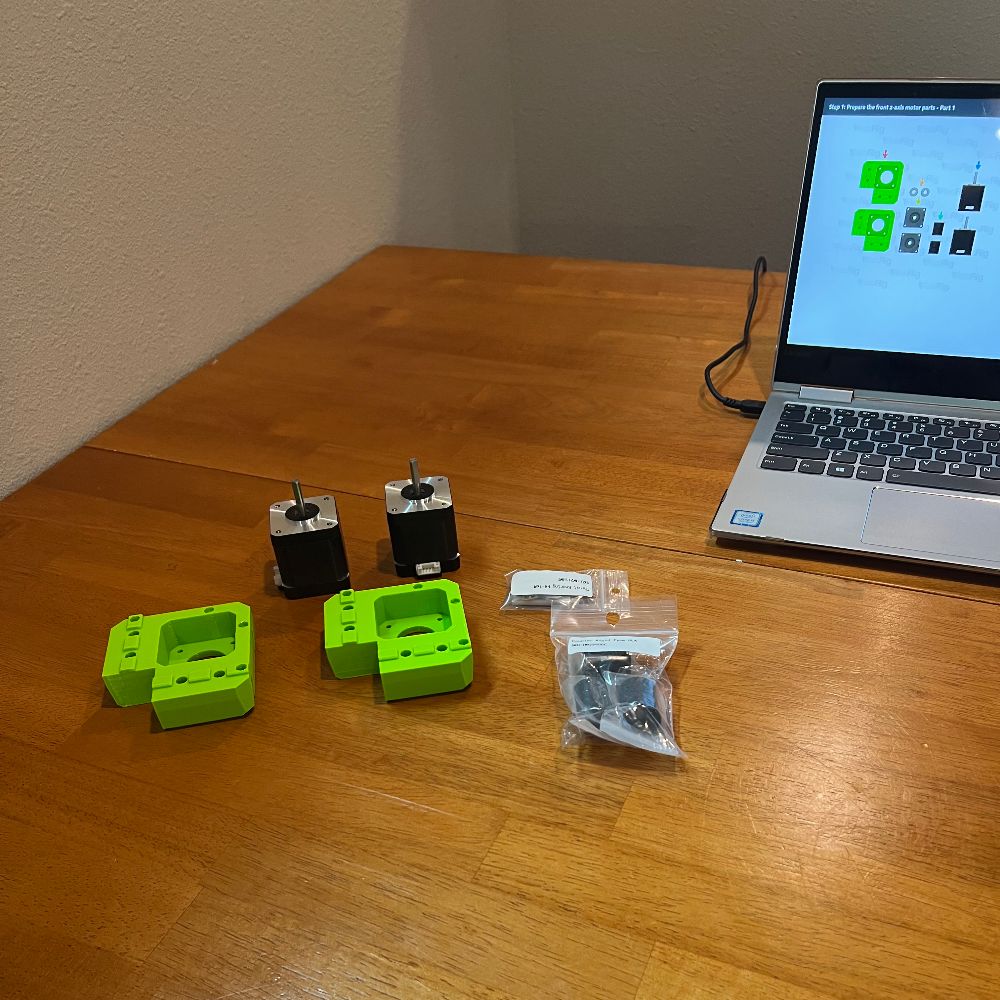
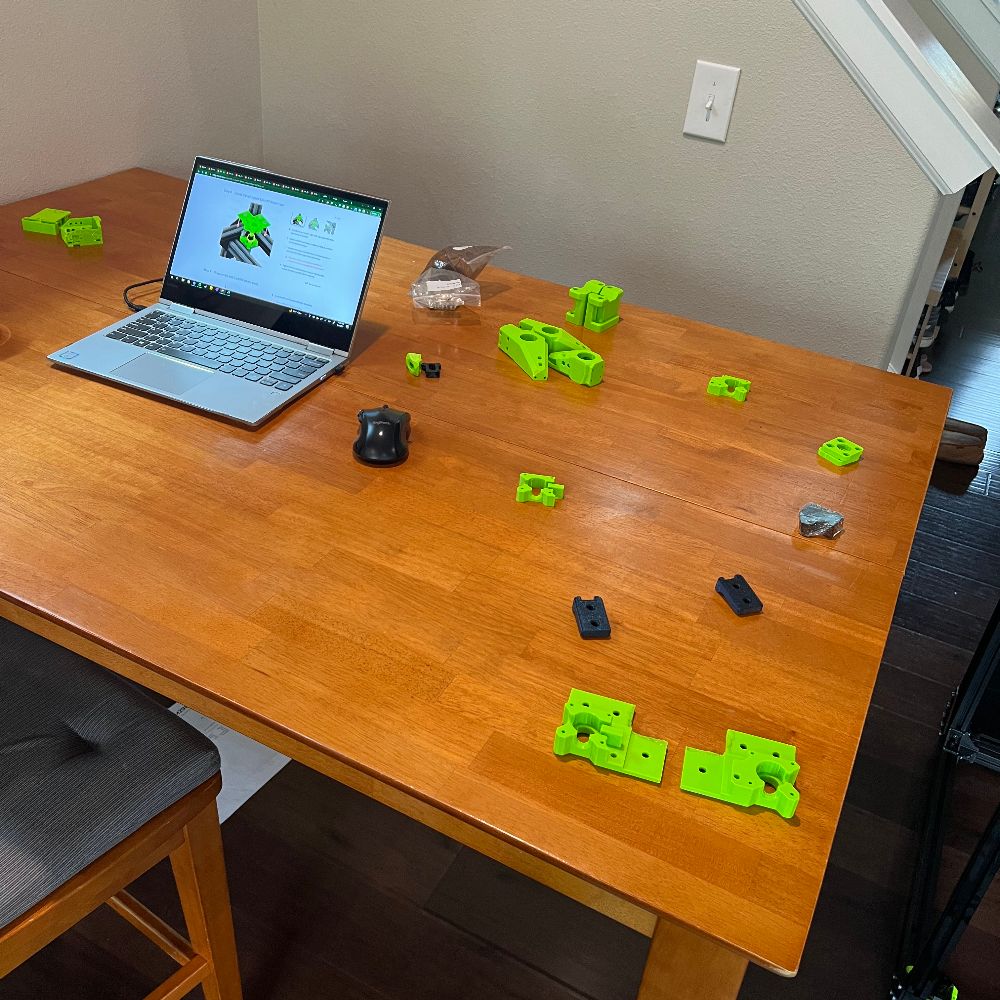
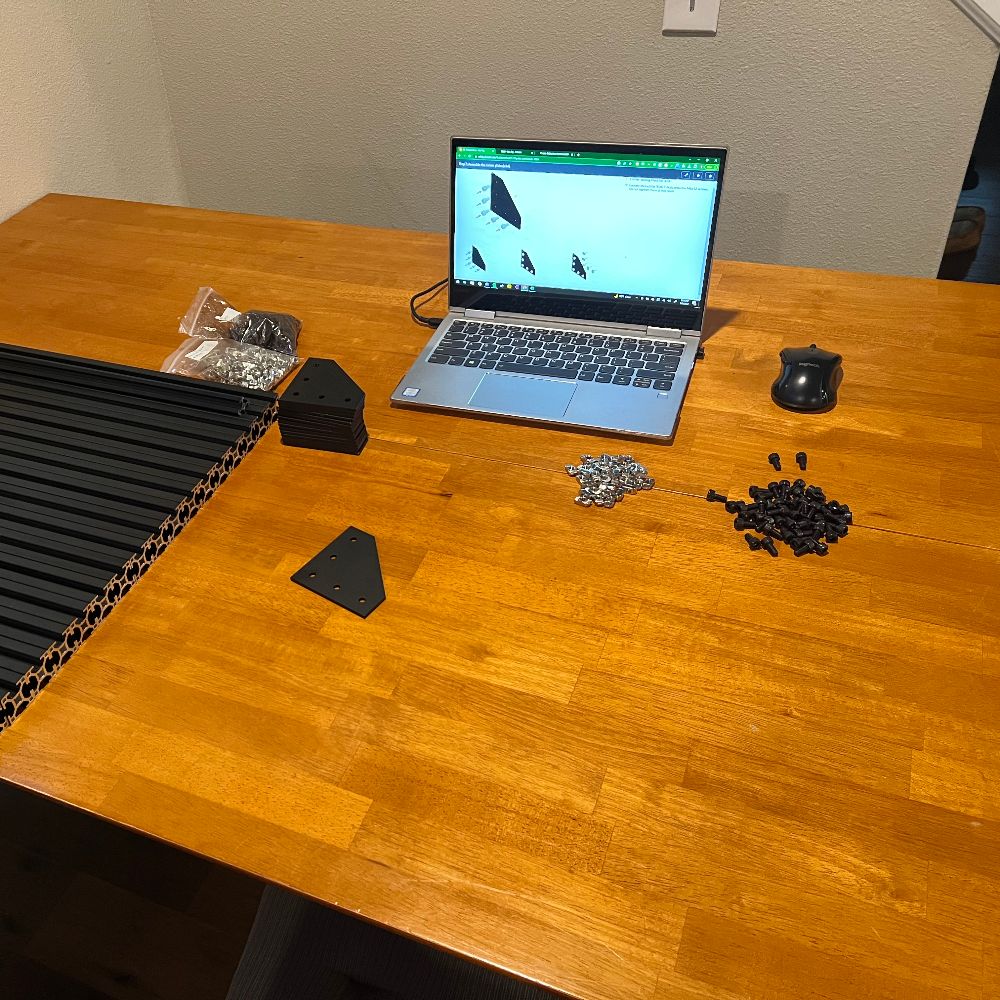
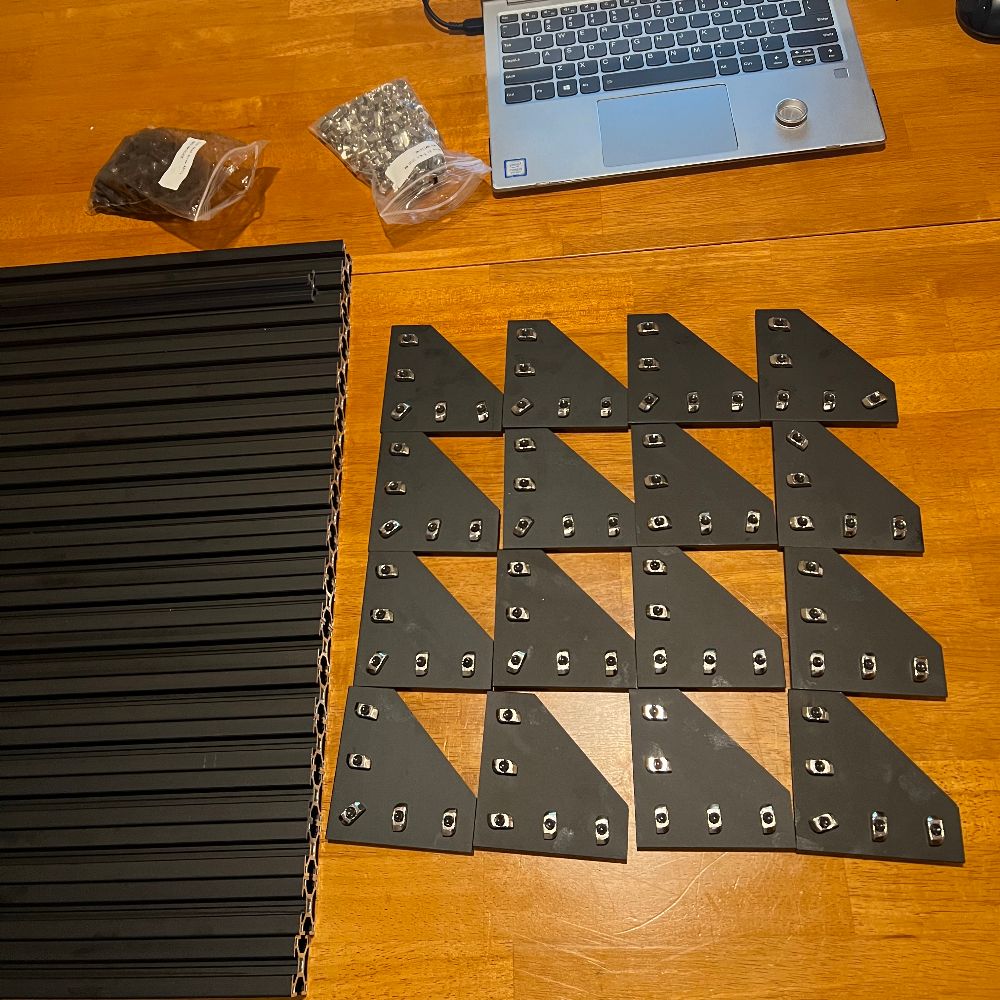
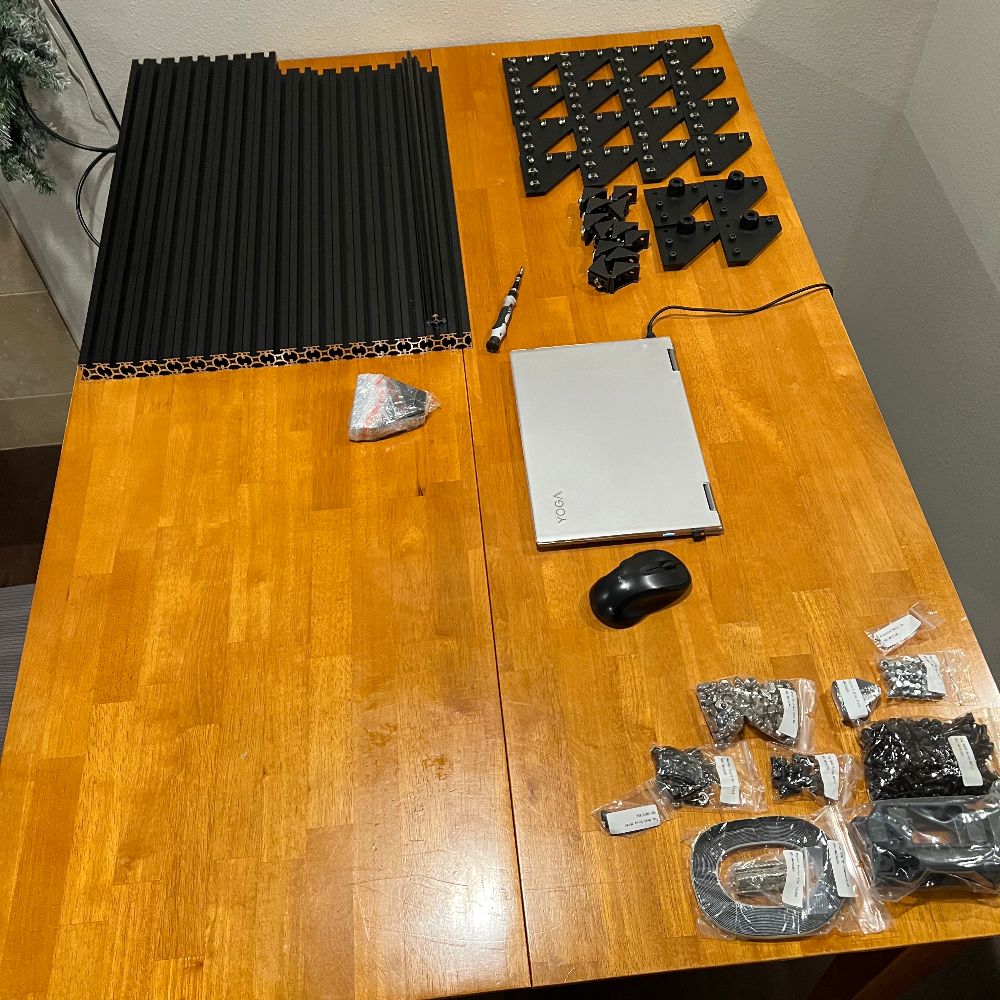
Started the build today 8-5
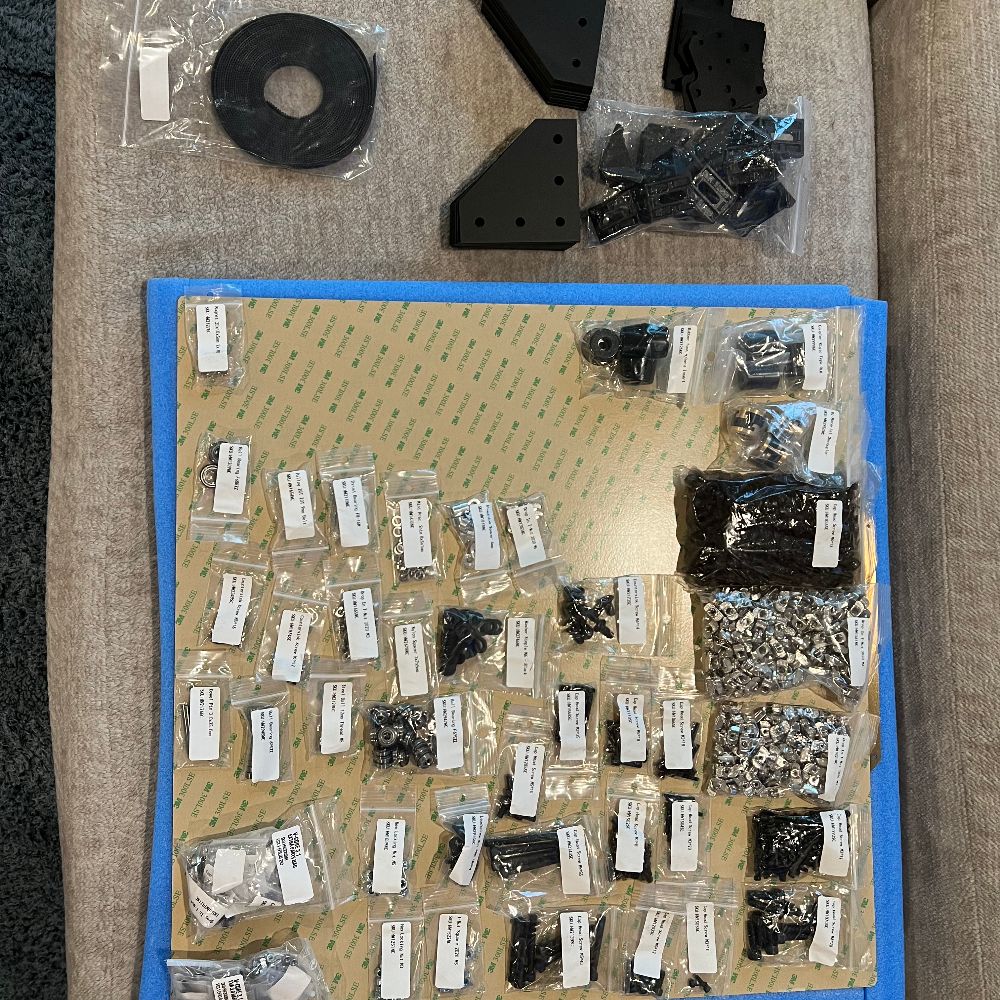
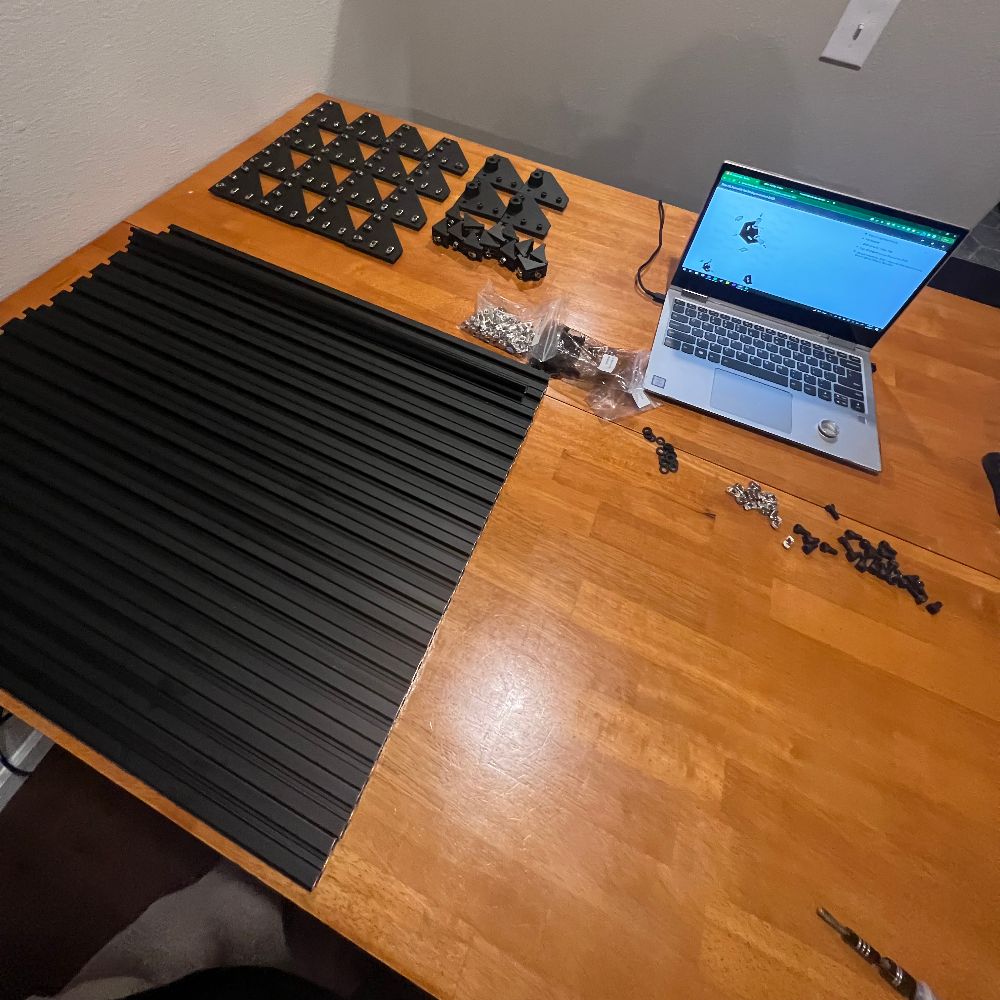
laid out all the parts and checked everything against the master BOM .csv file
Everything is here and in good condition
measured the extrusions and cleaned the grease off of them.
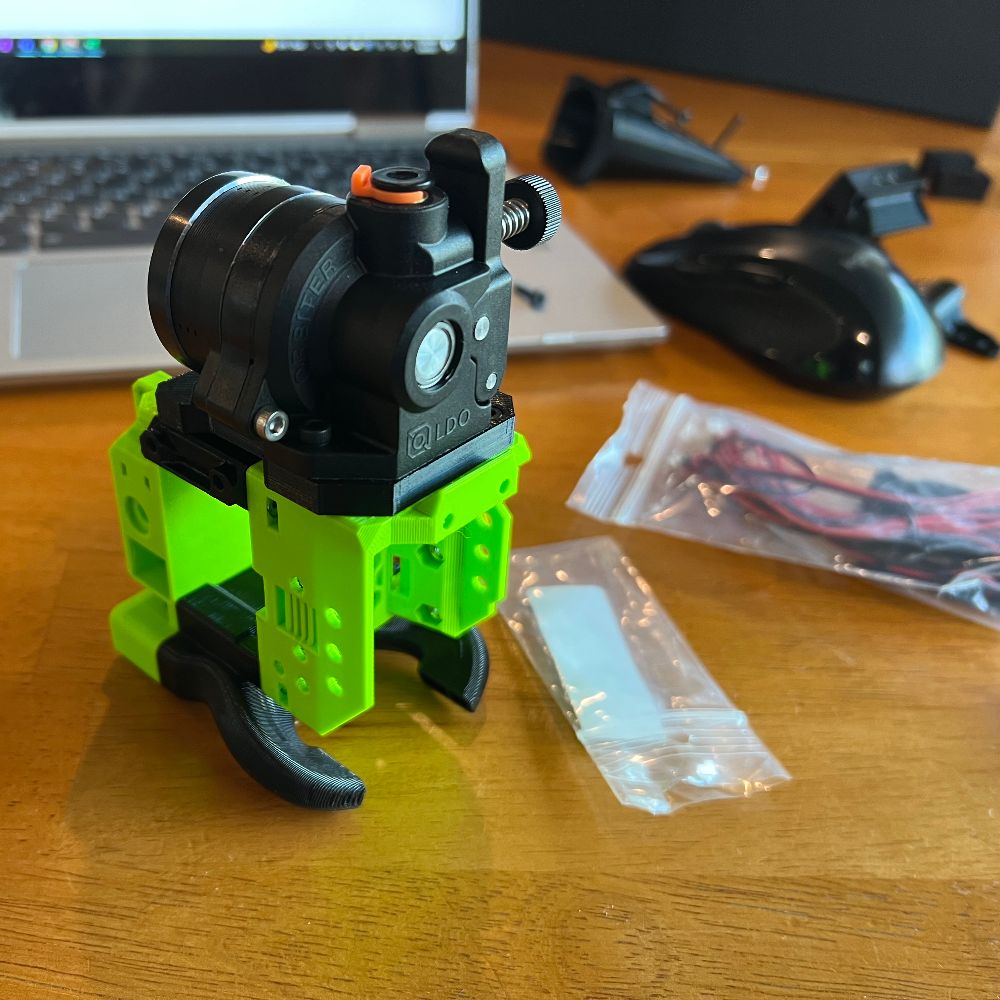
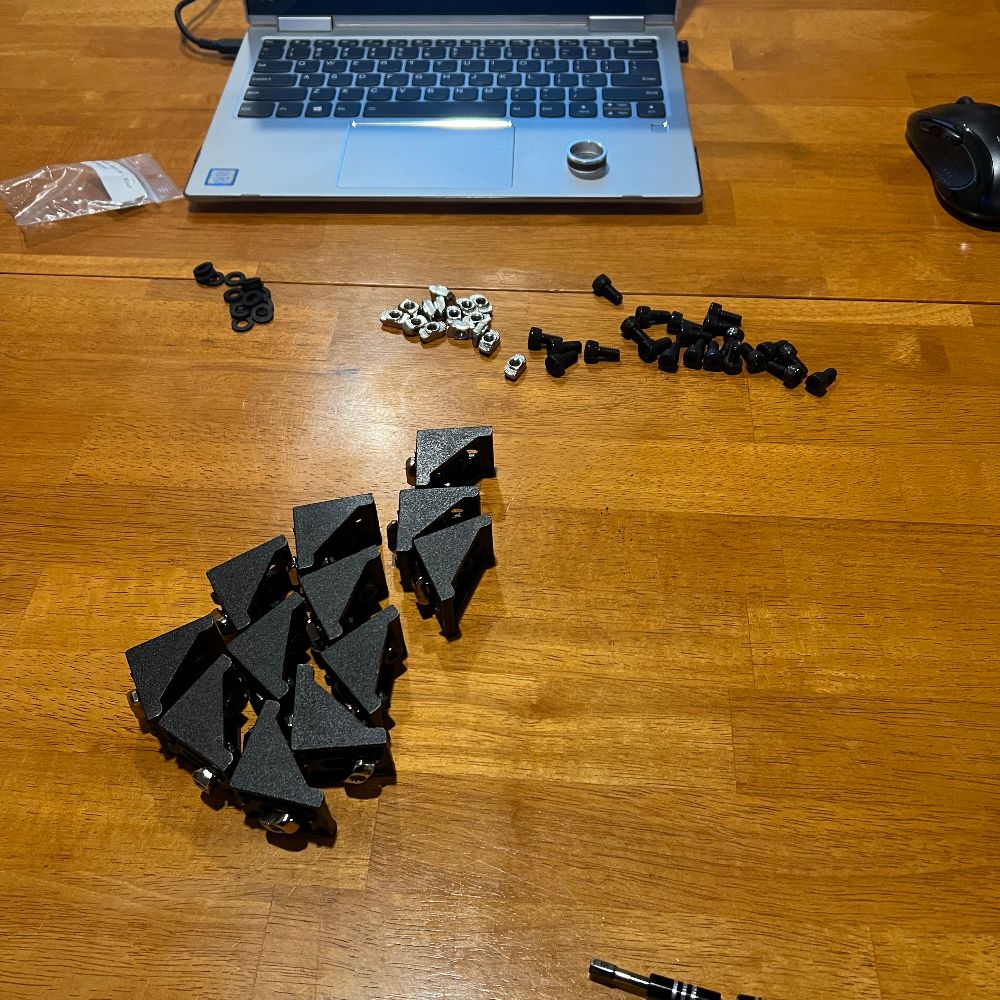
I also got all the brackets pinned together, except for the enclosure ones, which I forgot about until I finished
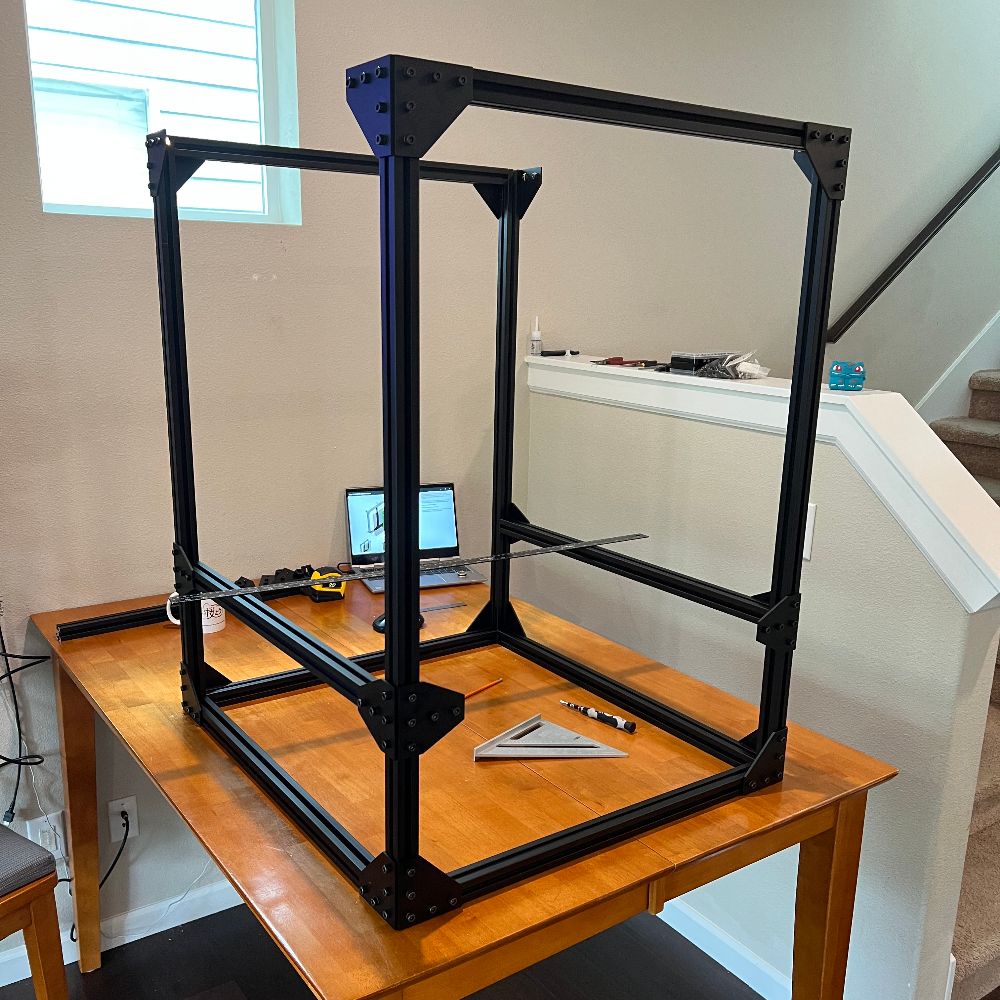
Also picked up 4 right angle clamps from Harbor Freight Today
Also printing 4 of the VzBot Right Angle Braces
So, I should have what I need to make sure the frame is square
Youtube
Replication Station
Youtube Channel,
both educational and entertaining
best channels for examples of this, categorized?
Channel List – Unorganized
Voidstar Labs
Ben Eater
PBS Space
Veritasium
Kurzgesagt
Real Engineering
Wendover Productions
MarcoReps
ThisOldTony
Dronebot Workshop
EEVBlog
3Blue1Brown
Lejynn
The Thought Emporium
Xyla Foxlin
Breaking Taps
Practical Engineering
Asianometry
SFIA
Fireship
TeachingTech
Low Level Learning
Great Scott!
Tom Scott
Scott Manley
Vsauce
Michael Reeves
Essential Craftsman
Nandland
Everyday Astronaut
Physics for the Birds
Junferno
Fesz Electronics
Improbable Matter
ElectroBOOM
Not An Engineer
TierZoo
N-O-D-E
NileRed
CNC Kitchen
StyroPyro
Physics Videos by Eugene
Afrotechmods
Tech Ingredients
The Organic Chemistry Tutor
Jeremy Fielding
I Like To Make Stuff
Andreas Spiess
Steve Mould
Brian Douglas
Things to figure out
If I were to make a youtube channel
1
exactly what type of channel would it be
2
what would the mix be between education & entertainment
3
expected audience expertise level
4
how many types of videos? how broad is the channel
generic project vlogs
build-alongs/walkthroughs
& then post detailed design writeup on blog
with circular links and references
design & methodology complete documentary
show whiteboard, brain, and CAD steps
justify design decisions, explore alternatives
course & book: self-study vlogs/reviews
vague
broad
pros
comfortable setup
testing different methods
in the spirit of “declassified” presentation of learning & building process
cons
potential copyright issues
need a legal team
slightly more formal teaching/pass-style
specific
deep
replication station – reverse engineer other youtubers’ stuff
project timelapses (irl, print, CAD, etc.)
5
“holding company name”
mostly a branding question
contains: websites, socials, small businesses/side $ projects, branding, name of lab
word cloud…
________ HQ
Brainstorm
Characters
Hatsume Mei
Heimerdinger
Powder
Goblin Engineer WoW
Loremaster
Edward Elric
Link
Purah
Values
Open Source – full disclosure of process, materials, (finances)
Proper Documentation – this stuff should be written down
Engineering is Learning by Doing
Learning to Learn, Learning to Build, Building to Learn, Building to Build
Realistic Representation of the “under the iceberg” of engineering research, design, prototyping, failures, waste, etc.
Engineering as optimized wastefulness – time, money, materials, energy
Engineering as a byproduct of privelege – be grateful you have time/stuff to waste playing around, exploring, innovating – creating something potentially useless
Decentralized/Solarpunk/Sustainable
Careful Methodologies for optimizing costs in learning, designing, building, documenting
Engineering is a modern name for ancient human heritage – Tool Use
Intersection of NaturalPhilosophy + Tool Use
Proper Presentation – it should be easy for someone else to replicate what you did
You don’t truly know something unless you can
1. explain it simply/teach someone else how to do it
2. apply that knowledge in real context
Goal must be the 1,000-100,000 true fans
Name should work for
Website
Social Accounts
Personal Brand
Youtube Channel
Physical Lab Space
+Name for fans
Nothing stopping me from just making volumes of cringe garbage content
Go Board
Contents
Introduction – Go Board Features
https://www.nandland.com/blog/go-board-introduction.html
Board arrived safely
Preloaded Script works fine
MicroUSB provides power and also is a UART line to the PC for programming
Install virtual com port drivers from FTDI
Install Tera Term – open source terminal emulator
115200 Baud Rate
8 bit Data
None Parity
1 bit Stop
None Flow Control
my board generates two serial ports when I plug it in
the higher number one works
Connecting to it in Tera Term, if you can type numbers/letters and they show up, the board is successfully moving data with the computer
Some uUSB cables don’t include data lines to cut costs. Watch out for that
Plug in a VGA Monitor
TF is this, 2000?
12345 serial inputs from PC through terminal should change color of VGA Screen
Looking for VGA stuff
Bought a VGA Cable and a VGA>HDMI Adapter
DID NOT WORK SAD
Monitor didn’t recognize it as an input
Download and Install the FPGA Tools and Drivers
Project 1 – Your First Go Board Project, Let’s Blink Some LEDs
Project 2 – The Look-Up Table (LUT)
Project 3 – The Flip-Flop (AKA Register)
Project 4 – Debounce A Switch
Project 5 – Seven Segment Display
Project 6 – How To Simulate Your FPGA Designs
Project 7 – UART Part 1: Receive Data From Computer
Project 8 – UART Part 2: Transmit Data To Computer
Project 9 – VGA Introduction (Driving Test Patterns to VGA Monitor)
Project 10 – PONG
Git & Github Bootcamp
Contents
1
Course Orientation
Intro
The best time to learn git is yesterday
Git is more than just some new syntax
“Living Git. Breathing Git. Second Nature. Fundamental Part of your Workflow”
Become one with Git
Pet chickens for variable names
Course Curriculum
Matrix of Topics
Intro to Git
Merging
Fetching & Pulling
Git Tags
Installation
Diffing
Github Odds & Ends
Git Behind The Scenes
Git Basics
Stashing
Collaborative Workflows
Reflogs
Committing In Detail
Undoing Changes
Rebasing
Custom Alises
Branching
Github Intro
Interactive Rebasing
???
Color Code
Git Core
Next Level Git
Github/Collab Core
Git: The Other Parts
Exercises
It’s hard to write practice exercises for git
Exercises at the end of each section
Accessing the Slides & Diagrams
There will be a “What Really Matters In This Section” video at the beginning of every section
It will have the slides attached and provide an overview
Nice touch
2
Introducing…Git!
What Really Matters In This Section
What Exactly Is Git?
Git is THE VCS
VCS – Version Control System
Software that tracks and manages changes to files over time
Revisit earlier versions of files
Compare changes between version
Undo Changes,
etc,
Other VCS – Subversion, Mercurial
Git has 88.4% market share.
Runner up is Subversion around 16.6
They stopped doing surveys it was so dominant
Visualizing Git
Git helps us
Track changes across multiple files
Compare versions of a project
Time Travel back to old versions
Revert to a previous version
Collaborate and Share changes
Combine Changes
Git is basically just the savepoint system for coding
Writers also use Git for version control
You can track versions and changes over time ofc
You can make forks and branches
But you can also merge/combine independent branches?
Seems like there could be dependency issues. If the branches are not totally independent changes of eachother they could conflict.
A Quick History of Git
Linux made Linux and Git
Git in 2005 after frustrated with shitty paid VCS
“Global Information Tracker” – on a good day
Who Uses Git?
Stackshare.io
Tech-Adjacent Roles use git too
Designers use git
Some govt’s have started using Git to draft laws
government.github.com
collaborative textbook writing
managing versions of novels, screenplays, etc.
daily diaries, composers of symphonies, drafting theses, etc.
Git Vs. Github: What’s the Difference?
Git runs on your computer
it runs locally. no cloud, no internet, no account
Github is a web service
It takes Git Repos and hosts them in a cloud
And makes them easy to collaborate with
You have to start with Git before you can move onto Github
3
Installation & Setup
What Really Matters In This Section
Installing Git: Terminal Vs. GUIs
Git is primarily a Terminal Tool
Git has several popular GUIs
Github Desktop
SourceTree
Tower
GitKraken
Ungit
List of GUI’s straight from Git site
https://git-scm.com/downloads/guis
The ability to fully manipulate git in a terminal is expected.
GUI’s are useful but use a lot of magic and obfuscate what’s happening behind the scenes. This can create problems down the line
For a skilled user, Terminal is faster
and there are things you can only do on a terminal
Commands are universal, so no investment in a particular wrapper
Course covers both side by side
WINDOWS Git Installation
Git was created for UNIX. Not Windows.
Windows don’t have UNIX by default
Command Prompt is the Windows CLI
CLI – Command Line Interface
BASH is the default shell for Linux and Mac
Git BASH is what we install
It emulates BASH on windows.
You can actually ignore the Git part and just use it as BASH
~/Dropbox/Root/TreeSheets/Lab/FPGA Bootcamp/Git
I can finally use LS and CD on windows
Install VS Code as the default text editor for Git BASH
Picked up a course on mastering VS Code as well
MinTTY
Verify you have git with
>
git –version
MAC Git Installation
Skip
Configuring Your Git Name & Email
you configure your name and email as a user profile, but there’s no account or anything
however
this will be what is listed as your name when you do contribute to a public repo
set your username/email
>
git config –global user.name “Tom Hanks”
git config –global user.email “tomhanks@gmail.com”
check your username
>
git config –user.name
already set to fishPointer and iantralmer@gmail.com
Installing GitKraken (Our GUI)
GitKraken time
Installed
Terminal Crash Course: Introduction
some bash stuff
not relevant to git itself
skippable
CD
RM
LS
PWD
this ones new to me
MKDIR
RMDIR
TOUCH <filename>
CLEAR
Terminal Crash Course: Navigation
Gonna watch these at 2x
mac has >open .
windows has >start
Open windows explorer at current directory
>
start .
Terminal Crash Course: Creating Files & Folders
touch creates new files
but it has a secondary use of updating the modified time of an existing file
bc i touched it
touch can make multiple folders at once. so can mkdir
try not to use _ underscores in folder names
Terminal Crash Course: Deleting Files & Folders
rm totally deletes the file
time for flags
rm -rf
the -r is for recursive
the -f is for force
so it forces a recursive delete on the target directory
this is how you delete an entire folder
you can instantly delete an entire folder of important files that may not be backed up
ls -a
-a makes it list all, including hidden stuff
4
The Very Basics of Git: Adding & Committing
What Really Matters In This Section
Most Essential Section in this course
What Is A Git Repo?
repo – repository
manually tell it in which directories to create repositories
a repo is a git workspace
Our First Commands: Git Init and Git Status
how to instantiate a new repo
git status
>
git status
if you run git status in a directory that does not have a repo, you will get a fatal error
there is no status, there is no repo
Initalize a repo inside the current directory
>
git init
Once you initialize the repo, you can run >git status and not get an error
The Mysterious .Git Folder
once you init, nothing changes.
Where is the “git” in this folder?
There is actually a hidden folder
You can see it with >ls -a
Git Documentation:
https://git-scm.com/doc
Reference Manual:
https://git-scm.com/docs
docs are thorough and arcane
rule about hidden folders and hidden files
they all start with .
ls -a reveals .git
the .git folder contains all of the git stuff. the version history and such
you can actually >rm -rf .git and delete the .git folder
if you do that and run git status after, it’ll return an error
because you deleted the thing that made it a repo
now you have to git init again to remake the repo
it’s hidden so you don’t screw with it. you can delete EVERYTHING
not just this one. ALL TIMELINES
the entire spiderverse
A Common Early Git Mistake
Git tracks a directory and all nested subdirectories
you can test this by initializing a repo in an empty folder
then mkdir a new folder
and then enter the child folder and run git status
you are still in that same repo
the repo is going to contain everything within the directory it was initialized in as though it were the root of all things.
YOU DO NOT WANT TO INIT A REPO INSIDE OF AN EXISTING REPOSITORY
git will git confused when git is asked to track gitself
you don’t want to make a repo in like, My Documents, or Desktop
It’ll end up tracking –everything– and that’s not really how people usually use git
The Committing Workflow Overview
commit time
bread and butter
Workflow
Working Directory
>git add
Staging Area
>git commit
Repository
a git commit is a checkpoint in the repo
it’s one of many
consider it your many savefiles
git isn’t a method of saving a files
it’s something you do after the files are saved
like a super-save or something like that
first, you change, create, delete files
then you “add” the changes made selectively for your commit.
so if you change 7 files but only 5 are ready, you can choose to only commit the 5 to the commit, the new savepoint
this is not a broad tool. it is tweezers of time
Staging Changes With Git Add
Workflow
Work on Stuff
Add Changes
Commit
once you’ve edited a file, if you run git status
git status will notice and call out the edited files that have been changed since last commit
but you still have to git add them
They are “untracked files”
Three Locations
Working Directory
the directory you’re actually working in, changing files, moving stuff around, etc.
Staging Area
this is the holding area for files that are soon to be committed
Repository
this is there all the commits exist.
as you make more and more commits with new snapshots of the files from the working directory, the repo will expand with more history
a commit is a savepoint. the repo is the save folder
when we make a commit, the contents of .git folder get changed
adding files to the staging area
>
git add file1.txt file2.txt
after adding files to the staging area you can run git status and see them in the “Changes to be committed:”
Finally, The Git Commit Command!
Before you run commit, you are expected to include a message that describes a summary of the changes included in that commit
name the savefile
how to write a good commit message?
running git commit will commit all staged changes
but it will also open the text editor you selected on install and prompt you for a commit message
if you forgot to change it from vim you will get trapped
just give git the commit message at the same time with the -m flag
>
git commit -m “commit message”
once you’ve committed it
git status will return and say
“nothing to commit, working tree clean”
everything you’ve done in the folder, it knows about, has tracked it, and can confirm it’s up to date
as soon as you change a file, the working tree is no longer clean
The Git Log Command (And More Committing)
Work on Stuff
Add Changes
Commit
There is a difference between existing files that have committed once before and have now been modified, and completely new files
git status will flag previously committed files that have been modified as such
git status will flag new files that do not exist in the repo under any commit as untracked
when you add these, and then git init
they will be flagged as “modified” and “new file”
find a log of all the commits for a repo
>
git log
>git log
$ git log
command
commit ed3c39d7bd34be1a23109ce194c33616400c969d (HEAD -> master)
commit hash, not important right now
Author: fishPointer <iantralmer@gmail.com>
username and email address, as configured earlier
Date: Wed Jul 5 13:03:01 2023 -0700
created two files
date and time and commit message
If you want to just add everything in the folder at once for a global commit. no need to be surgical. use git add .
global git add
>
git add .
Committing Exercise
just making files, editing them, committing, and repeating
5
Commits in Detail
What Really Matters In This Section
gitignore is critical
atomic commits, good commit messages, and navigating git docs
Navigating The Git Documentation
git commit has many many options and flags you can use
most git commands have a billion options like this
git docs do include examples
if you don’t want to use a reference and want a sequential coverage of git’s documentation, there’s also the Pro Git Book
try and stay sane reading these docs
Keeping Your Commits Atomic
atomic means to keep each commit focused on a single thing
keep your commits indivisible into smaller parts. just one change.
so if you make a new folder
and search and replace across four files
those things should be separate commits
the folder is one commit
the search/replace is a different commit
this is what it means to keep your commits atomic
!
When adding a directory, to add all the things within that directory and not just the directory itself
git add Directory/
make sure you include the slash at the end
Atomic commits makes it much much easier to rollback code
It also keeps the commit messages simple, since the changes they’re describing is simple
Commit Messages: Present Or Past Tense?
Official git documentation states to use Present Tense Imperative Mood
That is
Do This:
“Make xyzzy do frotz”
And Not This:
“This patch makes xyzzy do frotz”
“I changed xyzzy to do frotz”
Write the commit message as though you are giving orders to the codebase to change its behavior
But it’s a little unintuitive, so just do what your company says
Escaping VIM & Configuring Git’s Default Editor
you can change the default text editor Git is pointing to with a command
git config –global core.editor “code –wait”
there are other options like “vim” and “codium –wait”, Wordpad, etc.
These are included on the git docs for setup and config commands
Probably one for NPP too
There are COMMIT_EDITMSG files that’ll get opened if you don’t -m
You can include lots of info in there with #comments if you want.
You can also make the returned commit message really annoyingly long
Only in advanced and complicated projects will you need to write long commit messages
A Closer Look At The Git Log Command
when we git log, we sometimes want the commit hashes
we’ll use the hashes to revert to those commits
git log docs
crazy number of options for ordering, sorting, and filtering the commits listed in git log
you can git log –pretty in order to format the commit logs in a number of different ways, like for emails, or to fit on 80char terminals, etc.
git log –oneline
will output an abbreviated version of the commit hash, followed by the commit message, and nothing else. one line per commit. gorgeous
$ git log –oneline
31b1ed1 (HEAD -> master) add items needed to grow potatos
91915c2 add items needed for garden box
0e20858 add ingredients for tomato soup
even if your commit message is super long in full, the first line should still be an appropriately brief summary
in the case of –oneline, that’s all that gets shown anyway
Committing With A GUI
gitkraken can open several repos in different tabs like a browser
when you have a repo open, and some changes get made
a new node will appear on the timeline labeled WIP
and it’ll point out files have been changed. you can view them and start the staging process for a commit from there
it seems like it updates live too, since I touched to create a new file and it showed up right away on the GUI without any need to manually refresh
this is actually pretty awesome
keep in mind git log –oneline puts the most recent commits at the top of the list
the diagrams of the GUI are most useful for branching and merging
Fixing Mistakes With Amend
you can amend a commit if you forget to import a file
or to revise the commit mesage
example
git commit -m ‘some commit’
git add forgotten_file
git commit –amend
Core Command here is
>
git commit –amend
ONLY WORKS ON MOST RECENT COMMIT
Can’t go back like 10 commits.
The –amend flag will repalce the tip of the current branch by creating a new commit. It basically just redoes your last commit with the new data
after you do the bad commit
stage the files you need
then git commit –amend
this opens the text editor
from here you can edit the commit message file.
if you have no changes for the commit message file, you can just save and close to move forward
but notice that the newly staged forgotten_file will now be in the autogenerated commented description text
Ignoring Files w/ .gitignore
there are sometimes files and directories you want git to completely ignore
you can use a .gitignore
if you have like, API keys, or sensitive info, or credit card info, you obviously don’t want that stuff uploaded to github and publicly available for other people to download and work with
mac computers also generate fluff files you’re better off ignoring
if you have some code that logs output text, you can just ignore that since it’s going to get regenerated anyway
python dependencies and stuff should also be ignored
there could be thousands of libraries that really don’t need to be part of the repo
create a file called .gitignore
recall that’s a hidden file
three options for flagging files to be ignored
.DS_Store
will ignore files named .DS_Store
folderName/
adding the / at the end will ignore an entire directory
*.log
will ignore all files with .log extension
virtually every project on github will have a .gitignore
once you create the .gitignore file, and add some content to it to filter out other files in the repo
the repo will no longer flag the secret files as untracked in git status
but the repo will still flag .gitignore as untracked, since it is a new file
this is normal. you’ll have to commit the creation/changes to .gitignore just like any other file
There are useful tools like gitignore.io that can actually generate recommend .gitignore file contents depending on the environment you’re working in like Python, JS, etc.
6
Working With Branches
What Really Matters In This Section
conceptual understanding of branching
git head
git branch, switch, checkout
Introducing Branches
every commit has a hash
and every commit also references at least one Parent commit that came before it via its hash
except the initial commit ofc
say you have to tear apart the code to find a bug
but you’ve also been tasked with doing color scheme variations
and someone else has to add a new feature
and someone else is overhauling the UI
etc.
this is what branching was made for
for parallel works
without branching we’d be trapped in linear, serialized code changes
when atomized, it means that it’d be effectively impossible for multiple software developers to work simultaneously
The Master Branch (Or Is It Main?)
in git you are always on a branch
On branch master, nothing to commit
what you get from git status
you’ll also see the color coded “master” text
there is nothing special or unique about the master branch
many people treat the master branch as special
as the official branch or source of truth,
but that is a choice
from git’s perspective, it is not special
The master->main change is only on github
on git, they still use master
if you make an experimental branch and decide not to merge it back to your master branch, you can just let it sit there forever. no need to clean it up or anything
it’d be worse if you did, you lose info
(HEAD -> master)
What On Earth is HEAD?
(HEAD -> master)
The HEAD is a pointer that references the current Branch
When you switch from one branch to another, the HEAD is the thing that points to a different branch
So, if you make a new commit, it’ll go onto whatever branch the HEAD is pointing to
Each commit is uniquely identified by its hash
Each branch is a pointer that points to a specific commit
Two branches can be pointing to the same commit
In a case where you create a new branch but haven’t done anything else yet
Both branches exist, but no commits have been made to diverge them
In order to diverge them, a commit must be made after switching the HEAD
the HEAD will always point to the most recent commit on a given branch
it’s the tip of the branch or the head of the branch
You can also think of branches in terms of multiple people reading the same book
they all have their own bookmarks
when you open the book, it can only be opened to one page at a time
which bookmark do you pick to open to a particular page?
which branch do you pick to point your commits to? That is the info contained by HEAD
Viewing All branches With Git Branch
list of current branches
>
git branch
the currently active branch will be marked with a *
create a new branch
>
git branch <branch-name>
it makes a branch. do not include spaces in the name of the branch
this will only make the branch, it will not switch you to it
Creating & Switching Branches
if you create a new branch and have yet to create a commit to diverge it from the master branch
when you run git log, and the most recent commit is flagged as (HEAD -> master)
it will also list the second branch you created, since both branches are pointing to the same commit
(HEAD -> master, pbj)
Switch branches in git
>
git switch <branch-name>
Used to be checkout
what changed? not the same?
so once you switch to the other branch, and run git log
it’ll reference the active branch first, and any other branches currently referencing the same commit afterwards in the list
that is
(HEAD -> pbj, master)
After making a commit to diverge the branches, the HEAD will be pointing to pbj alone, as it now has a unique commit from the master branch
and the (master) will leave the HEAD list and show up further down the commit history on the most recent master commit
Since git log provides a chronological, serialized list of commits, it’ll flag the most recent commit in each branch that exists (according to the perspective of the active branch)
Time travel aspect:
if you git switch back to master
and run git log
It doesn’t know about the new pbj branch’s commit
Its timeline ends with it’s most recent commit
GIT LOG WILL RETURN DIFFERENT RESULTS BASED ON THE BRANCH
git log is a serialized list of commits that culminate in the most recent commit of the active branch
More Practice With Branching
The current location of the HEAD and the branch it is on when you create a new branch is important
Critically Important!!!
tech:
git commit -a -m “commit message” to just add and commit all unstaged changes
git log is starting to jam up my CLI. I don’t know how to fix it when that happens
so I’m just running git log –oneline instead
asked chatgpt, it’s q to exit
so if the head of a branch hasn’t moved since you created the new branch
then the head of that branch will be flagged in the new branch’s git log
but if you go back to the original branch and make a new commit, the head of that branch is no longer in the common history of the two branches, and so it won’t show up when you run git log on the new branch
IT DOES MATTER WHERE YOU BRANCH FROM
Switching Branches With Unstaged Changes?
the exact same functionality of git switch
>
git checkout <branch-name>
but it can do a lot more than just switch
It did too many things, so they simplified with switch
old docs will reference checkout
git checkout can do more than switch branches, it can restore working tree files too
git switch can create a new branch
>
git switch -c <branch-name>
-c flag lets you make a new branch and switch to it in one line
you can do the same thing with git checkout, but it takes -b for branch instead
>
git checkout -b <branch-name>
when you switch branches it will actually go into your folder, edit and delete and restore files to match what you’re expecting
so if you go into one branch and make a new file, that file will be deleted when you switch branches
but, it can only do that if it’s a tracked file that’s been committed onto a branch at least once
If you have unstaged changes on a particular branch and then try to switch to a different branch, it will warn you that the act of switching branches will overwrite and delete your uncommitted changes.
$ git switch pbj
error: Your local changes to the following files would be overwritten by checkout:
playlist.txt
Please commit your changes or stash them before you switch branches.
Aborting
so if you have to either stash or commit
how can you switch branches in order to reset your changes?
Deleting & Renaming Branches
create branch
>
git switch -c newbranch
delete branch
>
git switch -d newbranch
you cannot delete the branch you are on
-d will only work if the branch to be deleted has been fully merged into an “upstream” branch
-D is necessary for a force-delete
if you create a branch and immediately delete it, it’ll work because it’s technically merged (the master branch head and the new branch head are pointing to the same commit)
Renaming branches uses -m, which means move/rename
moniker? lol
rename a branch
>
git branch -m newname
in order to rename a branch, it must be your active branch
you don’t specify a target branch, just the new name
How Git Stores HEAD & Branches
optional video
just some behind the scenes
in the .git folder theres a file called HEAD
it will reference a file within the /refs folder
the refs/ contains a heads/ folder
the heads/ folder contains files for each branch
these branch files simply contain the hash for the most recent commit for each branch
Branching Exercise
easy stuff, already did more complicated work during the lectures
7
Merging Branches, Oh Boy!
What Really Matters In This Section
basically everything
especially resolving merge conflicts
only one command, merge, in this section
An Introduction To Merging
first, you merge branches, not commits
second, you merge into the current HEAD branch
that is, merge acts to merge the target INTO the current branch
so you should merge your features INTO master, by switching to master and then
how to merge a bugfix into master
>git switch master
>git merge bugfix
if merging a branch into master just involves “catching up” it’s called a fast forward merge
that is, if the master branch hasn’t seen any commits since the branch point for the secondary branch
it gets trickier when master has its own commits that bugfix branch doesn’t have
Performing A Fast Forward Merge
a fast forward merge is not a distinct command
it’s just a name we use for those conditions, when the master is catching up and there’s no work on master that could conflict with the branch absorbed
after a merge the branch does not go away
it still its own distinct context and distinct work can be done on it, and then merged again
at the moment of the merge, they contain the same info
or rather, each branch pointer is pointing to the same commit.
Visualizing Merges
gitkraken time
walked through the same example from the previous video, a simple fast forward merge, but with git kraken showing how the branch pointers point to the same commit after the merge
Generating Mege Commits
if both branches contain novel information, or conflicting information, there’s a chance git won’t be able to perform the merge automatically.
for example, if you both edit line 59 to be different things
when it’s not a ff merge and it’s not a conflict merge, but there are novel data from each branch
git will create a “merge commit”, so that there exists a commit that contains both sets of data from the two parents of the merge,
and that will be the commit that the master of the merge will now be pointing to
the secondary of the merge will remain where it is at, the branch pointer doesn’t move
it never did move, it just so happened that master and secondary started pointing to the same commit, but with the merge commit, there’s a new one for master to point at that secondary won’t be privy to
every commit has a parent
a merge commit has two parents
when you do perform a merge that generates a merge commit, you will have to provide a commit message like usual for it.
-m flag should suffice
that is,
>git merge branch2 -m ‘merge branch2’
the git return will discuss some “recursive strategy”
Oh No! Merge Conflicts!
when there’s a conflict,
git will tell you that it could not resolve the issues automatically
then, you will have to resolve it manually
it will create a modified version of the file that has both versions of the data, the one from the extant branch, and the one from the absorbed branch
in a format like this
HEAD<<<<<<<<<<< head content ========== branch1 content >>>>>>>>>branch1
Given the material from both, you can choose to keep one or the other, mix and match, or write something new to get them to cooperate.
Once you remove the conflict markers and save the document, you can add your changes and commit.
Resolving Merge Conflicts
when you delete a branch, it will warn you that all the changes contained within that branch haven’t been merged into master,
unless they have…
one technique for merging is to create a novel combo branch so that both parent branches can remain independent. just create a third branch for the merger
Using VSCode To Resolve Conflicts
just another merge example
Merging Exercise
doing this one
1. Fast Forward Merge
make a repo
create a fork branch
make updates on the fork branch without changing the master
switch back to the master
merge the fork branch into the master
this is a fast forward merge
2. Merge Commit – No Conflicts
make a new file on a new branch
make changes to the first file on the original branch
switch back to the original branch
merge the two, now the original has both files
no conflict merge, but not a ff
3. Conflict
8
Comparing Changes With Git Diff
Introducing The Git Diff Command
git diff helps us understand the differences between commits, files, branches, etc.
git diff, git log, and git status are all tools to help get a good picture of how a file or a repo has changed over time
like git log and status, it is informative and has no affect on the repo
git diff on its own lists all the changes in the working directory that are NOT staged for the next commit.
where git status will just tell you the files that have been modified,
git diff will actually print out a bunch of text lines, labeled with the line number ranges, of the changes you made,
and mark the removed lines with — flags
and mark the new content with ++ flags
and even color them red and green
the rest of the printout is just there for context.
A Guide To Reading Diffs
format is dense and highly syntaxed
you can diff between two versions of the same file
in the simplest case, between the working directory and the staging area
but you can also diff two different files
or two different branches, or two different commits, etc.
“diff –git a/rainbow.txt b/rainbow.txt”
if you git diff in a repo with multiple files that have been changed, it will list off a git diff for each file
the markers
— a/rainbow.txt
+++ b/rainbow.txt
the markers indicate which file the content came from
the code chunks are called chunks
they’re just there for context
the code chunk line number range things are broken down like this
@@ -3, 4 +3, 5 @@
notice the lack of comma after 4
what it’s saying is
from “-” which refers to file a
line 3
and then four lines after that
from “+” which refers to file b
line 3
and then five lines after that
this is called a CHUNK HEADER
Viewing Unstaged Changes
next up
git diff
git diff HEAD
git diff –staged
git diff –cached
git commit -am only works if the file exists on the previous commit
that is, it won’t work on the very first commit of the repo
Viewing Working Directory Changes
git diff HEAD
when we do git diff HEAD
it’ll show the changes between now and HEAD
HEAD being the last commit, it’ll show you all changes in the working tree since your last commit
the difference here is that
if you have uncommitted changes,
git diff HEAD will show the changes even if they’ve been staged using git add
but git diff will only show unstaged changes
git diff HEAD includes staged and unstaged changes
he used git diff HEAD on a new file that didn’t exist in the previous commit,
but mine didn’t do that
neither git diff nor git diff HEAD would detect it before staging
and then after staging, only git diff HEAD detected it
which conflicts with the rules above
Viewing Staged Changes
git diff –staged
git diff –cached
they do the same thing
they will show ONLY staged changes
git diff will only show unstaged changes
git diff –staged will only show staged changes
git diff HEAD will show both unstaged and staged changes
Diffing Specific Files
you can do like
git diff HEAD style/main.css
that way the git diff doesn’t list off every single file that has changes
and you can just view the changes on a single file
Comparing Changes Across Branches
git diff branch1..branch2
you like. actually put the double dot
then it’ll go through and compare all the files in each branch for you
and files that only exist in one branch will have everything in red, or green, as flagged per file A or B respectively
so it’s pretty straightforward
you don’t have to use the .. you can just use space but people are fans of .. for some reason
order matters, but it just flips the A and B file notations
Comparing Changes Across Commits
git diff commit1..commit2
since commits aren’t named you have to use the hash numbers
which is kind of a pain to copy paste in
example
$ git diff c083591..1a9a55b
Visualizing Diffs With GUIs
this is one of the areas where GUIs shine
git kraken will offer file view and diff view when you’re staging changes
you can also just ctrl+click two files and it’ll automatically offer a diff between them
or two commits
sometimes people call the code chunks, hunks
Diff Exercise
running git clone for this one
Note: DO NOT RUN GIT CLONE INSIDE A REPO
git clone creates a repo on your local using the link
which means if you do it in a repo you are making the rookie mistake of creating a repo within a repo
git clone https://github.com/Colt/git-diff-exercise
why is there a hidden branch
are they not on your machine until you switch to them???
completed exercise, was a good one
9
The Ins and Outs of Stashing
What Really Matters In This Section
some people just don’t use git stash
pretty optional
Why We Need Git Stash
since branches restructure the files and folder on your machine
if you make changes on a branch and then try to change the branch without committing them, there are two options
1. the changes go with you to the new branch
2. git detects a conflict and won’t let you switch
sometimes you need to switch to another branch before you’re ready to commit on the stuff you’re working on
so you stash it
in scenario one, if you switch back to the original branch and commit, the changes won’t exist on master
only one instance of the changes, and it carries with your HEAD
Stashing Basics: Git Stash & Pop
the command is
> git stash
or
> git stash save
it will take all uncommitted changes and stash them, and then revert the changes in your working copy so you can switch branches without conflict
seems really useful
> git stash pop
is what pulls it out of the stuff and puts everything back on the table
Practicing With Git Stash
Git Stash Apply
git stash apply
most people if they use stash at all will just stash and pop
no fancy stuff
>git stash apply
so after you’ve stashed some changes
you can switch branches and go somewhere else
but if you decide you want to pop out those stashed changes onto a branch other than the one you stashed them on
you can use git stash apply, and then it’ll act like a normal merge operation where you have to manually resolve conflicts, etc.
it also doesn’t remove them from your stash
pop pulls it out, applies it, and clears the stash out
git stash apply pulls out a new instance of it, and applies it while retaining the stash
Working With Multiple Stashes
you can just keep stashing stuff
over and over
>git stash list
to view all the stashed changes
not super practical
you can pop particular stashes in the stash by reference the stash by the stash id
stash@{2}
Dropping & Clearing The Stash
>git stash drop stash@{2}
this is how you just delete a stash entry
>git stash apply stash@{2}
to completely empty the stash
>git stash clear
Stashing Exercise
Done
Had to leave for a week, so I came back and walked through this example again
10
Undoing Changes & Time Traveling
What Really Matters In This Section
many commands covered in this section
Checking out Commits and Escaping Detached HEAD
both critical
restore, reset, and revert are all different
Checking Out Old Commits
git checkout is a swiss army knife,
people thought it had too many features
so they created git switch and git restore
you can
>git checkout <hash>
you only need the first seven characters of the hash to properly checkout
so git –oneline can provide that
when you checkout a hash like that, you enter a detached HEAD state
you can look around
make experimental changes
commitn them
you can also discard any commits from this state
without impacting other branches
by switching back to a branch
after checking out the hash of a previous commit, you can check git status and log and see that you have time traveled to when that commit was the most recent commit
HEAD detached seems to just mean that you’ve time traveled.
recall: HEAD points to the BRANCH REFERENCE
the BRANCH REFERENCE points to the most recent commit on the branch
When you time travel, you disconnect the HEAD from the BRANCH.
The branch reference is always at the tip, the most recent commit.
whenever HEAD is pointing directly at a commit, and not at a branch, then this is considered detached HEAD
you can also confirm it’s pointing directly at a commit hash and not a branch in .git/HEAD
Re-Attaching Our Detached HEAD!
simplest way to reattach your head is to just switch branches
>git switch master
moves the HEAD back to the BRANCH reference at the tip of master
this detached head will also show on the GUI for gitkraken
when in detached head, you can do 3 things
1. stay in detached head, exame, poke around, etc.
2. leave and go back via git switch, canceling changes
3. create a new branch from this point and switch to it
when you do #3 and create a new branch from that point, you can now make and save changes that are retained, since HEAD is no longer detached. It is now pointing at a valid branch reference
this is how you can time travel backwards and take a new path forward.
Referencing Commits Relative to HEAD
>git checkout HEAD~1
think of this as a relative index
that is, HEAD – 1, or the commit immediately before the one HEAD is currently pointed at
History
Commit 1
HEAD~3
Commit 2
HEAD~2
Commit 3
HEAD~1
Commit 4
HEAD
wonder if HEAD~0 works
it does work. You detach your head and point at the directly at the commit, even though there is an available branch reference pointing at the same commit
you can re-attach your head quickly with
>git switch –
this will simply return you to whatever branch you were on when you originally detached the HEAD
Discarding Changes With Git Checkout
say you are working normally, no detached head time travel funny business
you’ve edited a file and decide none of the changes are going well, you’d like to revert that file back to where it was when you started
that is, revert that file back to the last commit, how you found it
>git checkout HEAD <filename>
this will check out the version of that file within the commit that the HEAD is currently pointing at.
So this can be used when you’re editing several files, and you’d like to revert specific ones
kind of like clearing just one of several whiteboards with notes on them.
another shorter version to this is
>git checkout — <file>
just like >git switch –
it automatically reverts the named file back to whatever HEAD’s commit has
Un-Modifying With Git Restore
git restore can do that checkout reversion nonsense
its a newer command
git switch and git restore were both introduced as more specific alternatives to git checkout
you can discard changes on a particular file and revert it back to the last commit
NOTE: THIS COMMAND IS NOT UNDOABLE. ONCE YOU GIT RESTORE, YOU CANNOT GET THE DISCARDED CHANGES BACK
>git restore dog.txt
will restore dog back to HEAD
you don’t have to specify HEAD with this one
You can also reference a particular commit with the checkout
git restore –source HEAD~1 dog.txt
>git restore –source <commit hash OR HEAD~n> <filename>
again this deletes those changes
Un-Staging Changes With Git Restore
git restore can also unstage files
when you git add, for whatever reason there doesn’t seem to be a git remove
git restore does this for you
>git restore –staged <filename>
it actually tells you about this in git status
(use “git restore –staged <file>…” to unstage)
you can git restore –staged .
to remove everything from the staging area
just as you git add .
to add everything to the staging area
you don’t have to remember this, because git status will tell you every time
but it doesn’t tell you that you can select the manually source of the restore function and not just default to reverting to HEAD
>git restore –source HEAD~1 dog.txt
Undoing Commits With Git Reset
>git reset <commit-hash>
sounds similar
resets a repo back to a particular commit
git reset is how you undo commits
say you made 3 commits on the wrong branch and you need to delete and undo those commits and get them off the record for that branch
>git reset <commit-hash>
will revert the branch and commit history, and delete all time that has passed since that commit
it doesn’t revert the files, it just deletes the commit history
meaning, if you delete commits 4 and 5 with a reset function
the changes to the files made in 4 and 5 will persist
this sound annoying, but it lets you keep the work and move it to another branch
that way you can make a new branch, store those bad changes on a different branch, and then move on as normal from the commit
there are also hard resets
>git reset –hard <commit>
if you’re absolutely sure you want to delete both the commits AND the file changes, use hard reset
>git reset –hard HEAD~1
will delete the last commit and the changes made within it
if there is a branch forked off of a commit sometime after the commit you’re hard resetting to, it won’t get deleted
you are resetting the active branch, MASTER
there’s no reason for the BRANCH2 to have to forget everything, it has it’s own version of the history independent of whatever resets occur elsewhere
Reverting Commits With…Git Revert
git reset moves the branch pointer backwards and eliminates commits
git revert performs similarly to git reset
git revert creates a NEW commit with the unmodified files. it requires a commit message
git revert seems to be more of a historical cloning operation
there are different contexts in which revert and reset are more useful
note that when you git revert <commit>, the commit you reference is the one whose changes you want eliminated
not the commit you want to revert TO
if you want to reverse commits that other people already have on their machines, you should use revert
if you reset and delete those commits from the shared history, things will get confusing because people will still have local versions of the erased commits
so it’s better to keep everything in the log, and create a revert version on the commit history
that way everybody’s changelog lines up
reverting a commit can also create conflicts
git may not know what to keep and what not to keep
this concludes the core git functionality segment of the course.
Undoing Changes Exercise
Actually a really good exercise
11
Github: The Basics
What Really Matters In This Section
Everything in this section is Critical
What Does Github Do For Us?
it is a hosting platform for git repos
hosting, collaborating, file backups
alternatives include GitLab, BitBucket, and Gerrit.
World’s largest source code host
Started in 2008
56 million developers and 100 million repos
Free!
Why You Should Use Github!
Github is really useful even if you’re only working with one other person on a hobby project
Github is the primary home for open source projects
React, Swift, etc. are all there
If you want to do open source, you’ll have to work on github
making open source contributions is great proof that you know what you’re doing
React is a JavaScript Library
Tensorflow is a Machine Learning Framework
Github profile showcases and exposures your projects
You can make friends and professional acquaintances this way
it’s vaguely social networky
You can stay up to date on living projects you’re invested in
Frameworks, etc.
Cloning Github Repos With Git Clone
Cloning is the creation of a local copy of an external repo
using a URL
MAKE SURE YOU ARE NOT INSIDE OF A REPO WHEN YOU CLONE!!!
>git clone <url>
you get the source code and the git history
all the commits, all the files
when you run git clone
it will make a new folder for you
git clone is a git command. it is not tied to github
there are other codebases that are not github. you use git clone for those ones as well.
Cloning Non-Github Repos
if you can see it, you have permission to clone it and do whatever you want to it
doesn’t necessarily mean you are allowed to repackage it and resell it though
you’re not allowed to just push changes up to a repo somebody else owns
there are protocols for this process
if you read the documentation for git clone, there is not a single mention of github
Github Setup: SSH Config
Secure SHell
authenticate your terminal
1. generate an SSH key
2. tell github about it
https://docs.github.com/en/authentication/connecting-to-github-with-ssh/generating-a-new-ssh-key-and-adding-it-to-the-ssh-agent?platform=windows
Guide is liable to change but
keys are stored in ~/.ssh/
verify the ssh agent is active
$ eval “$(ssh-agent -s)”
create a new ssh key
$ ssh-keygen -t ed25519 -C “email@gmail.com”
add the key to your list of keys
$ ssh-add ~/.ssh/id_ed25519
id_ed25519 is the name and can be changed. not sure why it’s that
then cat, to reveal and then copy that hash
paste it into the add SSH key prompt in your github account settings
Creating Our First Github Repo!
existing repo
if you already have something on your local machine you want to put on github
1. create a new repo on github
2. connect your local repo, “add a remote”
3. push the changes up to github
if you are starting from scratch
create a brand new repo on github, and then clone down the empty onto your machine
work locally, then reupload
if you start the blank on github, then you won’t have to link the local instance to the cloud instance
click create repo
A Crash Course on Git Remotes
in order to push code up to github
or any other hosting platform
we first need an initialized git repo somewhere on our local machine
since we’re uploading to some far off platform
the code has an external destination, so we set up a remote
remote meaning, remote destination, which is designated by the URL
these destinations are the remotes, and consist of a URL
push, puts code up there
fetch pulls down
>git remote -v
lists the remotes/destinations the repo knows about
works with
>git remote
as well,
-v makes it verbose
the -v will show a (fetch) and (pull) link
meaning you can pull and push to difference locations
the name of the remote will probably be “origin”
>git remote add <name> <url>
lets you add a remote given a name and url
Origin is conventional, not special in any way
similar to how the Master branch is just a conventional name
so now, example of pushing an existing local repo up,
onto a new repo i just created on github
it provides instructions for this:
…or push an existing repository from the command line
git remote add origin https://github.com/fishPointer/psychic-octo-rotary-phone.git
git branch -M main
git push -u origin main
first, add the remote
then you can use plain >git remote to check your work
you can rename and remove
git remote rename <old> <new>
git remote remove <name>
Introducing Git Push
>git push <remote> <branch>
you have to specify which remote
and which branch to push
so you won’t necessarily want to push all your branches
and you may not want to push the branch you’re currently on
though often people just push their master branch
thus the common command is
>git push origin master
stupid ass github won’t let me login using my username and password
it’s not “secure enough”
made me go into an obscure developer settings menu and generate a fine grained personal access token and manually select the 1. permissions, 2. repo context and 3. expiration date
so i made one with all permissions, all repos, and 1 year
now i can push
nope, it’s asking for the login every time
From Stackoverflow
Make sure you are using the SSH URL for the GitHub repository rather than the HTTPS URL. It will ask for username and password when you are using HTTPS and not SSH. You can check the file .git/config or run git config -e or git remote show origin to verify the URL and change it if needed.
using the ssh URL to initialize it worked fine.
—
you don’t push commits, you push entire branches
Touring a Github Repo
can switch branches
view commits
comment on commits
visually see commit changes
etc.
Practice With Git Push
basic workflow
make changes
>git add .
>git commit -m “message”
push up to github
>git push origin master
A Closer Look At Git Push
if you create an empty repo on github
and then create an empty repo locally
all you need to do to connect them is tell the local repo about the remote
there’s a distinction between the branches you have locally and the branches you have on github
there are two “master”s, one local, and one remote
you can use
>git push <remote> <local-branch>:<remote-branch>
in order to specify which local branch should be pushed to which remote branch
that is,
git push origin pancake:waffle
will push the local pancake branch up to the waffle branch on the github repo
so if you make a new branch locally and just
>git push origin cats
it will create a remote branch called cats in order to push cats(local) onto cats(remote)
that is,
>git push origin cats == >git push origin cats:cats
note that if you push cats:master
the one on github will have the contents matching your local “cats” branch, but github will still list it as “master”
What does “git push -u” mean?
git push -u origin master
-u lets you set the upstream direction of the branch
that is
if you’re using
>git push -u origin master
then it’ll designate origin master as the remote and branch as the upstream destination
it’ll remember this
such that next time you run just
>git push
it’ll automatically target origin and master
the upstream desgination -u is per branch
so if you have branch dogs locally and on the remote repo
then git push -u origin dogs
will LINK together the two dog branches
such that you can just “git push” with no further specification
you can also set the upstream to be a different branch using the same local:remote syntax
>git push -u origin dogs:cats
Another Github Workflow: Cloning First
option 2 is starting from scratch, cloning the empty repo down to your machine
you will get a warning: you appear to have cloned an empty repository
the reason to do this is it comes with a preconfigured remote
Main & Master: Github Default Branches
2020 they renamed master to main
if you initialize the repo on github site, and include a readme, there will be a file, meaning the branch will exist. and it’ll default to main
if you just init an empty repo on github web, there will be no files and no branches, until you do your first push
github’s recommended commands include a rename line for main
>git branch -M main
and then
>git push -u origin main
Github Basic Exercises
need to refresh on merging and time traveling
12
Fetching & Pulling
What Really Matters In This Section
Remote Tracking Branches
Git Fetch
Git Pull
they’re all critical
Remote Tracking Branches: WTF Are They?
recall that a branch is just a pointer that references a specific commit
when you clone a repo down to your machine
there are two pointers
first, the active one. you add a commit, the branch reference will point at that most recent commit
second, the remote tracking branch
this one is fixed and will point at the commit that the branch was referencing when you cloned it
that is,
“At the time you last communicated with this remote repository, here is where branch X was pointing”
that’s the information contained by the Remote Tracking Branch
their nomenclature is <remote>/<branch>
so we usually add the remote with the name “origin” and the default branch is usually “master” so the remote tracking branch is usually
origin/master
other example
upstream/logoRedesign
references the state of the logoRedesign branch (at the time of cloning)
on the remote named upstream
>git branch -r
will list the remote tracking branches in the repo
Checking Out Remote Tracking Branches
as you add commits, the remote reference will stay where it’s at
otherwise what’s the point of it lol
once those two references diverge because you added a new commit
>git status will tell you
Your branch is 1 commit ahead of origin/main by 1 commit
you can go detached head by
>git checkout origin/master
and go see what the repo looked like when you first cloned it over
recall git switch – to go back
once you push, you’ve interacted with the remote branch
and so the remote tracking branch will be updated as well
Working With Remote Branches
workalong exercise
when you clone a repo
you’ll open it up and check the list of branches
and even if there’s a dozen branches on the github repo
>git branch will yield only main/master
but if you run
>git branch -r
you’ll get to see all the remote tracking branches as well
you could >git checkout origin/puppies
and go into detached HEAD, but you wouldn’t be able to post changes
when you clone the repo, there’s automatically a connection between local/master and origin/master
so if you want to work on a different branch, that connection needs to be made for local/puppies and origin/puppies as well
the newer git switch command has this functionality built in already
>git switch <remote-branch-name>
creates a new local branch with matching name
AND
sets it up to track the remote branch origin/<name>
does both
recall to create a new branch you usually need to add the -c flag
>git switch -c newbranch
so in this case, without the create flag, it will only work on branches it knows exist remotely
Output
Branch ‘movies’ set up to track remote branch ‘movies’ from ‘origin’.
git switch fjaskldfj won’t work
it used to be
>git checkout –track origin/puppies
guessing this would create the track when you did the checkout, so you wouldn’t go into detached HEAD
Git Fetch: The Basics
git fetch time
fetch and pull are different
fetch will clone the most recent version of the remote repo into the local repo
pull will clone the most recent version of the remote repo into the working directory
so, if you have a local repo you’re working on
and your master branch is ahead of the remote one by 1 commit
but then somebody else pushes a change up to the remote repo, and now there are 3 new commits your machine doesn’t have
you can clone those onto your machine using git fetch
>git fetch <remote> <branch>
you don’t have to specify a remote or a branch, it will default to origin and all branches
so once you run git fetch, your “origin/master” branch will have the newly downloaded 3 new commits, while your HEAD and “master” branch will remain distinct and in its own branch.
now you have access to the most recent changes in the form of another branch called “origin/master” but the stuff you were working on hasn’t been affected
note that when we created the remote tracking branch earlier, that technically counted as a branch with no new commits, thus its branch head wasn’t shown to diverge
Demonstrating Git Fetch
note that
when you git clone
origin/master does not update dynamically with everything else going on in the world
git is not always online like that
if you want to see the most recent version of origin/master
you run git fetch
that’s what it’s for
pinging the remote repo for updates
so if there have been 100 new commits on the remote repo
and you run git status on your local repo
it will say you’re up to date
because the remote tracking branch origin/master has not been updated
similarly
if you git fetch and get those 100 commits
git status will now tell you that your local master branch is 100 commits BEHIND origin/master
and can actually be fast-forwarded (git pull foreshadowing)
Git Pull: The Basics
pull will move your HEAD too
fetch won’t move your HEAD
git pull = git fetch + git merge
>git pull <remote> <branch>
where we run git pull from does matter
because that branch will get merged into by the latest versions
git pull can and will result in merge conflicts
because your version has changes that will conflict with the recent updates
Git Pull & Merge Conflicts
same stuff
git pull merge conflict walkthrough
A Shorter Syntax For Git Pull?
if you just run >git pull
remote will default to origin
branch will default to whatever tracking connection is configured for your current branch
remote tracking connections can be configured manually, but most people don’t mess with that stuff
pull is more dangerous than fetch
Summary
Fetch
gets changes from remote branches
updates the remote-tracking branches with new changes
Does not merge changes onto your current HEAD branch
Safe to do at any time
Pull
gets changes from remote branches
updates the current branch with the new changes, merging them in
Can result in merge conflicts
Not recommended if you have uncommitted changes
13
Github Grab Bag: Odds & Ends
What Really Matters In This Section
Adding Collaborators and Managing Repo Visibility is important
Then, readmes and markdowns
then gists and pages
Github Repo Visibility: Public Vs. Private
public – anyone can see the repo, not everyone can push up to it
private – whitelist
settings tab on a repo only visible to owner
delete/privatize/change ownership all in danger zone at bottom of settings
People usually start private, go public later
Adding Github Collaborators
repo settings has manage access
big green Invite a Collaborator button
person2 gets an email link to accept the invitation to collaborate
permission on both sides
Github Collaboration Demo
You get the idea
What are READMEs?
pertinent information
what the project does
how to run the project
why it’s noteworthy
who maintains the project
github will automatically detect and render the README as the blogpost beneath the list of files when you view the homepage of a repo
almost everyone puts it in the root of their repo directory
has to be all caps
README.md
md is for markdown
succinct and convenient syntax for generating formatted text
A Markdown Crash Course
markdown is a tool that generates markup
text-to-HTML conversion tool
advertised as easy to read and easy to write
check out the markdown file in plaintext to see how easy it is
for drafting with a sidebyside render
markdown-it.github.io
https://markdown-it.github.io/
^^ contains a more perfect reference of all the formatting features than I could write up as the default file
can make codeblocks and automatically color them as syntaxed by a called language
reddit uses markdown
Adding a README To A Project
most of the time when you’re working on a project you don’t really expect anybody to ever see it
recruiters are almost definitely only going to look at the README. Non-technical people will not look at your code
you have to add and commit and push the README just the same as you would any other file
so anyway, make sure you make pretty README files and have a good grasp on Markdown
Creating Github Gists
a simple way to share snippets of code
like pastebin
a microcosm of the repo’s features
gist.github.com/user
you can share your gists
people can fork it, star it, etc.
lightweight version of the repo
no commits and pushes and stuff
just a very fast way to share code
sometimes a gist is more appropriate
btw, you can have non README .md files and have them render formatted text anywhere you want on github repos/gists
there’s also a /discover page where you can just scroll through a feed of random code snippets,,, lol.
Introducing Github Pages
pages hosted and published out of github repos via github
you can make a website easily
static webpages only
no serverside stuff
clientside only, just HTML/CSS/JS
not for high capacity website with lots of traffic
pages.github.com
the domain is github.io
if you see github.io, you are being pointed to a github page
there are user sites and project sites
username.github.io
username.github.io/repo-name
you get one user site
you might use username to host a portfolio or personal website
project sites are unlimited, one for each repo
Github Pages Demo
you can have a perfectly normal project
and then make a branch where you made a github page
you select a branch in the repo
and tell github it has a website for github pages
specifically an index.html file
Then in repo settings, down near delete, you can enable github pages
so make a new branch, add the index.html file, and then point github settings to that index.html in that branch that exists just for the website
it’s perfectly fine to have a project branch at the beginning of time, where the website exists on one branch and the other is the actual project, with virtually no file overlap/merge, etc.
standard name is gh-pages, but not necessary.
There’s also Github Actions now, so they have a workflow for building pages better than this process
https://fishpointer.github.io/psychic-octo-rotary-phone/
that worked
14
Git Collaboration Workflows
15
Rebasing: The Scariest Git Command?
16
Cleaning Up History With Interactive Rebase
17
18
19
20
Digital Electronics
Contents
1
Introduction
2
Logic Gates
3
Boolean Algebra and Reduction Techniques
4
Boolean Arithmetic
5
Combinational Circuits (LONG)
6
Flip Flops and Registers (LONG)
7
Sequential Circuits
8
Programmable Logic Devices
9
Analog to Digital and Digital to Analog Converters
10
Logic Families
11
Semiconductor Memories
12
Extra
13
Thank You Note
FPGA Bootcamp Master
Course List
Core Series
GO Board Tutorials
Digital Electronics
FPGA-1
FPGA-2
FPGA-3
FPGA-4
Nand2Tetris
Verilog HDL: VLSI Hardware Design
Verilog for an FPGA Engineer with Xilinx Vivado
SystemVerilog for Verification Part 1
SystemVerilog for Verification Part 2
Code Series
Git & Github Bootcamp
100 Days of Code: Python
Beginning C++ Programming
Microcontroller Embedded C Programming
Advanced C Programming
Electronics Intermission
Monty Choy Interview Questions
Complete Electronics Hardware Design Course
Crash Course Electronics and PCB Design
Peripheral Coding
Linux Administration
Linux Shell Scripting
MATLAB
Web Development Bootcamp